
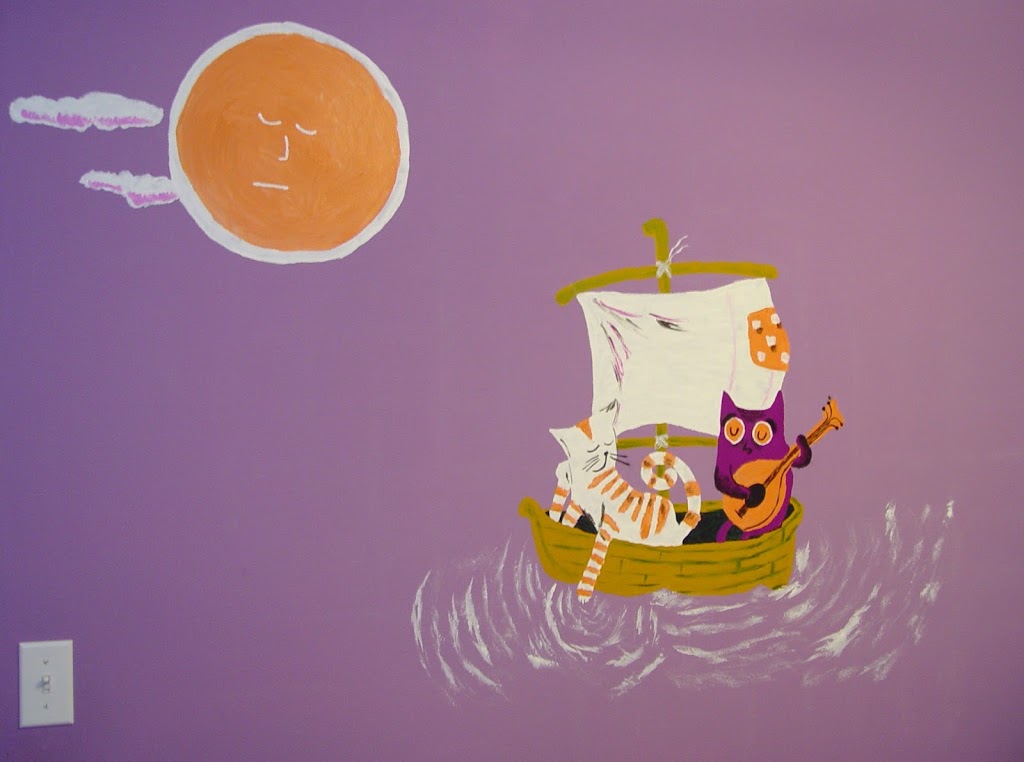
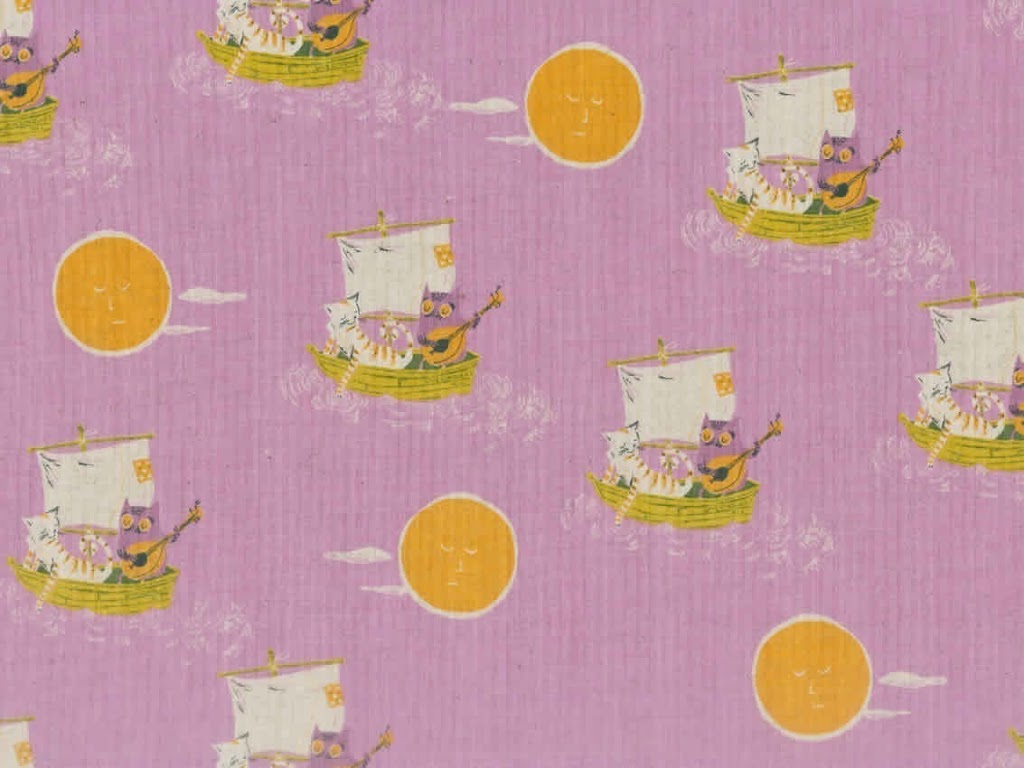
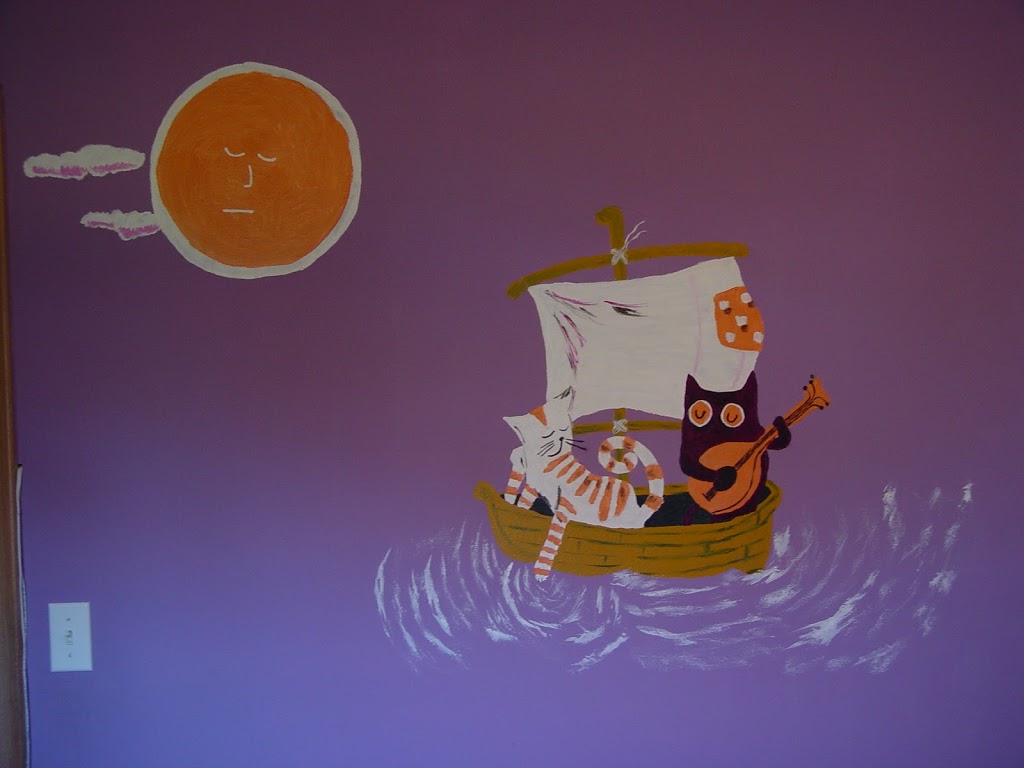
Welcome to Far, Far Away Week! – a week devoted to projects inspired by Heather Ross‘ beautiful Far, Far Away fabrics. Here’s the first project – a mural for your wall! I chose to paint the owl and the pussycat in their cute little row boat under the moon. The original fabric looks like this,
so with my daughter’s walls already painted a very close shade of purple I was ready to go!

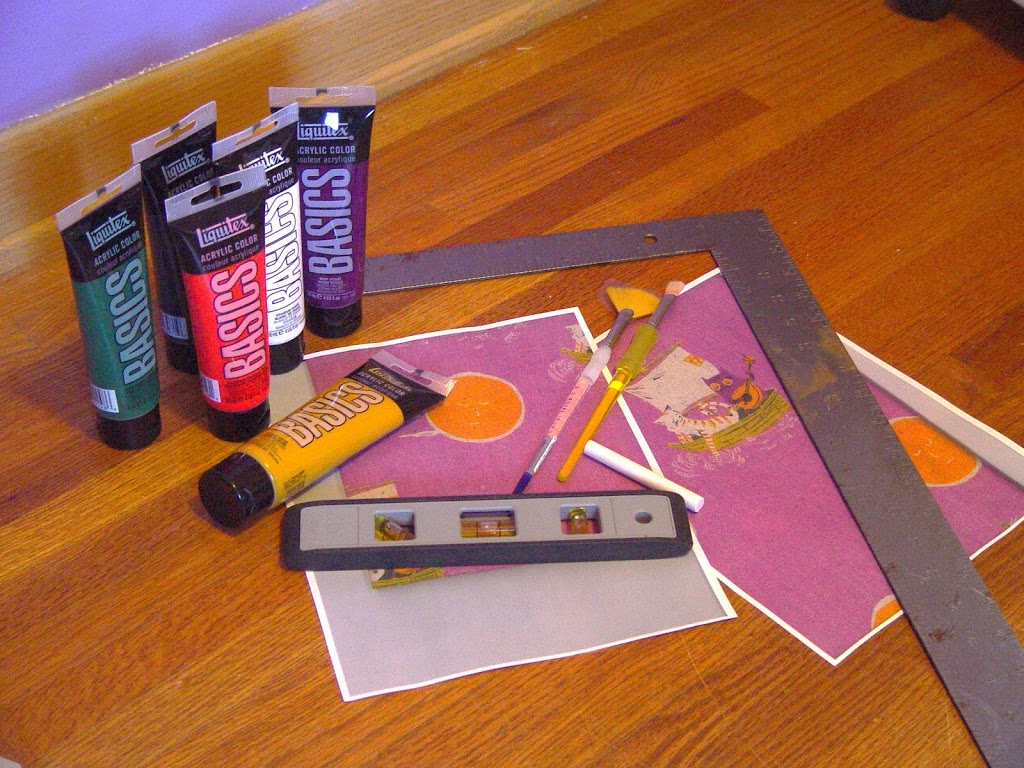
First I set out to Kinkos. Yup, I photocopied (and enlarged slightly) the image (aka the fabric) I wanted to use. Next, a stop at Michaels to find some acrylic paint close to the shades I needed. I picked a cheap artist quality paint. (It had to be pretty thick so it wouldn’t run on the walls and cover quickly with one coat.) Grab a few brushes a piece of chalk, a straight edge and a level and we’re set.
Step 1. Divide and Conquer.
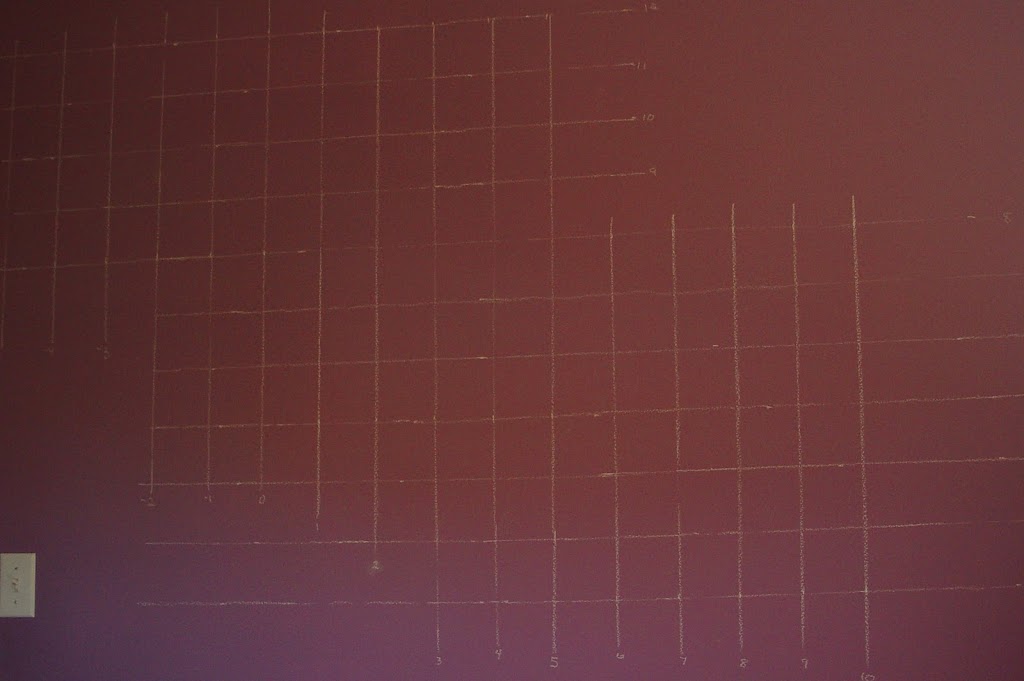
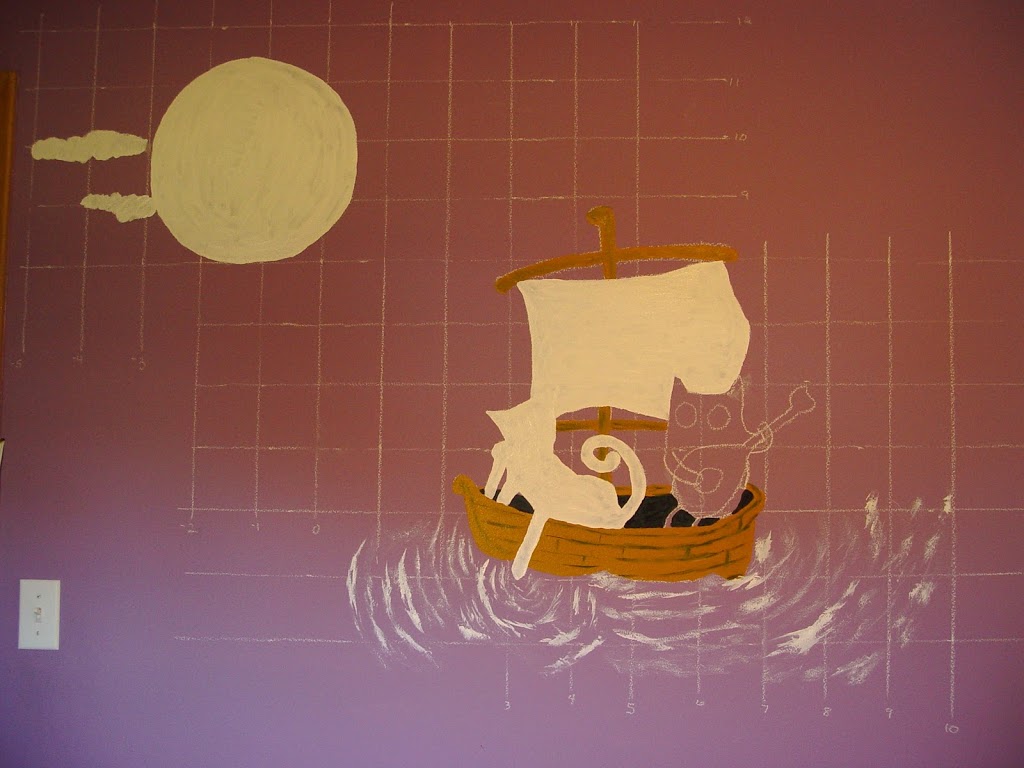
Ok, so first I drew a grid onto my photocopy. I drew lines every 1.2″, but you can do it what to like. (The idea is to divide up the image into little boxes so it’s easier to draw on the wall.)
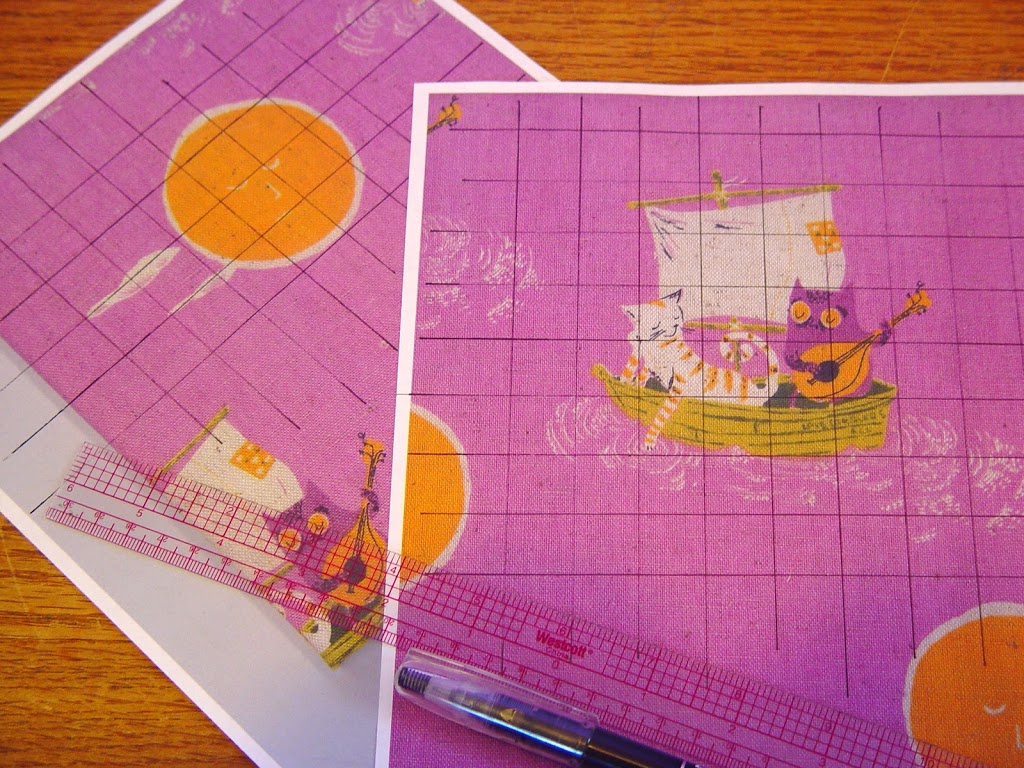
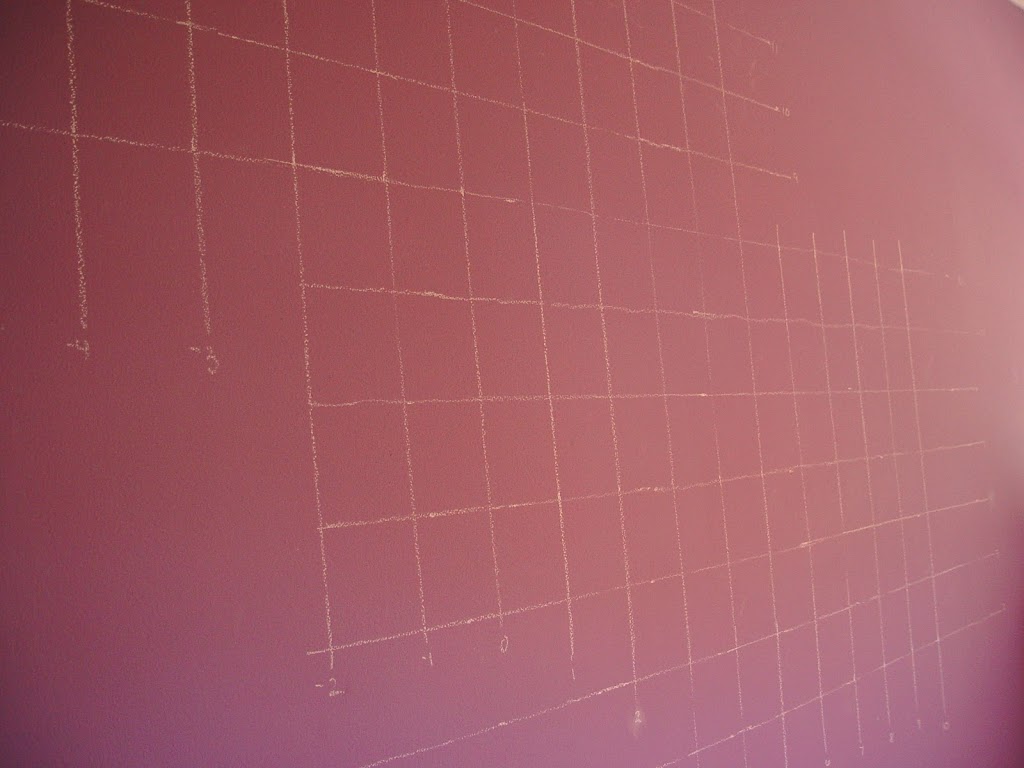
Next, the wall. Decide how big you want your final mural to be. We’ll be drawing the same grid on the wall as you did on your paper only larger. Simply increase the distance between your lines equally in each direction. So if you want to increase the length and width 5x you would draw a grid line every 6″ (5 x 1.2″ = 6″, using 1.2″ because that was the original grid spacing). You get the idea. Once you’ve decide on your grid spacing, use the chalk and a straight edge (and use a level to make sure your lines are level) and make your larger grid.
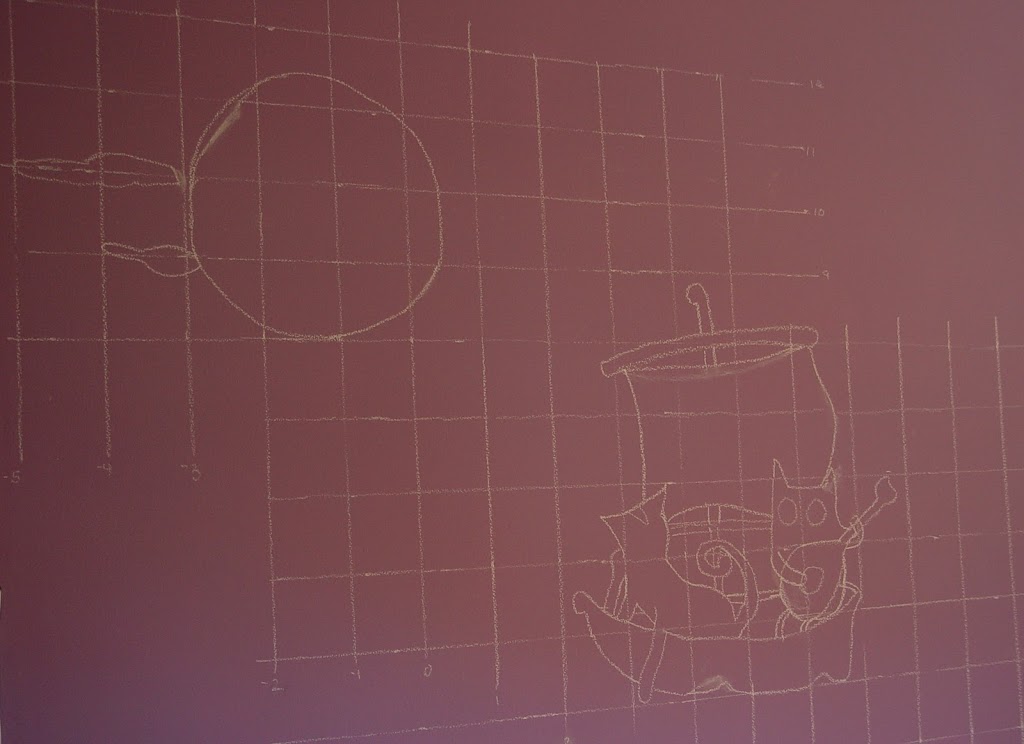
Once you’ve got your grid, you’re ready to “draw” your image. This is a great method for those of us who can’t draw well (or just don’t practice enough). Focus on each box at a time and draw the main shapes of that box. Don’t worry about the details, we’ll get that with the paint. Take your time. If you need to remove a line, simple wipe it with a damp cloth and the chalk will disappear. When you’re done, you should have something like this:
Step 2. Paint.
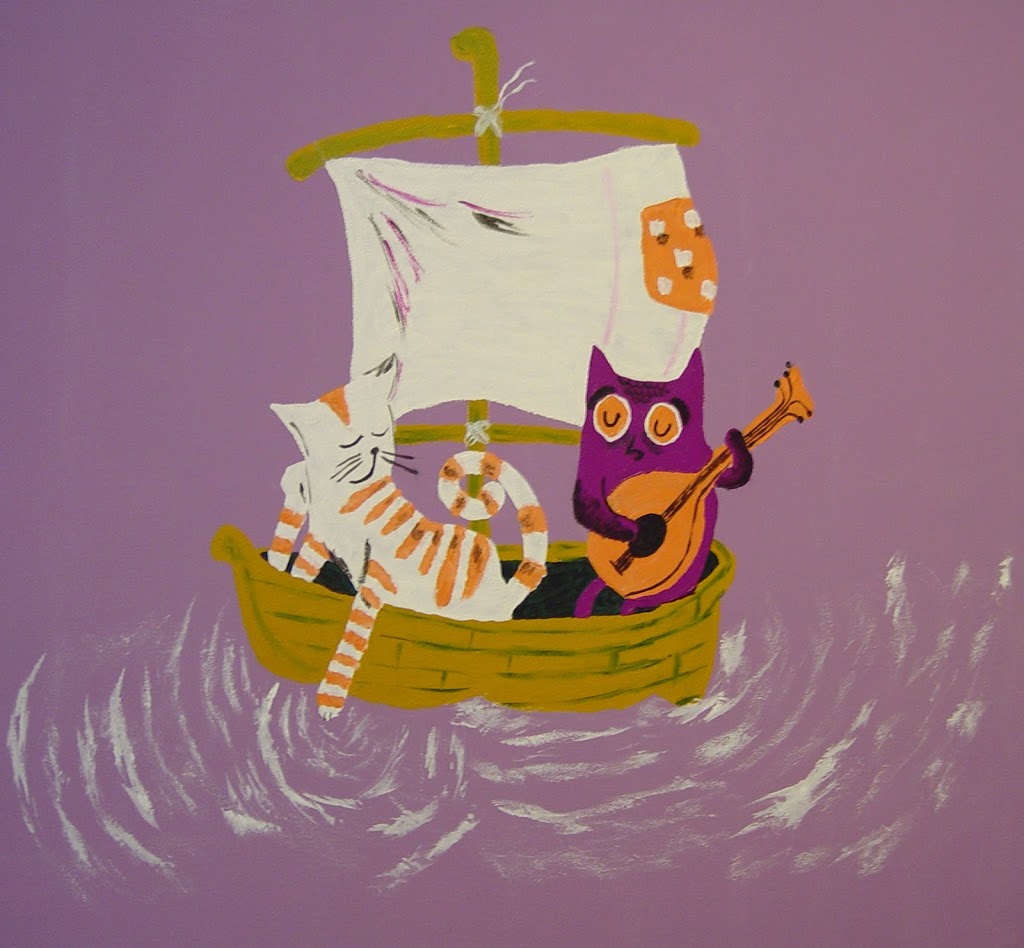
Here’s the fun, really relaxing part. Painting! I did the bulk of this mural when my kids were home from school. They really liked watching me. (Although, they did want to paint on the walls too. I did stop and let them paint on some paper instead.) I started with some of the background painting – the boat and the shadow in the boat.
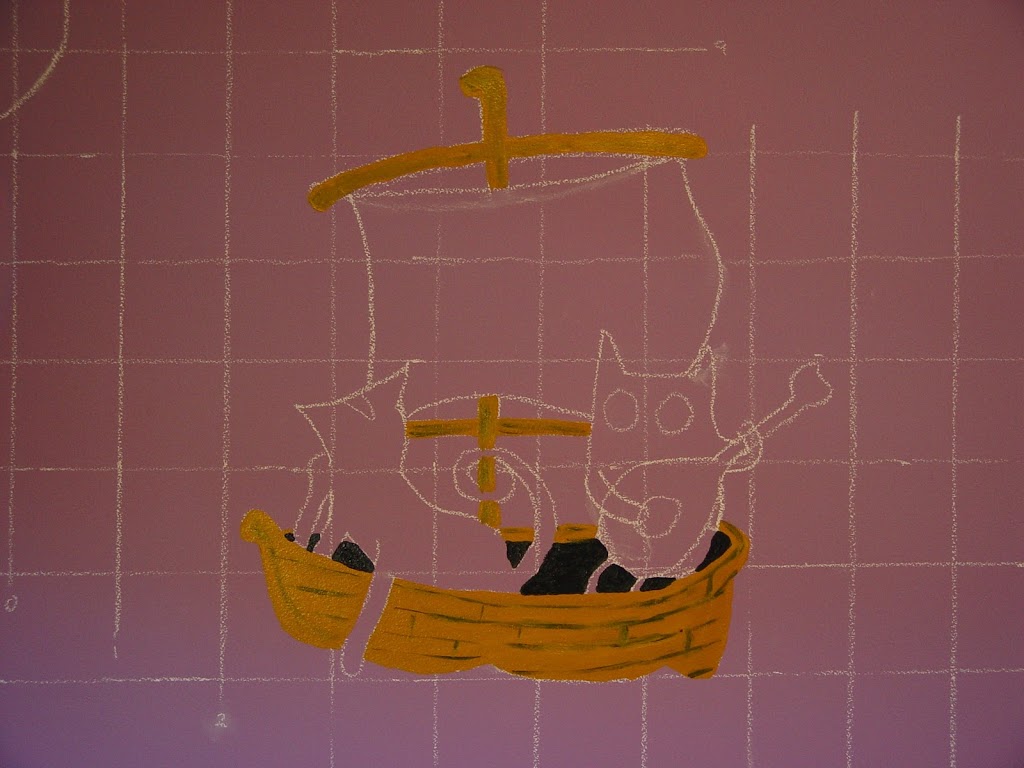
Then I moved onto the white. Looks a little weird, but have faith! Keep going.
I just kept painting away, using my photocopy as a guide and taking pictures every once in a while.
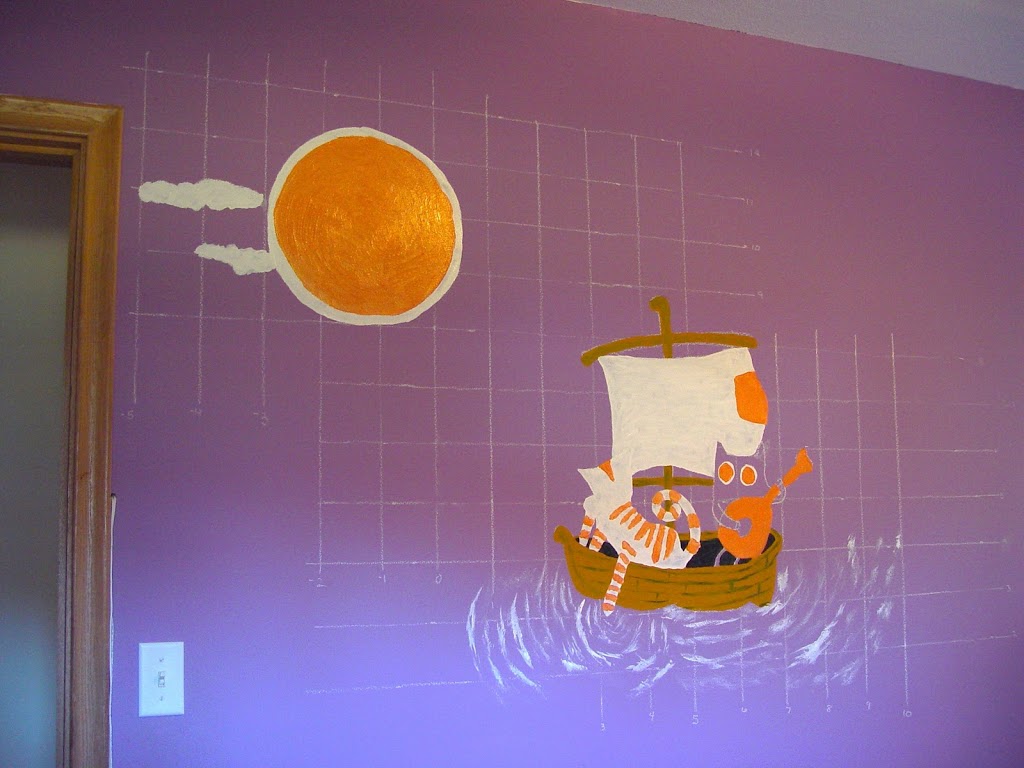
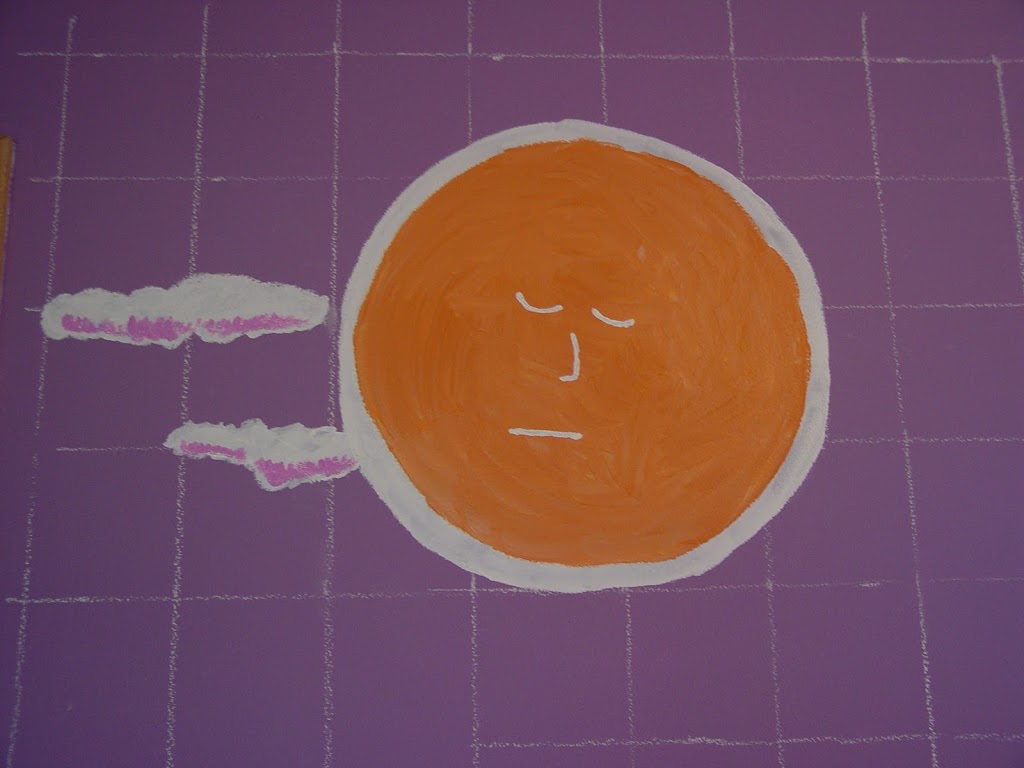
The moon and clouds are done!
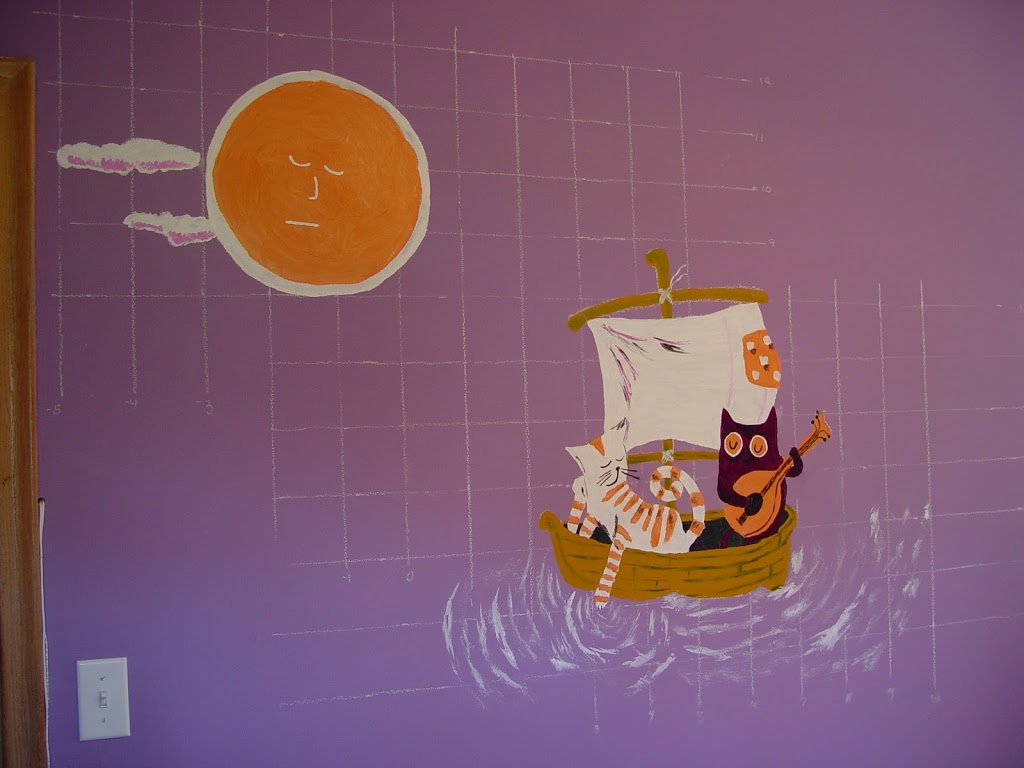
Keep adding colors and details as you go. If you don’t like something, just paint over it! The first time I painted the owl, he turned out too dark.
So I painted the owl again and I love it now!
Step 3. Remove your grid.
When you’re all done, let it dry really well (I waited overnight) then remove the chalk lines with a damp cloth.
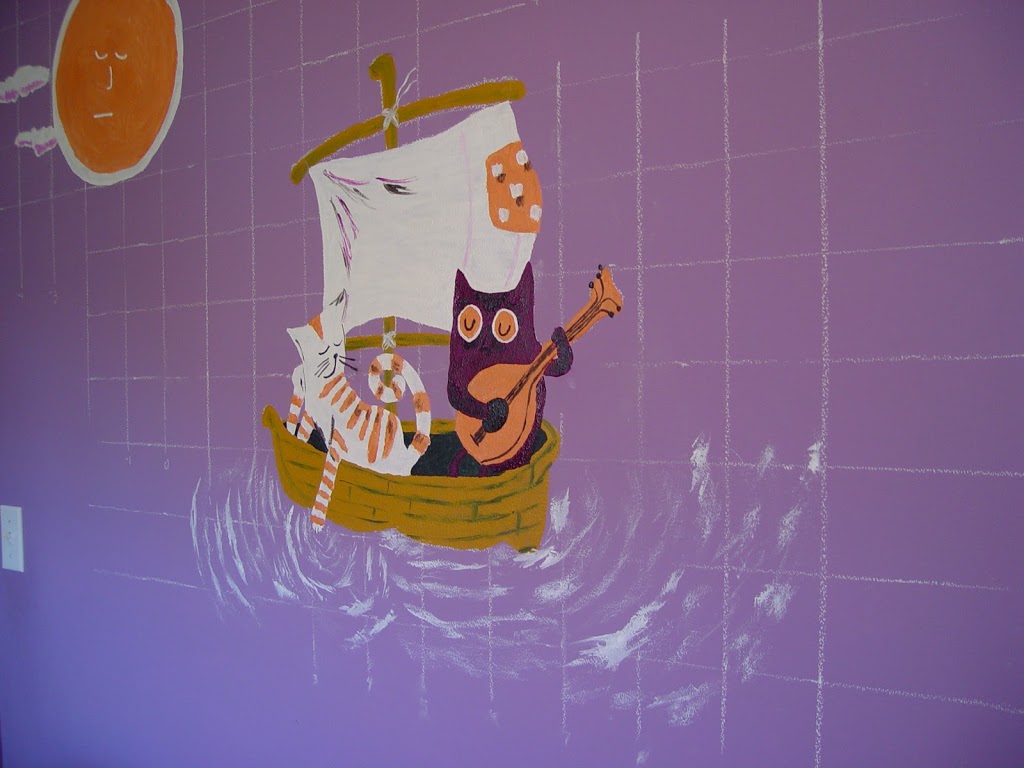
Here’s some close up views!


Great idea! My daughter has a blanket she got as a baby and has loved it a little to much, I think I will paint it on the wall.. great idea with the grid… I was wondering how you got it so perfect, I think I can do it!
Wow! this turned out so fabulous! you are so talented!
This is soooooooooooo cute!
very cool Vanessa! You did such a great job. Did your kids want to paint their painting on the walls now too? 🙂 can’t wait to see the rest of your projects.
have you ever heard the poem that goes along with this picture? The owl and the pussy cat? Its hilarious to try to read to little kids who just don’t get the joke. Anyways, you did a wonderful job, so pretty
fantastic! I’m such a sucker for the far far and away prints!