
We don’t normally have a lot of candy in the house. Well, the Halloween candy (at least nothing with chocolate – because that’s all eaten within hours) is still in a jar in the kitchen cupboard. This little project was inspired by my son who asks for candy from the brightly colored packages at the checkout at Target.

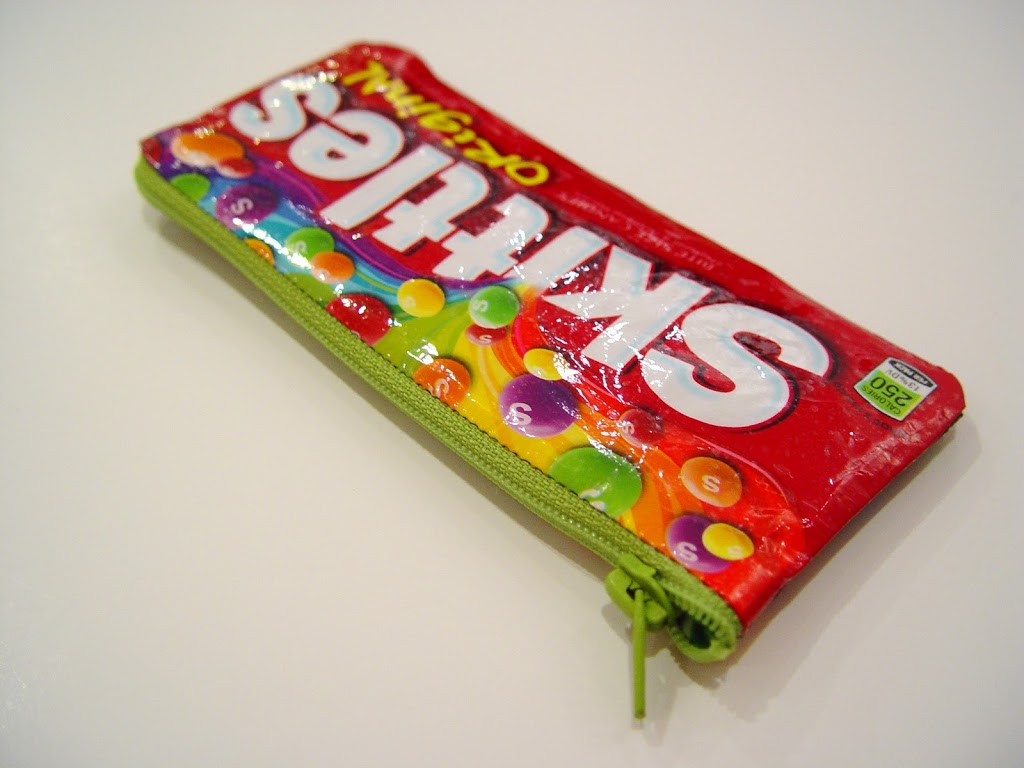
So, here’s a little “sweet tooth” pouch.
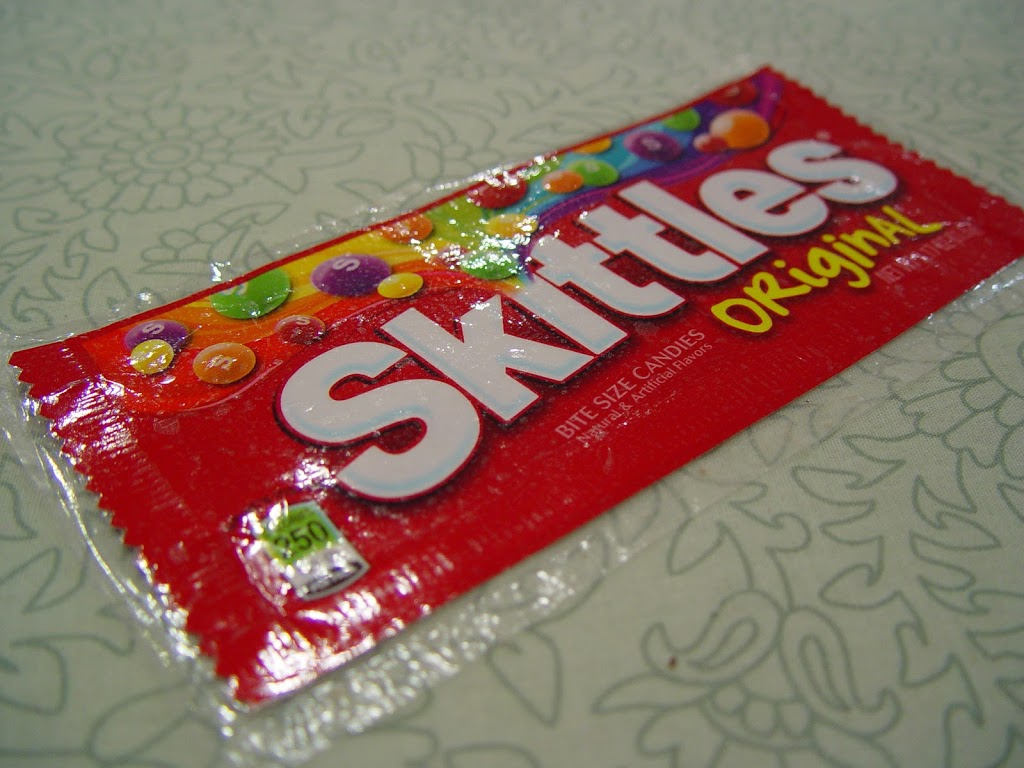
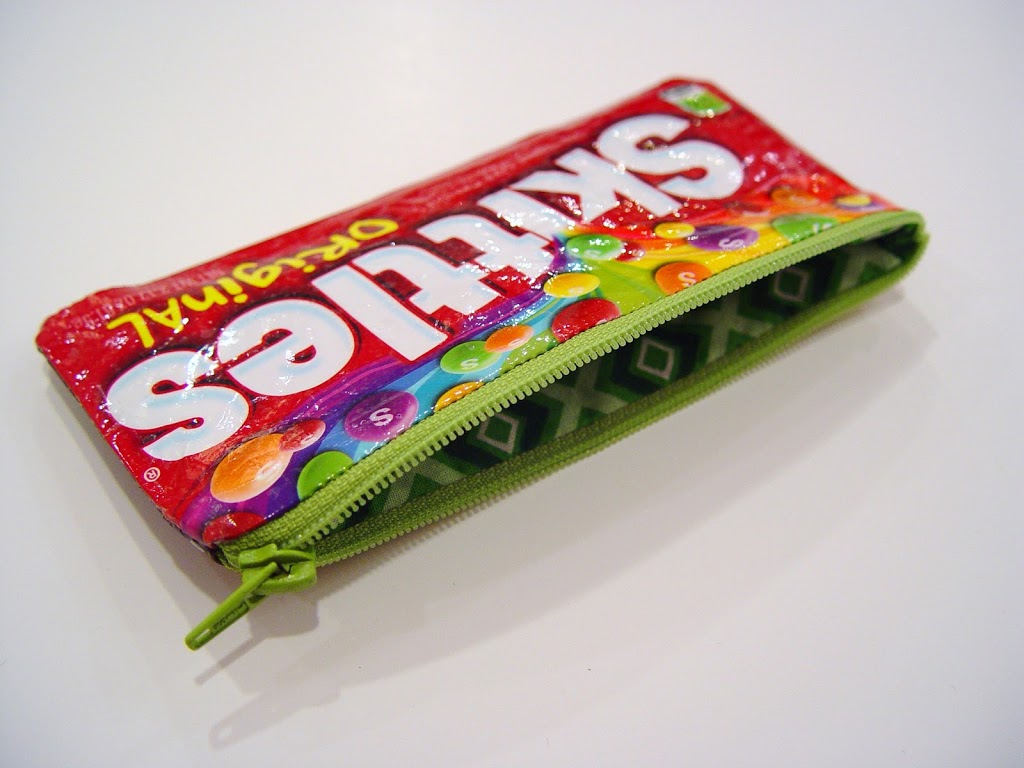
You’ll need two candy pouches – I used skittles and M&Ms. You could use candy bars too (you just might need more than one per side to make it a bit bigger).
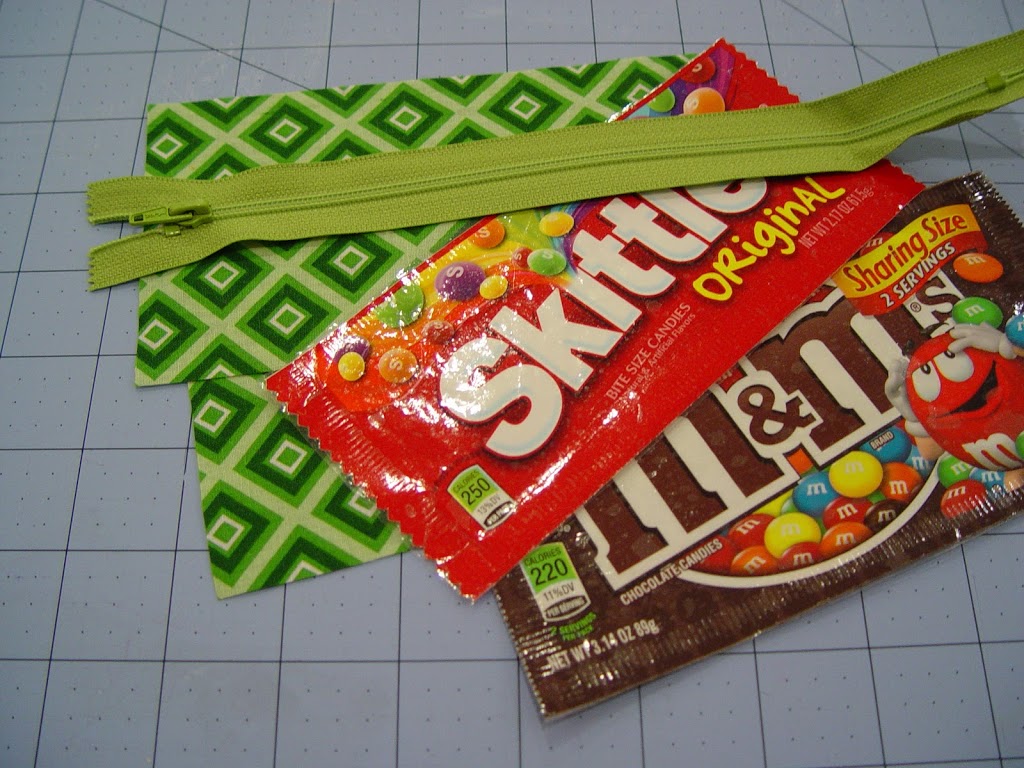
You’ll also need:
iron-on vinyl
a zipper (7 – 9″ works well)
two pieces of fabric for lining (each should be the size of your candy wrapper).
thread, sewing machine, zipper foot, iron, X-acto knife
UPDATE: Several of you have emailed me asking where to find iron-on vinyl. Well most fabric stores do carry it with the interfacing. I picked mine up at Jo-Ann’s, although I did have to insist that the employee at the cut counter look for it (since she was convinced they didn’t have it, but of course, they did). You can also purchase it online in several places including Jo-Ann’s and Amazon.
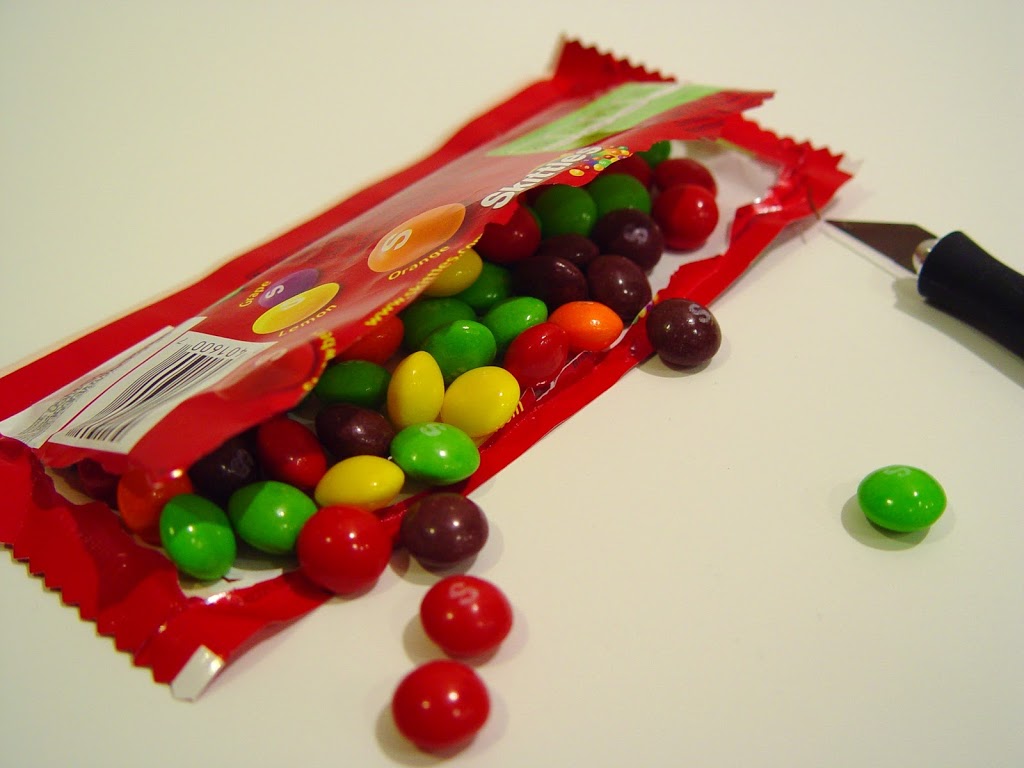
First, we’ll put the vinyl onto our candy wrappers. Carefully remove the back of the candy wrapper leaving the top piece fully intact.
Cut two pieces of vinyl slightly larger than the wrapper. Peel off the paper backing and stick to the front of the wrapper, smoothing out with your fingers.

Using a clean rag (or ironing cloth), iron the vinyl for 8-10 seconds on medium heat. Repeat for the other side. Trim any excess vinyl. Repeat for the other wrapper.

Now that you have your wrappers covered in vinyl, we’ll assemble the pouch.
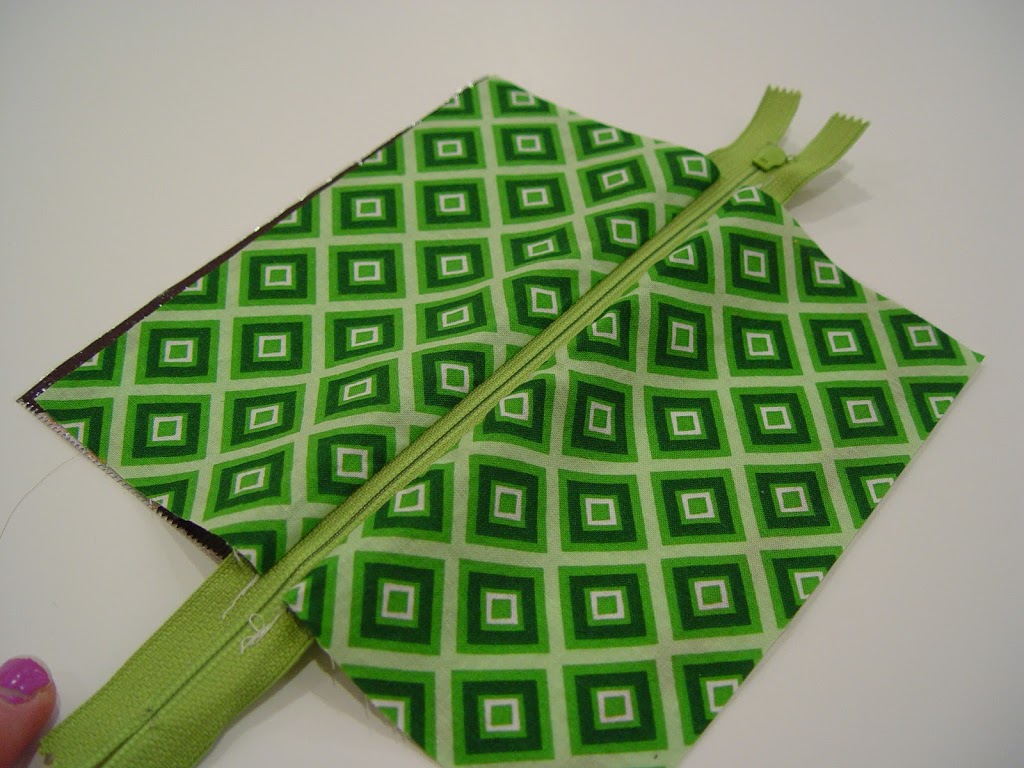
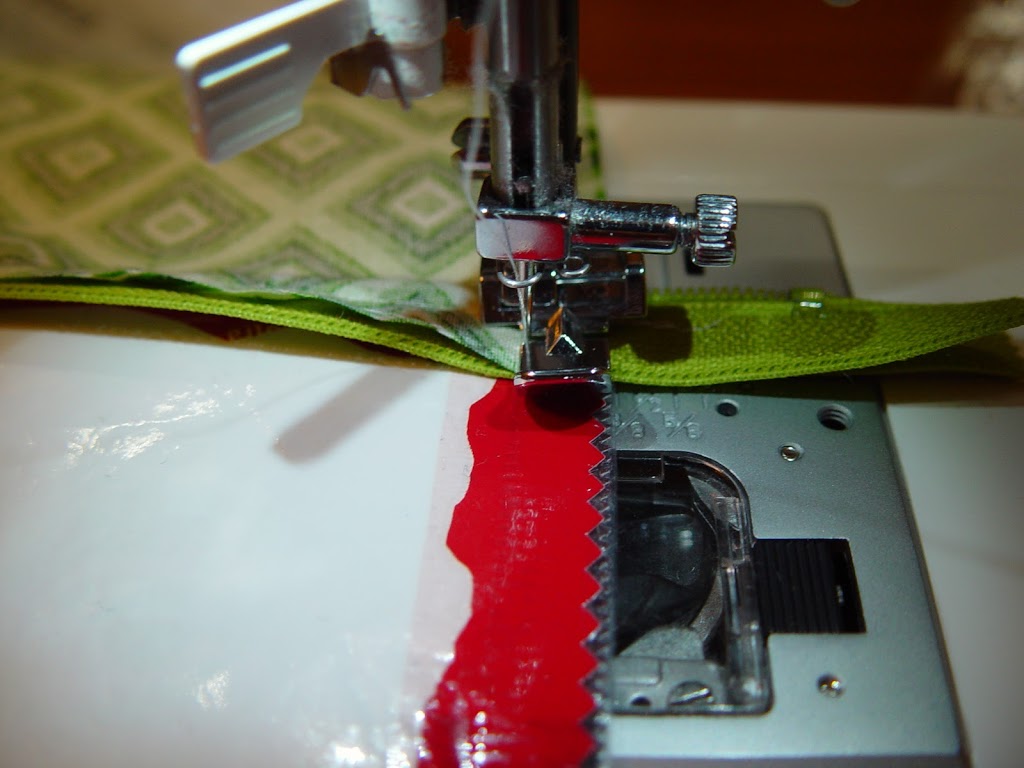
Place your lining fabric right side up and then place the zipper on top matching the edges. Zipper should be facing up, as in the photo.
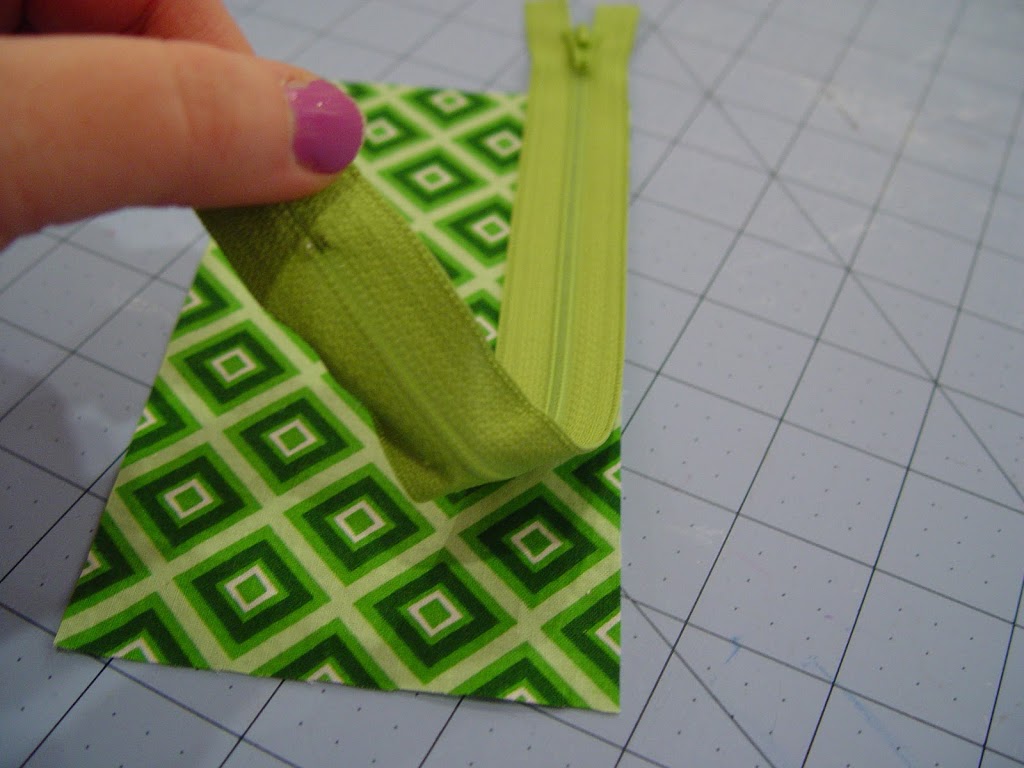
Place the wrapper on top (right side down).

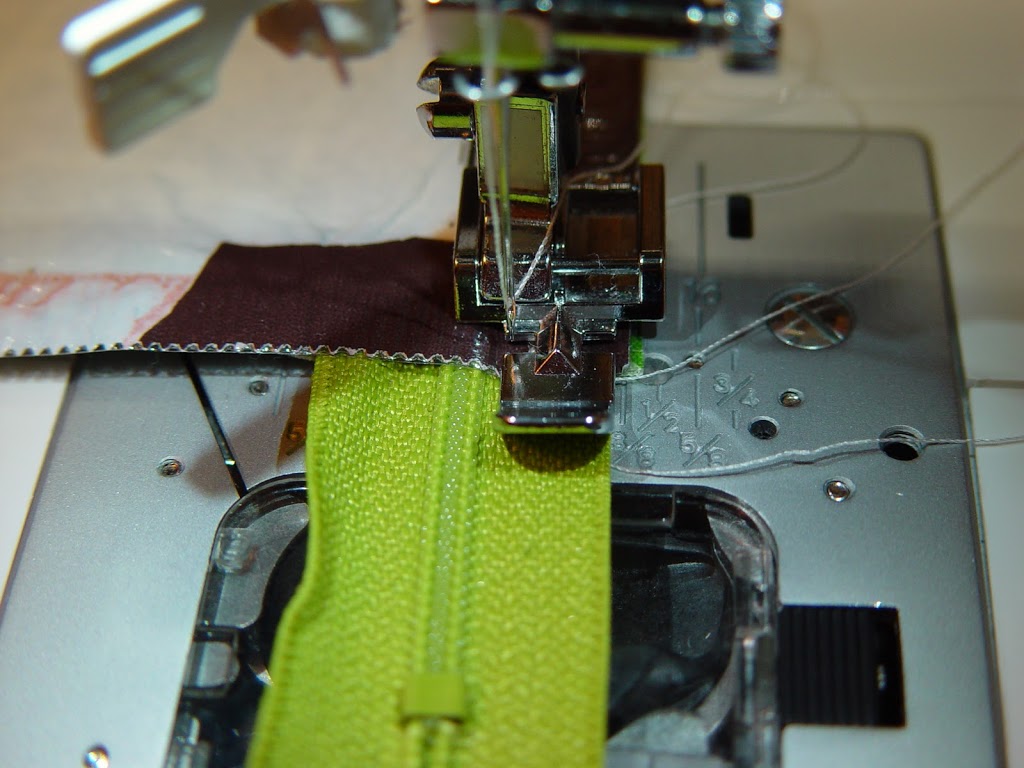
Increase your stitch length and using a zipper foot, sew along the length of the zipper.
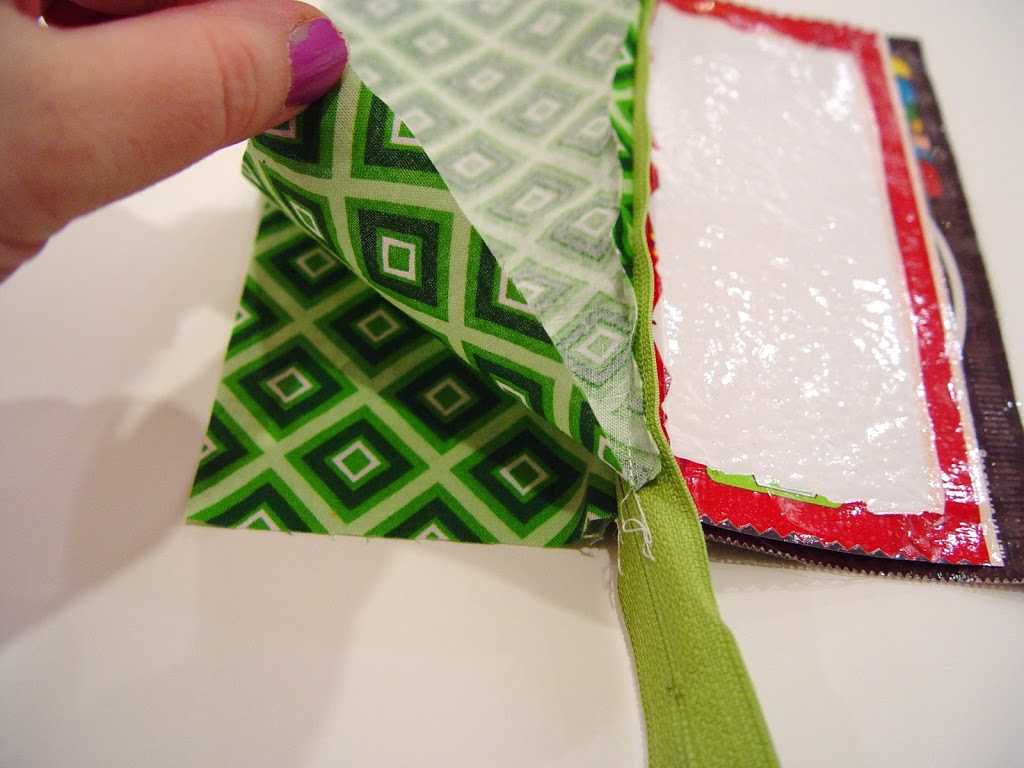
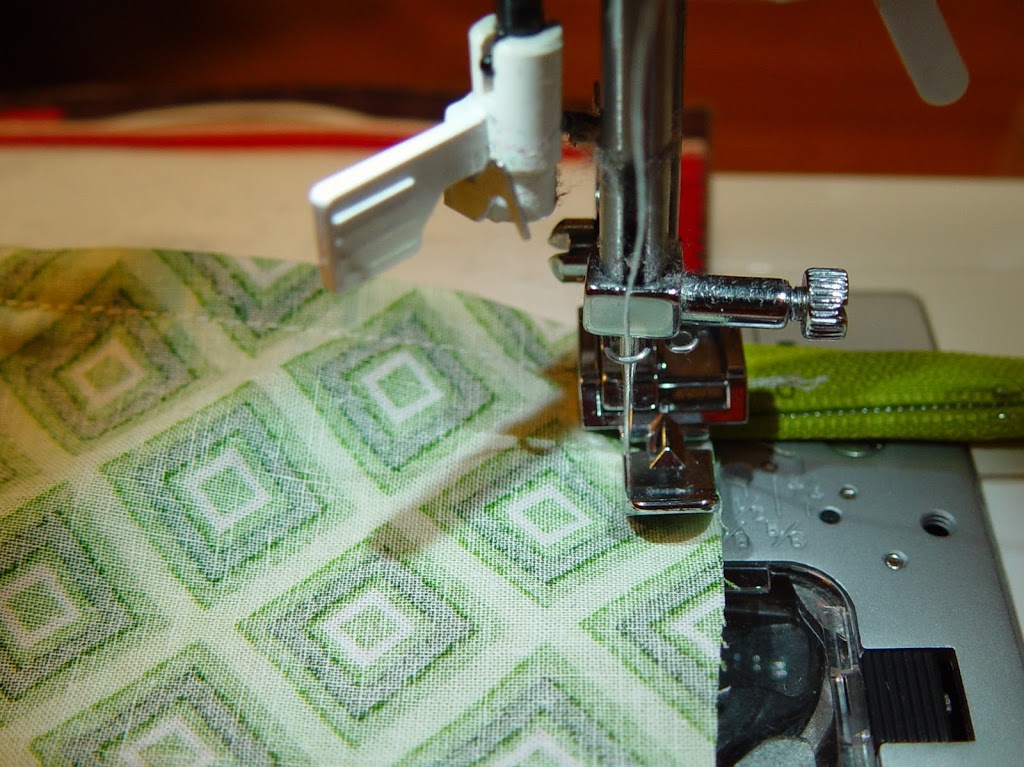
Fold over the front and lining (so wrong sides are now touching) and add the other piece of lining and wrapper to the other side of the zipper.
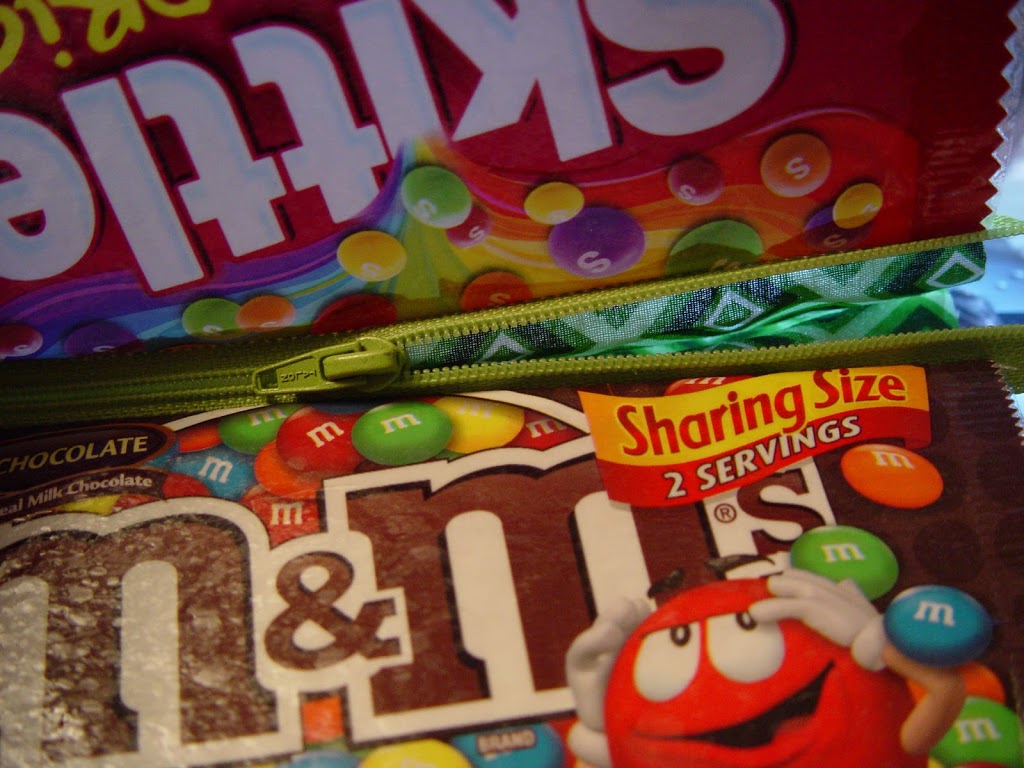
Now the top looks like this:
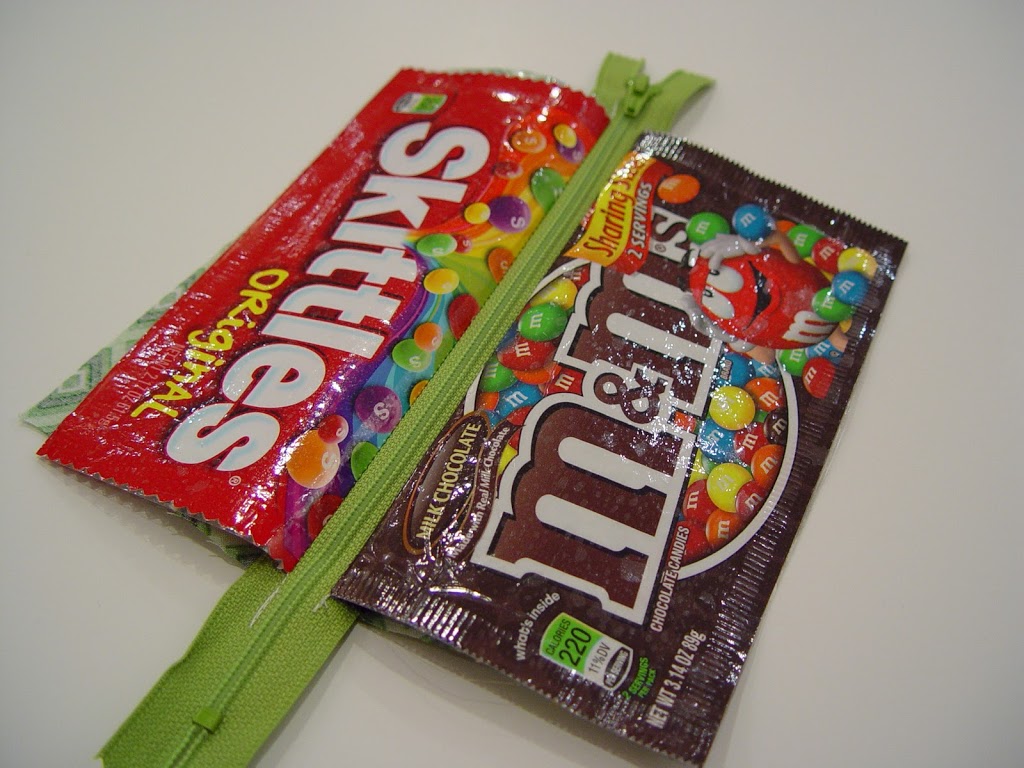
and the other side looks like this:
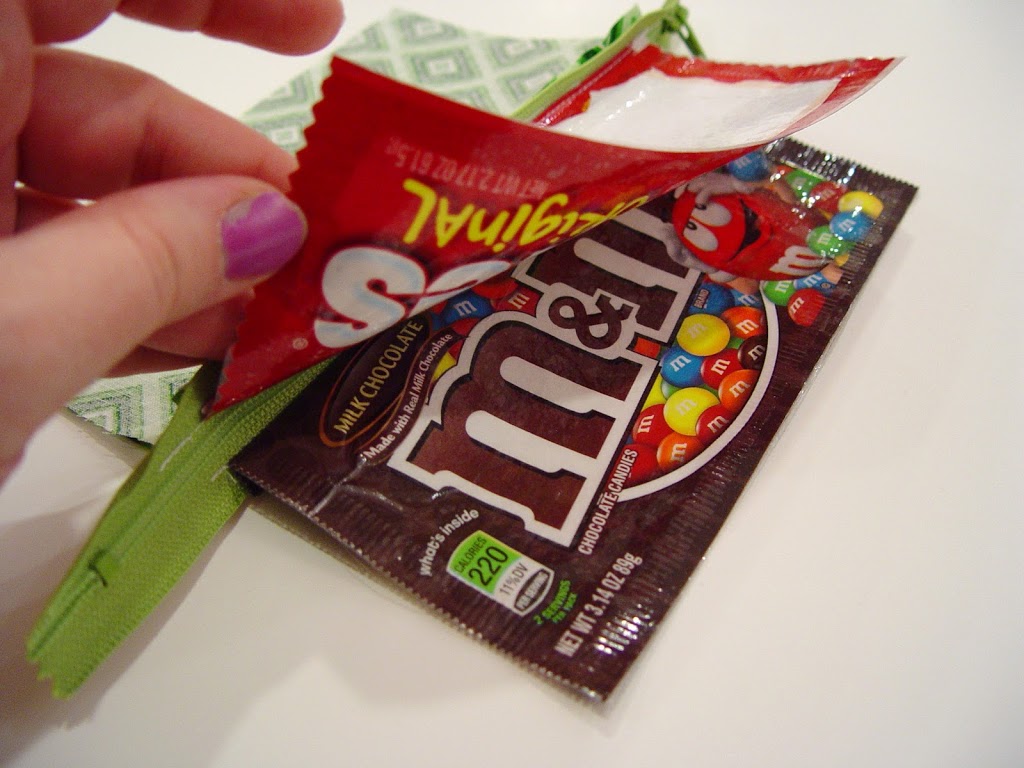
Now fold the bag so the the lining is touching and the wrappers are touching (right sides together) like this:
Starting with the lining, sew around the bag.
Make sure you pull the zipper partway open so you can turn it inside out later.
When you get to a zipper, make sure it’s “pushed” toward the lining.
Continue around the bag, leaving a large opening at the bottom for turning. A large opening is best (even larger than pictured below). The vinyl wrapper is a bit stiff and difficult to fit through a small opening.
Trim the extra zipper bits and trim the corners (turning points).
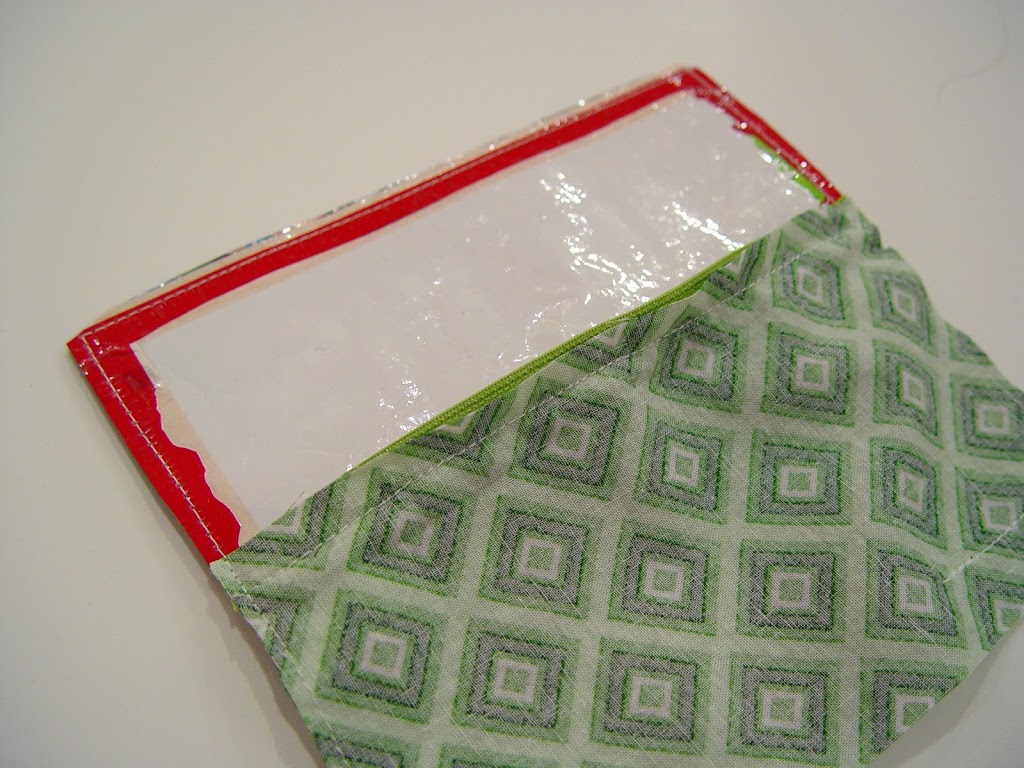
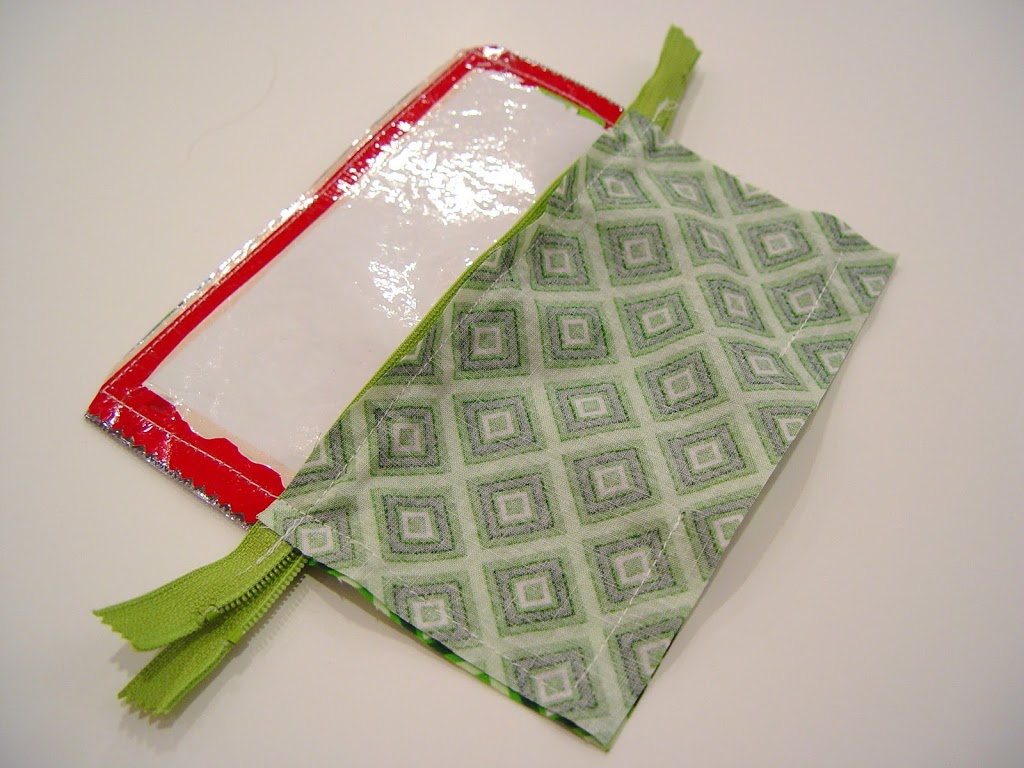
Carefully turn the bag right side out. Sew up the bottom of the lining (by hand or machine) and tuck it into the pouch.
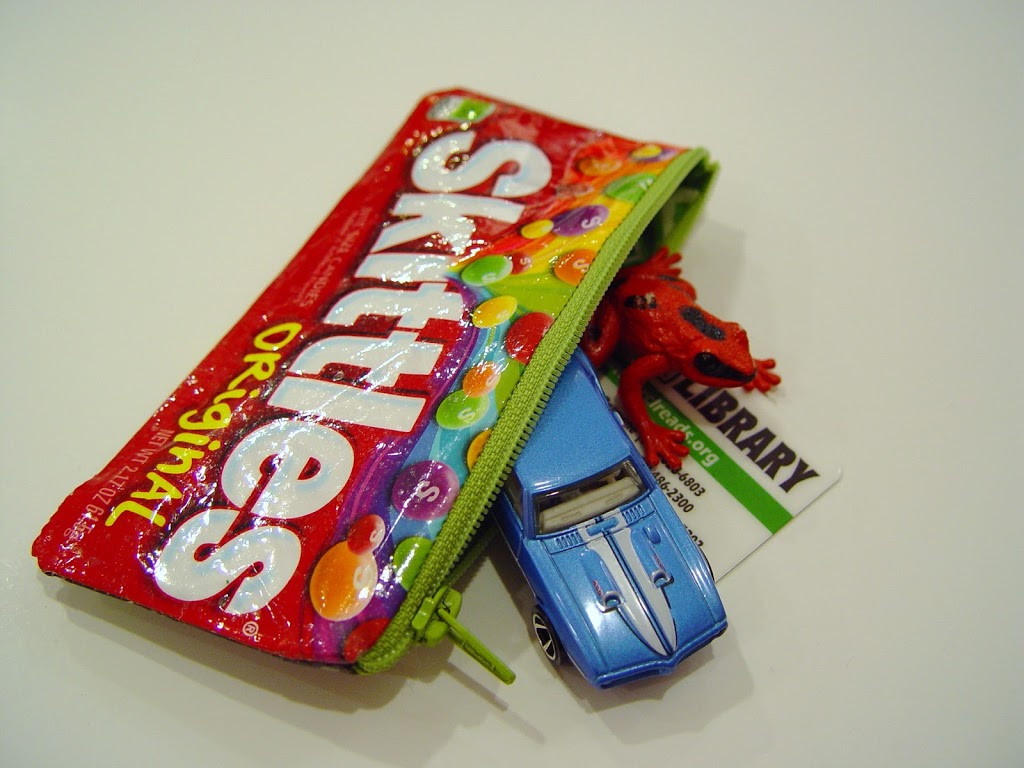
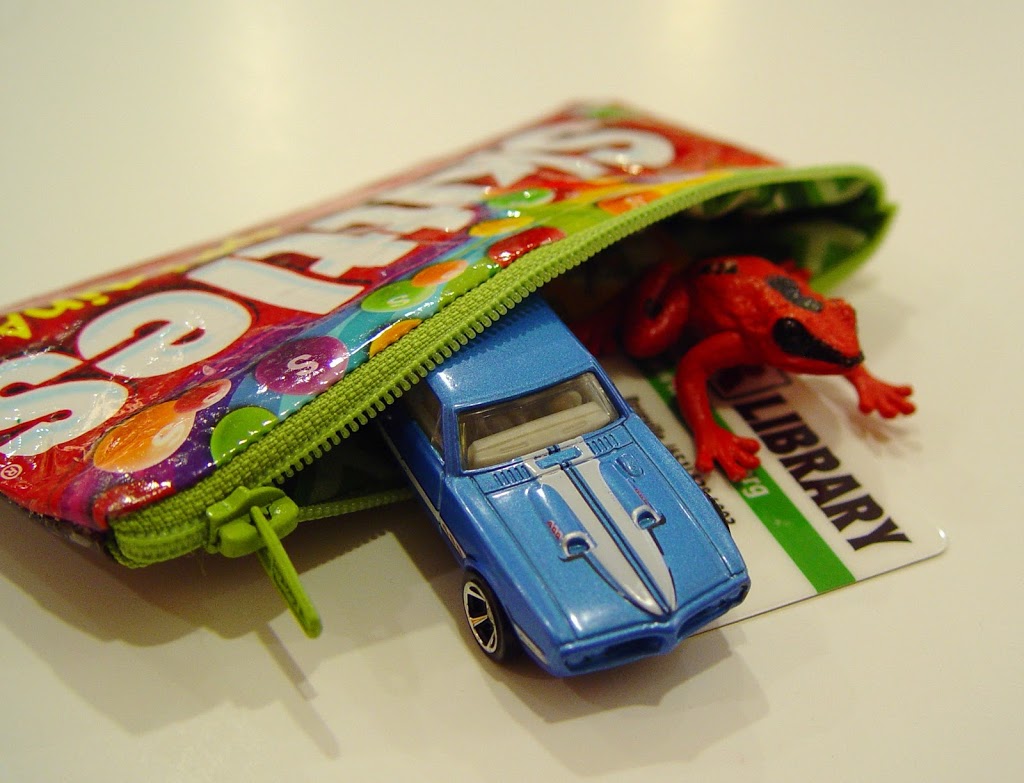
Don’t forget to have your little one fill it with treasures – a favorite car, a new library card and of course, a frog.

That’s really neat! and skittles are my favorite. My kids even like it they want me to make them one. Thanks for the great tutorial.
Oh my gosh. I’m bookmarking this. I can’t wait to make them!
I’d love to have you come link up at my For the Kids Friday Link Party! Stop by and check it out!
http://sunscholars.blogspot.com/2011/03/for-kids-friday-2-part-2.html
Ok… seriously, these are too cool! I’ve got to find a place to share them on my blog. I’ve already shared on Facebook.
Where do you find iron on vinyl?
I bought it at Joanns, but you can also find it in Amazon.
Is it possible to do this without a sewing machine? Can it be sewn by hand? I don’t have a sewing machine and I don’t know anyone that has one! And I really want to make one of these!
There are plenty of tutorials out there for making these without a sewing machine. Just Google no sew candy wrapper pouch. It involves a stapler. 🙂
I love it! I want to make one as soon as I have some suitable candy wrappers. Thank you for posting this wonderful tutorial.
This is so cool! I wish I didn’t have a chronic fear of sewing in zippers ~ maybe I’ll bribe my mom to do that part. :0)
This is so cool!! Right up my alley:)
This would be so great as a coin purse too!
Really fun, and great tutorial!
Lindsay
Individual Reese’s peanut butter cup wrappers make the cutest coin purses!!
Wow, I love them! I hope I can find iron on vinyl here in oz so I can make these.
I’ve always wondered how these were made – Thank you!
Now I’ve got to find iron on vinyl!! oh and buy some sweets!!
TOO COOL. Maybe my kids will eat a healthy snack from such a cool bag. What great gifts to give to little ones as well. Cant wait to make.
This is so clever!! Great tutorial! I’d love for you to link up to Wow Me Wednesday!
http://polkadotsonparade.blogspot.com/2011/03/wow-me-wednesday.html
Wow! That’s fabulous!!
This is great! I’m gonna have to make these for my kids. They will love them!!!!
That is awesome! What a fun idea! Thanks for sharing the tutorial! 🙂 Would love for you to join my linky party! 🙂
http://www.inspiringcreationsblog.com/2011/03/friday-favorites-linky-party_17.html
This is a super great idea! Some years, for birthday presents for my grandchildren, I just send them money, but I’m always thinking of a fun way to send it. This would be so cute to make and tuck the birthday money inside! I’m doing it!!
What a fun project! Thanks for sharing!
That’s so cute!
I LOVE this idea!! Thanks for the tutorial!
I can’t- wait to try it ! I love the idea ;D
I have always avoided things like this with zippers…but you make it looks so easy…I think I can do it…can’t wait to try! Thanks so much..the grand kids will love it!!
awesome!!! I´ll feature this project on my blog…hope you don´t mind.
hugs from Brazil
This is soo cool! I’m sharing with my friends at my sewing club, they’ll love it! thanks again.
This is one of the cutest projects ever! Thank you so much for sharing how to do it too!
wow! so cute and useful! thanks a lot. ^0^
This is such a cool idea! I can’t wait to try it
Wow! Fabulous! =0)
Hugs,
Aud
This is so awesome! I’m definitely making some for my nieces and nephews. I found some iron-on vinyl in the section by the pre-packaged interfacing (I think it’s heat n bond). Found your blog thru Anna at Noodlehead, really enjoying looking around!
Great and cute! Very nice idea and result! Congratulations!
una spiegazione più che perfetta…ma c’è in italiano??????al mercatino delle “pari opportunità” al quale ho partecipato per la festa della donna c’erano borse fatte con l’involucro dei pacchetti di caffè….originalissime,ma forse lo sai già…ciaooo e complimenti!!adry
I love this! I’d love it if you shared it over at the Glitter Link party!!http://runwithglitter.blogspot.com/2011/04/running-with-glitter-3-link-party.html
I actually have some iron-on vinyl I bought a few years ago on clearance! I’m including these in my Earth Day round-up tomorrow!
Love this! Found it on Crafty Staci and came straight over to see it. I can’t wait to make some of these–thanks for sharing!
Sharing your link on FB, too! 😉
This is incredibly nice! We often throw candy wrappers ones we consumed all its sweet delight. But what we didn’t know is that even the smallest wrapper can clog drains. To keep our environment clean, we should learn to recycle just like this one.
I want to make one of these RIGHT now!
where can you get the zipper?
i dont have iron on vinyl so is there anything else i can use instead of it?
I’m wondering if clear packaging tape could work instead of vinyl….
It wouldn’t have the same flexibility the vinyl has and it may discolor and loose adhesion over time. If you give it a try, let me know how it works!
It doesn’t work well at all the glue from it will mess up your needle! I’m going to try the vinyl I pray it doesn’t do it again. I also had a problem with it tearing right through the tape and package
LOVE THIS!!! Great job!
Perfeito!!!
I just made one out of Pirates Booty bag and it is so cute! I think it took a total of about 20 minutes to make. Thank you!!
I found you on pinterest. I am so trying this. I’m going to follow you now. Jamesandleighann.blogspot.com
That is so cool…I think I will make several for the grandkids for Christmas.
O this is super neat! I always wondered how stuff was made with wrappers 😀
Just made this for a christmas present for a friend. (i’m 16 years old) Loved making it, and I ate all the candy. which im slightly ashamed of. 🙂 awesome tutorial though. thanks!
Loved the idea and here is what I did – I made one like you suggested and used the iron on vinyl. I started to make the first bag and I melted it – my iron was too hot – and I bought the larger bag of candy! Made a second bag (much cooler iron)using fabric for the back and put the iron on vinyl on it. After completing it, I felt that the vinyl make it too stiff and crinkly.I also didn’t like the zipper installed that way (It is a personal preference of mine.) I then made another bag, no iron on vinyl, installed the zipper a little differently and put a little pleat in the bottom so the bag stands up. This one is softer and I like it better. I will be giving these bags to my grand daughters as a Christmas gift. I can send photos if you would like to see my bags.
Cindy Roth
http://www.longarmuniversity.com
cindyroth1.wordpress.com
I would love to see a photo!
I posted on my blog photos of these bags that I made for my teenage grand daughters. Here is the link to my blog – http://cindyroth1.wordpress.com/2011/12/20/a-very-cute-last-minute-gift/
Cindy Roth
http://www.longarmuniversity.cocm
cindyroth1.wordpress.com
wow fabulous
Thanks for the excellent tutorial – definitely a much cleaner view in my mind of how to install a zipper and turn everything. Best tute I’ve seen!
This is so cool! I am definitely making one for my nephew! He’ll probably love this, but I’m going to use wrappers from his favorite chocolates! I’m sure he’ll love that even more!
This is really awesome! I really want to make this but could I use something else instead of vinyl? For example that plastic foil we use to wrap our notebooks in?
Adorei sua arte… sempre muito criativa!
Parabéns!!
SIMONE LOTERO
Foz do Iguaçu – BRASIL
http://artedesimone.blogspot.com
How fantastic is this!!! I have a supply of iron-on vinyl– guess I will have to go get some candy!! Thanks for this tutorial!!!
Hancock fabrics online has iron on vinal 😉
great idea
My sewing group asked that we bring in an idea for something made from a recycled item so I made one of these. Thanks for the great idea!
Walmart. Has it
This comment has been removed by a blog administrator.
If you buy the fun size (large) skittles bag the material is more like plastic so you can skip the iron on vinyl step – though you could reinforce inside with duct tape to make the wrapper stronger – otherwise, good tutorial.
I used packaging tape and it messed my needle up the whole thing a sticky mess I won’t try that again
if you did the lining in wrapper as well it could be a waterproof lunch baggy!
SMART!!
soo cute! which I knew how to use a sewing machine
Very smart and cute! Now when I see the candy/snack isle I view it differently! Just another craft supply store at the grocery store!
Thank you!!!
http://www.bizzybeegifts.us/
I can’t find any clear vinyl…only colored ones
I am so doing this! Thanks.
Wow! Very cool. We’re happy to see one of our Ramsey County Library cards has a crafty new home 🙂
Oh how fun! I was just thinking about chains from gum wrappers recently and that I don’t remember how to make them. Thanks for posting! 😀
candy wrapper purse instruction
is it okay if the zipper isn’t quite long enough for the fabric? like, the candy wrapper is not as big as the zipper, but the handle is beneath the wrapper
I love your picture of the iron. I used to work for Rowenta in Germany and may have made your iron depending on how old it was. I also did the coffee makers with the clear tube that you could see the water with the little red ball in it (I put the ball in the tube).
Hello!
I LOVE this idea and I really want to try it out, though I live in Europe and I’ve been trying to see if I can find any of this iron-on vinyl. I do find some, but I am not sure if it is the same as the one you use here. Is it possible to bug you into putting up a link to the product you use? Those I could find on both Jo-Ann and Amazon is the “Heat’n Bond Iron-on Vinyl-17”W x 2yds”, but I am not sure if it is the right one. Is there a different brand that I could use as well?
Thanks in advance!
Pellon’s Vinyl Fuse (http://www.amazon.com/Pellon-Vinyl-Fuse-protection-100R/dp/B00AIM8RLY) AND Thermoweb’s Heat’n Bond (http://www.amazon.com/Thermoweb-17-Inch-2-Yard-Heatn-Iron-On/dp/B00114QDMI) are both good options. I prefer the latter, but both are fine. You can find them with glossy or matte finishes.
This is the answer that I was looking for. No one knew too much if anything about iron on vinyl. also, the candy wrappers were a little bit hard to take apart without a tear. Just keep on trying, and take it slowly to tear away.
I wondered about thermoweb’s heatnbond. JoAnn Fabric carries both. I will use my 50% or 60% off coupon to purchase it.
I found some in New Zealand. (Iron on vinyl that is) i made my sons school book bag…
http://artycrafty.wordpress.com/2014/01/29/back-to-school-book-bag-made-from-chip-packets/
I just made this and I couldn’t get tight corners and turning it inside out with the sticky vinyl made too many creases. I was going to round the corners and complete the outside and inside as two seperate pieces then hand sew the inside to the zipper. Can’t wait to try it this way:) great idea though love it
I am new to sewing & have made 2 of these now … Your instructions made it all so easy …. Love them … Thank you x
How long would it take to make this?
Lots of potential for different sized bags in October ! Good excuse to buy candy then even tho we are rural and get no trick-treaters. Thank you for a well written tut.
I love how you put a zipper in, may have to do that with the dress I’m making. Seems very easy, thank you for sharing.
Did you put vinyl on both sides of the Skittles package?
Wow, stunning ,thanks.Can´t wait to make one!!
Thanks for sharing! Great idea!
Fab!
Which looks better for this – matte or glossy vinyl?
Thank you x
They both work. I prefer the glossy – it is a little clearer than the matte finish.
Is the vinal optional?
The vinyl adds stability to the wrapper. I would not make it without the vinyl.
GREAT tutorial. I love all the little details and the pictures. I feel confident that I can make one of these pouches after your great instructions. THANKS !!!!
I used the clear peel and stick laminate. YOu can get a huge roll of it at Walmart for under $4. Works very well. (like the contact shelf paper)
These would make amazing pencil cases for any child at school. 😀 Love the re-cycling sweet wrappers idea.
However, the turning part is confusing.
The turning instructions are the standard method for any lined pouch. If you’ve never made a lined pouch start with a fabric version to learn the basic construction and then try the vinyl pouch. If you don’t want to turn it, when you have your sides (and optional lining) sewn to the zipper, you can place the right sides of your pouch out (folded like your finished pouch should look) and sew around the outside of the pouch securing the raw edges with binding.
Such a lovely idea! My girls gonna love this pouch, and it’s a good recycling lesson for them. We are trying recently to recycle more at home an to minimize the rubbish we produce. Thank you for sharing this nice idea!
Well, I made this pouch and it was more difficult than I thought it would be. Ironing on the vinyl wasn’t a problem, turning it was. I think the photo where you say to leave the zipper open a little should say “Leave the zipper open as far as you can before sewing around the sides and leaving a LARGE opening for turning. Also, rounded corners would definitely be better, because you cannot get a sharp corner without ripping through the vinyled candy wrapper. Definitely use a longer stitch length, otherwise when turning, once again, the candy wrapper will rip out it’s seam.
If you turn it right side out when the vinyl is slightly warm that also helps.
Made several. When I turned bag out, the zipper ends did not turn out squarely, as pictured. How did you manage to get zip corners to turn out the way pictured? The bags of candy make tinier bags than I expected, not big enough for pencils. Also found the stitching is unforgiving – if you make a mistake you can’t rip out stitching that has perforated the seam. Any pointers? All said, this is a nice idea and thank you for sharing it!
Thanks for this! I just made one and it turned out perfect! I’ll give it to my grandgirl on Halloween! 😉
@aquilterstable on Ig
I think I am doing something wrong, the candy bag (lager size Skeetles tears at the zipper part, Do I need to use a heavy clear tape, I am using a a duck tape packing one, do I need to use a different needle like a ball point, or something else please let me know.
Clear tape is too tacky for this project and will gum up your needle making it difficult to sew. Iron on vinyl (which I used) is much different. I doesn’t gum up the needle.
These are absolutely the cutest. I’ve just finished making one and will use it as one of my projects for the Kid’s Sewing Camp that I’m teaching this summer. The kids will love it.
Thank you for the great tutorial. They were offering this as a class here in Fremont, NE and I was unfortunately not available to take it. I successfully made a ‘bag’ out of a 10 x 15″ bags of fruity tootsy rolls. My daughter will love it!