
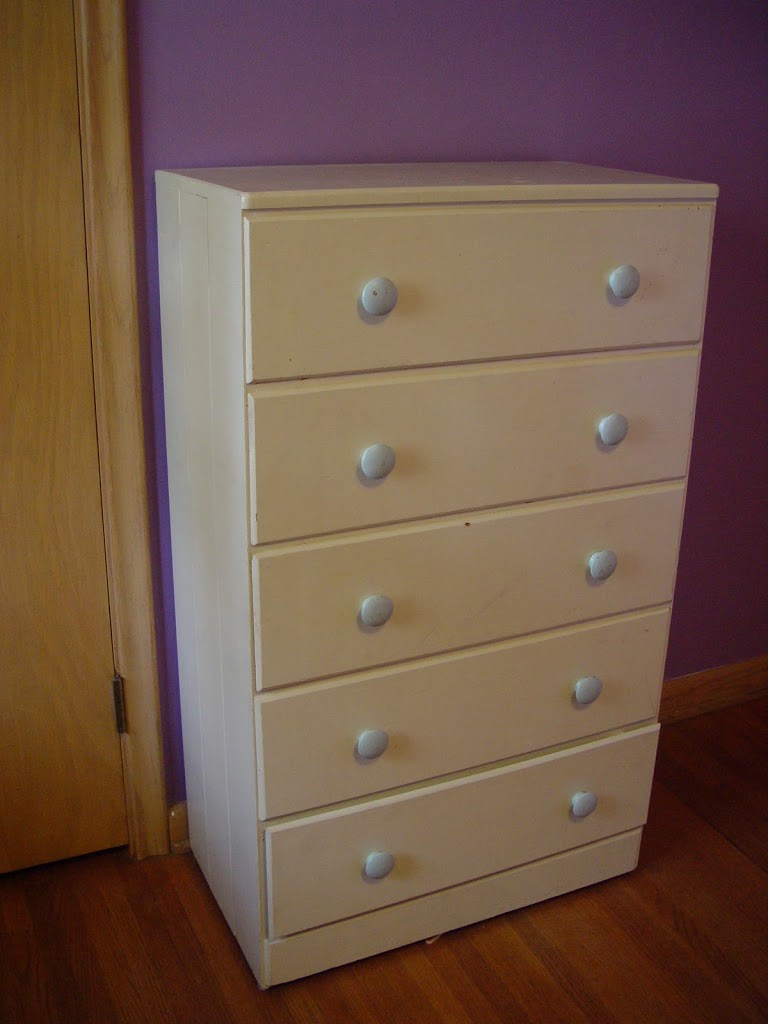
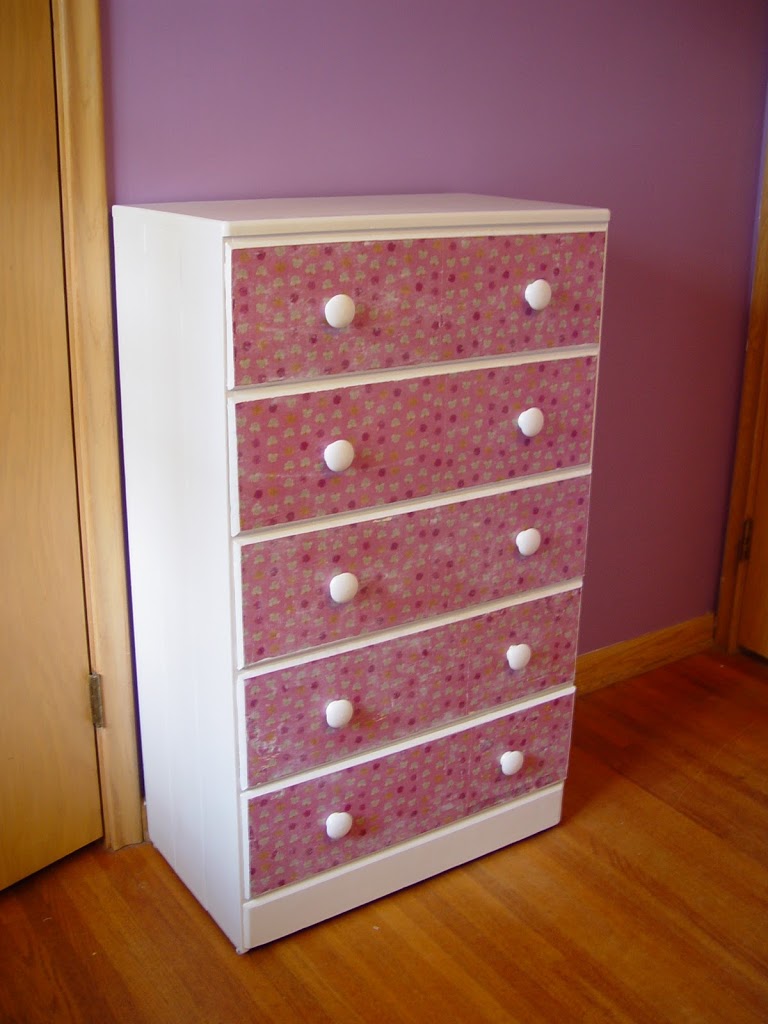
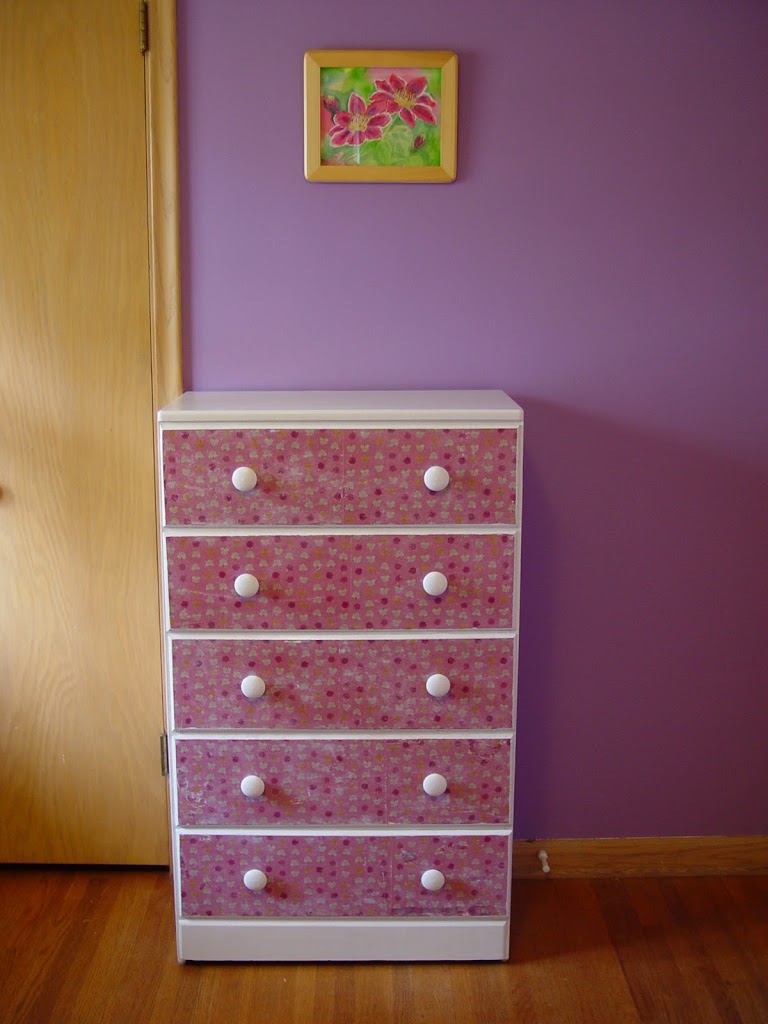
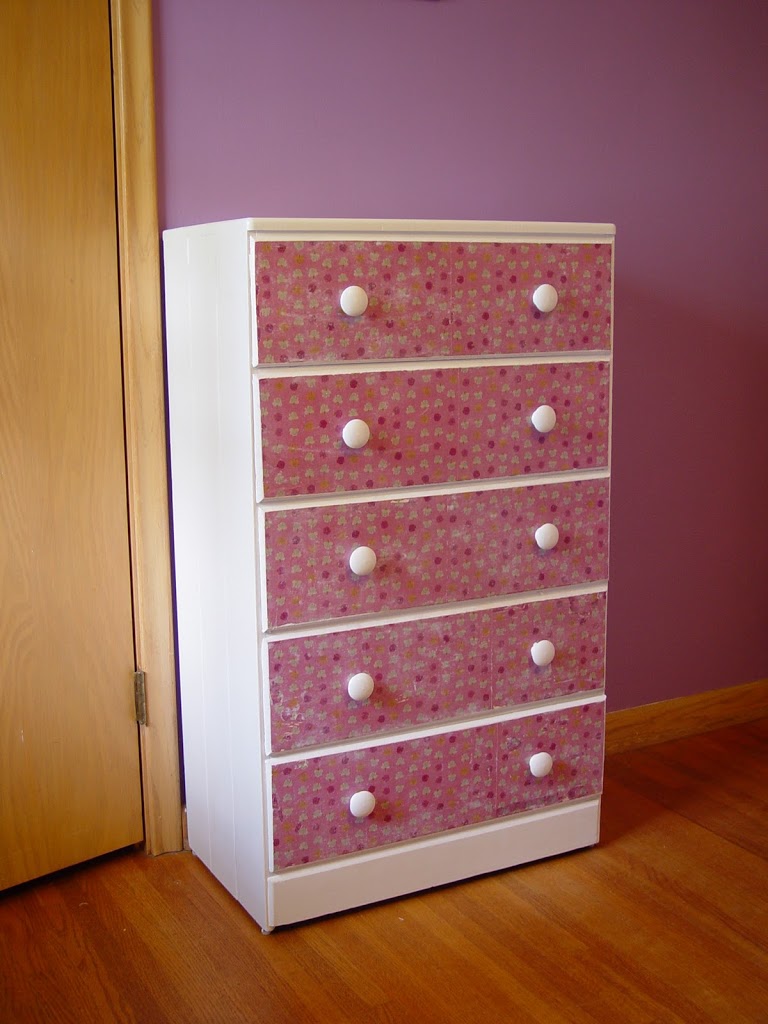
This dresser has been in my daughter’s room since just before she was born. Before that it was in my parents’ basement for as long as I can remember. It’s been in need of a new coat of paint for a while. Far Far Away Week seemed like the perfect opportunity to give it a new makeover and transform it into this…….
The first thing I did was take it outside on a nice day and sand away. The paint it had on it had a glossy finish. A bit too shiny for my taste. In order to use a paint with less shine, I had to ruff up the surface a bit.
Next I took it back inside and gave the dresser that nice new coat of paint it needed. This time white instead of an off/white and semi-gloss instead of high gloss. I used a small sponge paint roller to leave a nice smooth surface. And what a difference that made.
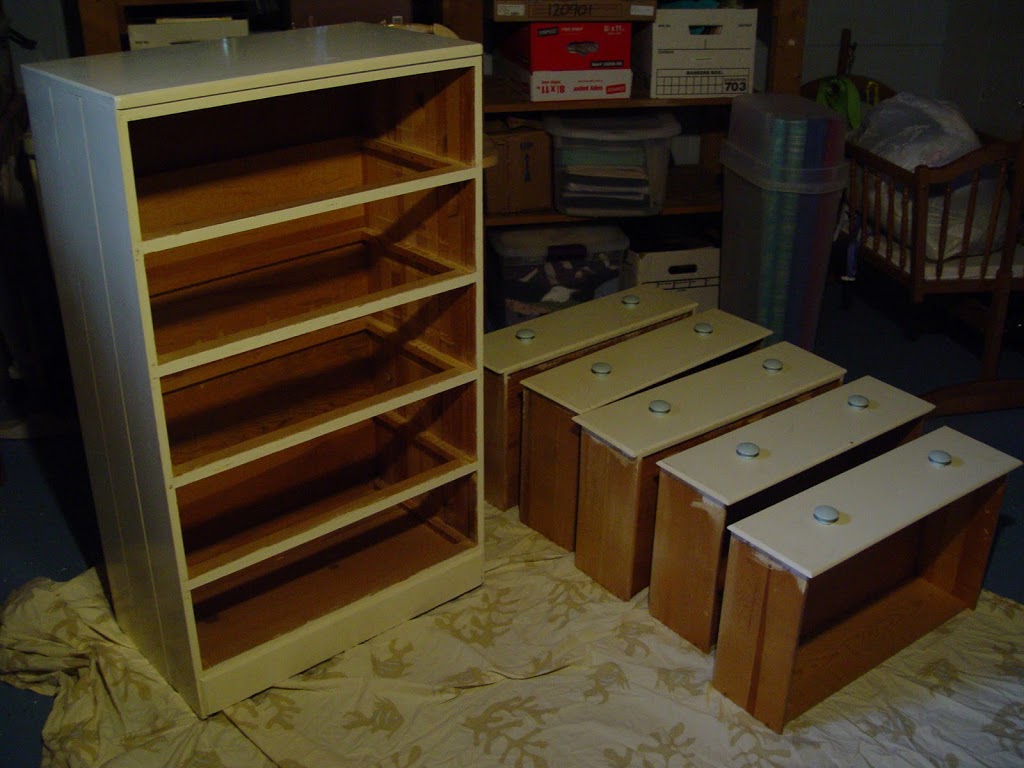
Now onto the dresser drawers.
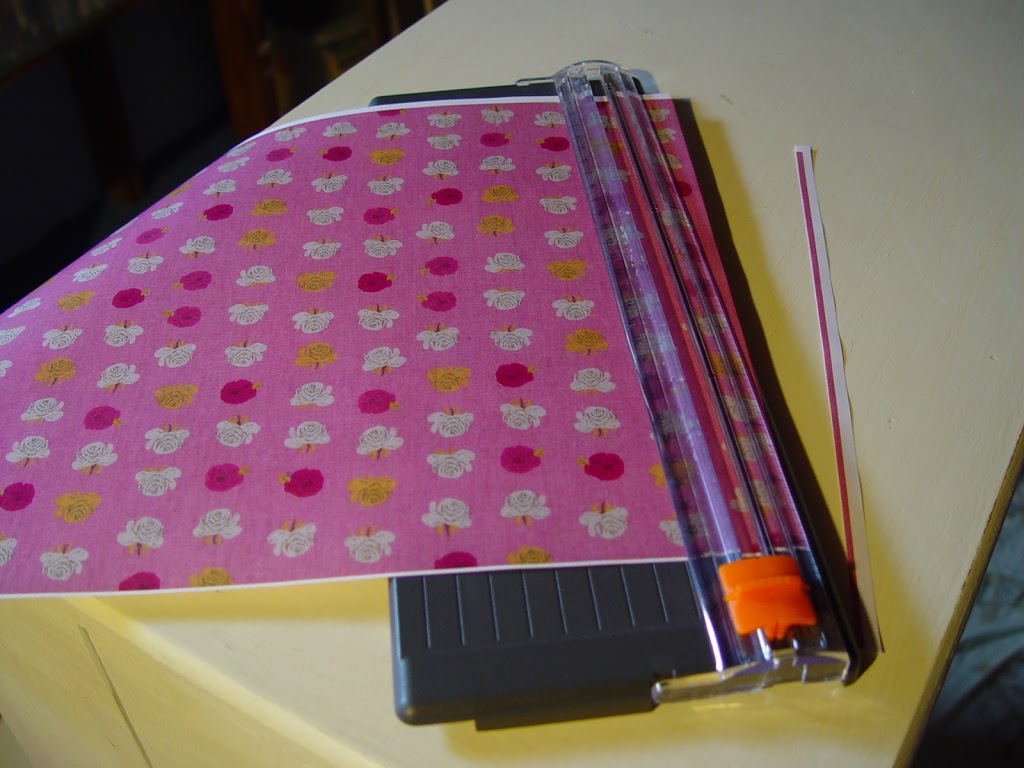
Since I was redoing this dresser in honor of Far Far Away Week, I wanted to incorporate some of Heather Ross’ amazing artwork. Well, this rose fabric was the key! So simple, but lovely.
I didn’t want to put the fabric directly onto the dresser drawers. It wasn’t quite the look I wanted. Plus I didn’t want to use that much fabric. So instead, I took my fabric to Kinkos to make a large color photo copy, actually ten of them. (two for each drawer). To do this successfully, you need to iron your fabric really, really well. Any tiny wrinkle will be magnified by the copier. Use spray starch – a lot. You need to take a mirror image photocopy because of how the image is applied.
Please note: My understanding of copyright law as it applies to photocopying fabric is that it is legal if you do not resell anything made with those photocopies and the fabric you used remains in your possession (meaning you do not sell the fabric you photocopied either.)
I decided to transfer the image from my photocopy onto the dresser instead of simple decoupaging it on. It yields a much different look and with this old dresser, I wanted to make it look a little aged.
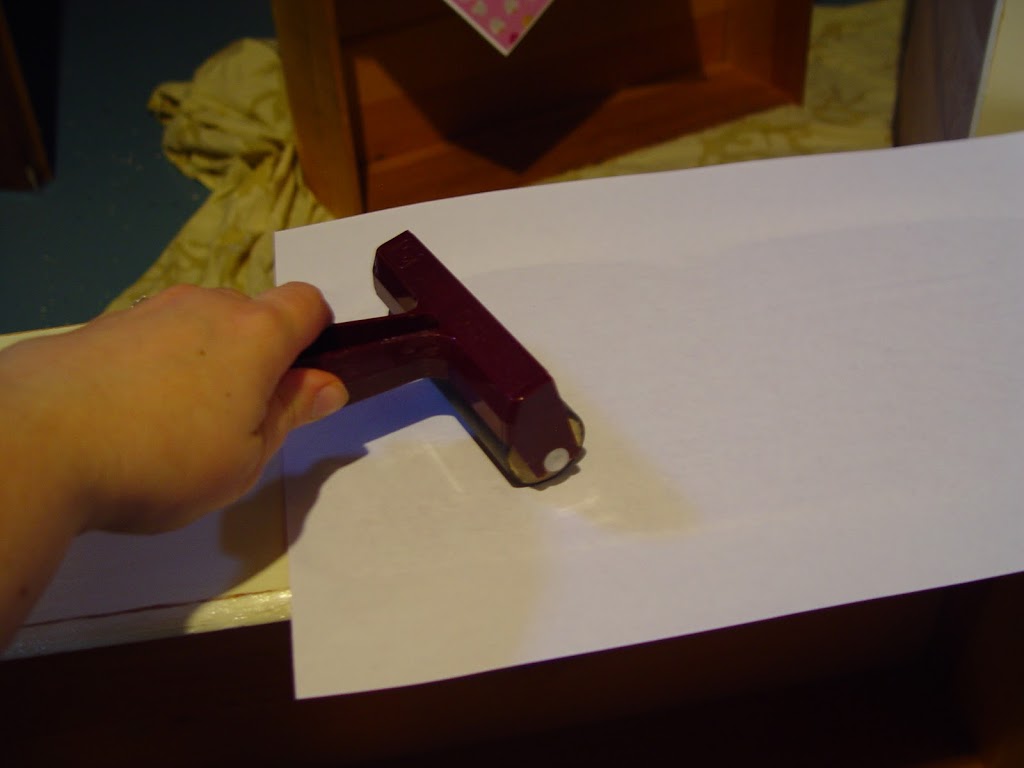
To do this you’ll need your photocopies, some gel medium (to transfer the ink from the photocopy – available at fine art supply stores) and a brayer and brush.
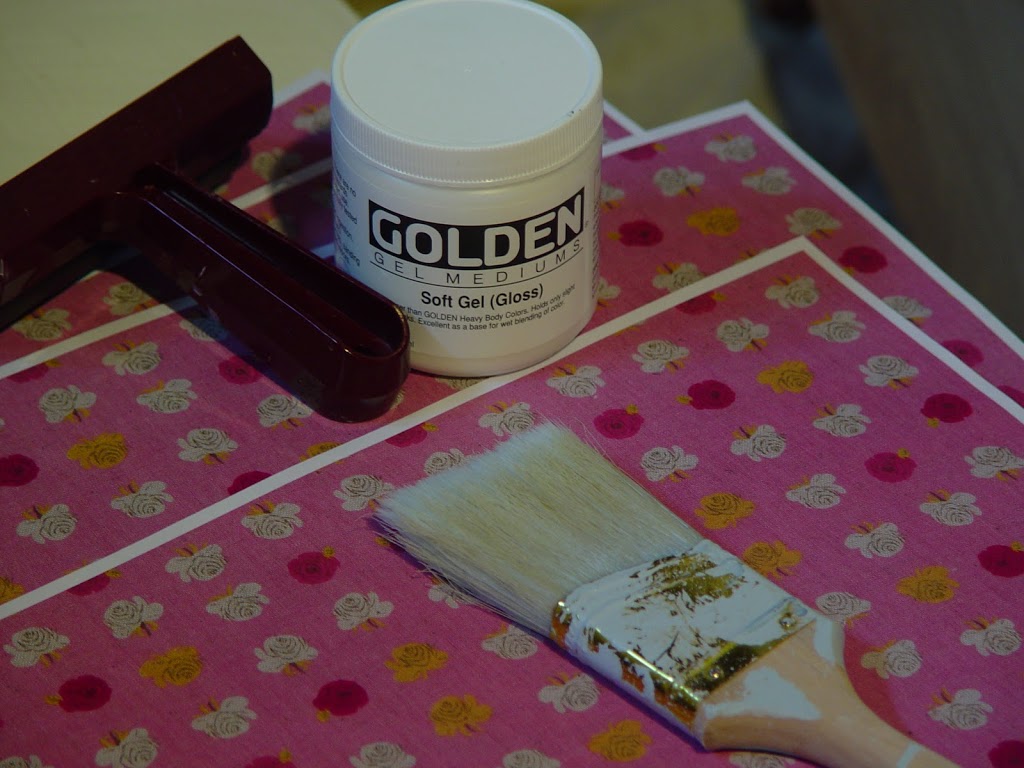
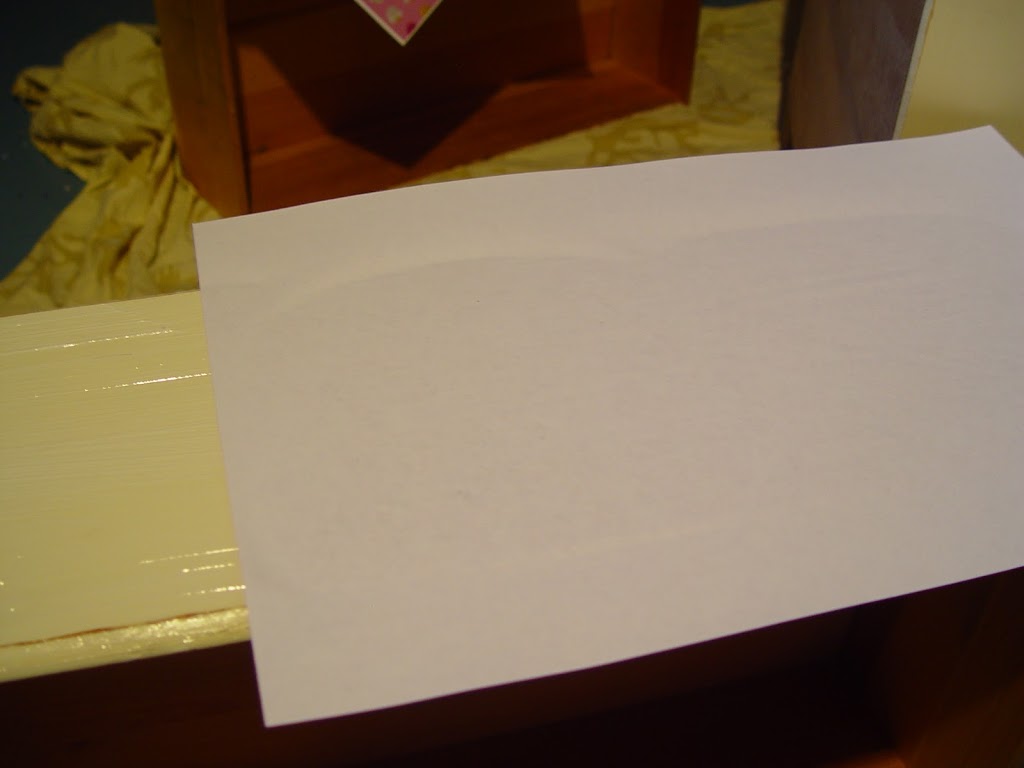
Trim the photocopy of any white edges.
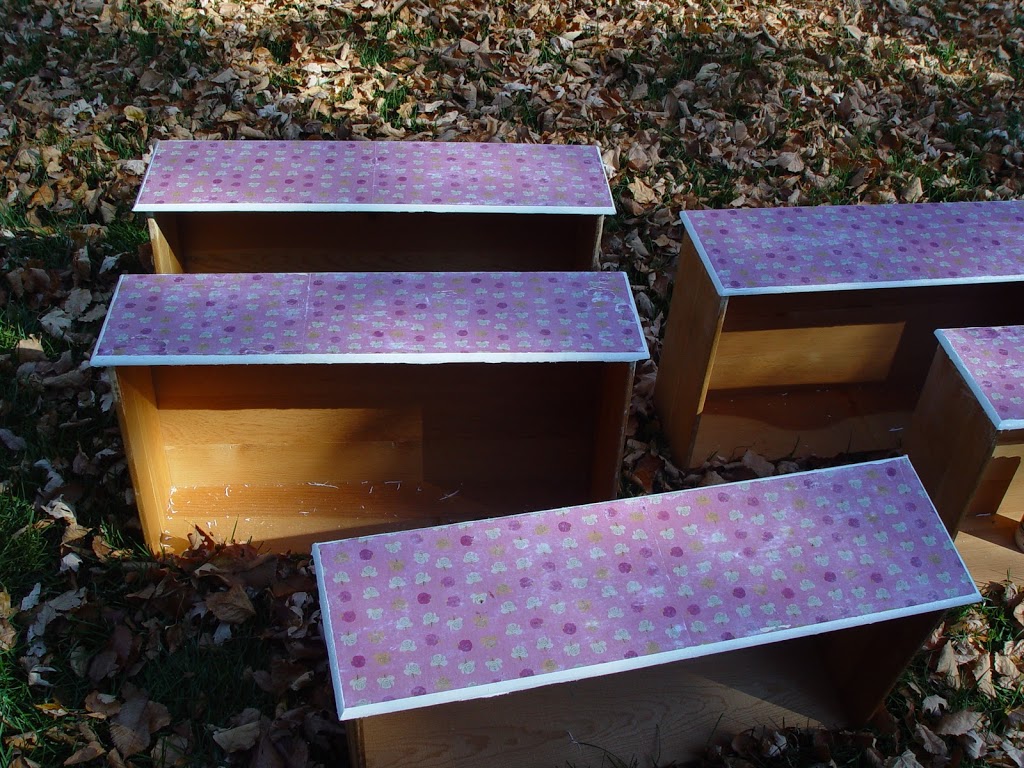
Spread a thick coat of the gel medium and carefully apply your photocopy (image side down). I needed two copies per drawer to cover.
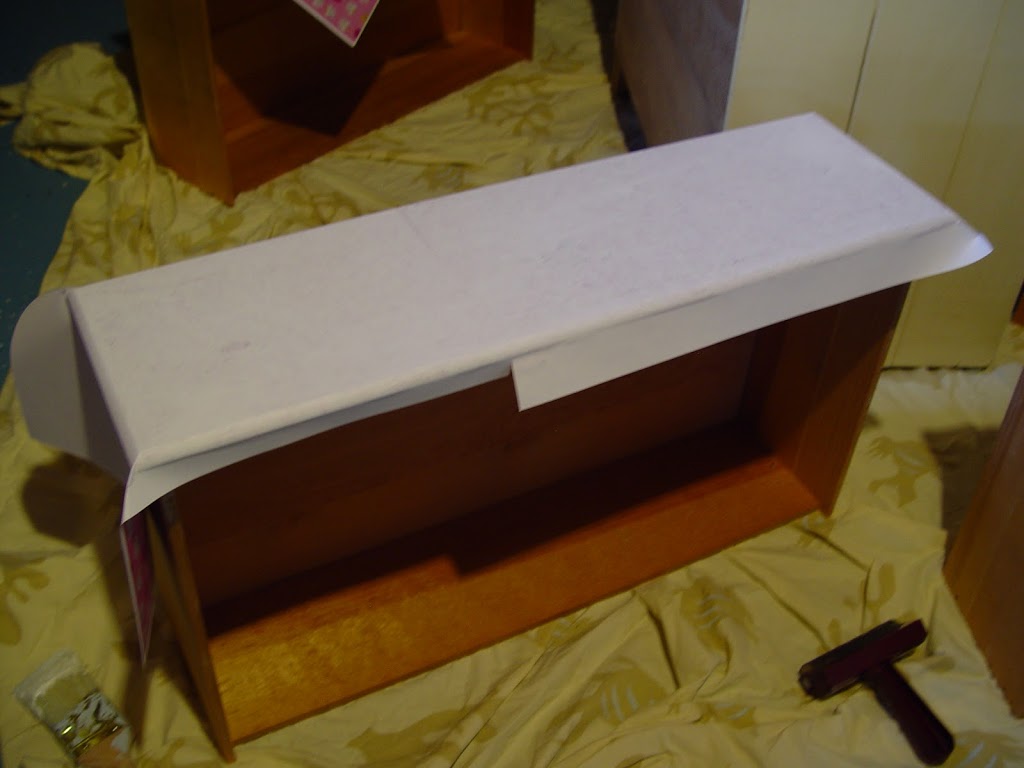
Use your brayer to even it out making sure there are no air bubbles.
Let it dry. I waited overnight. Then spray your paper with water (not too much)
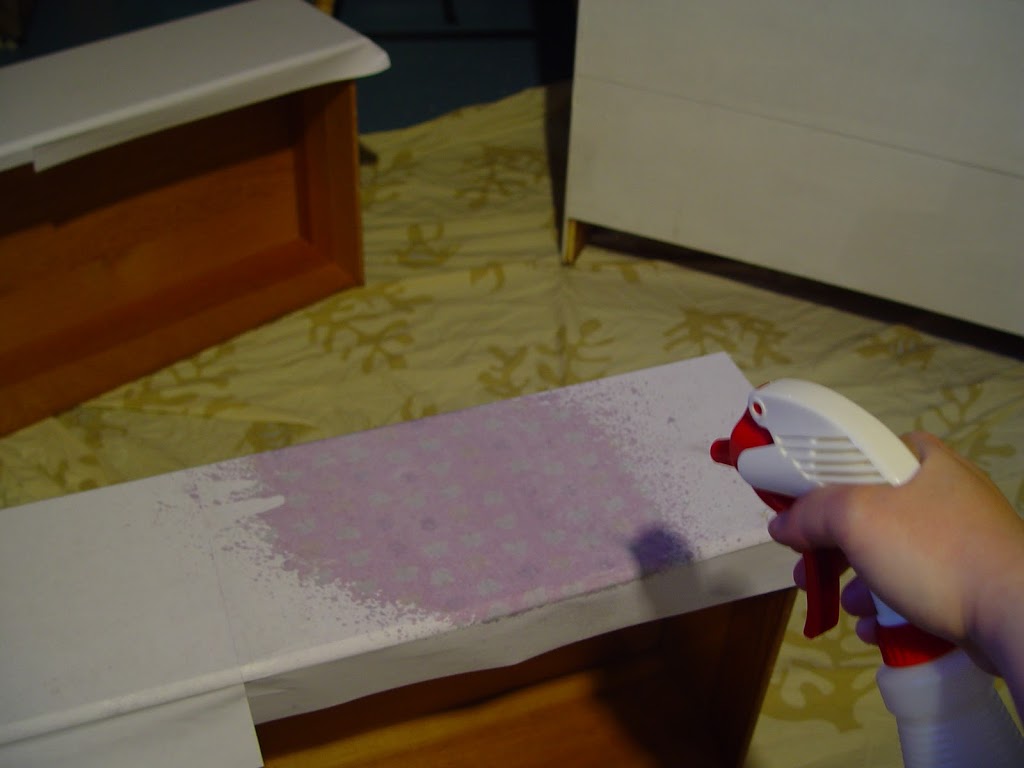
and start rubbing away at the paper backing with your fingers. The image should stay on there.
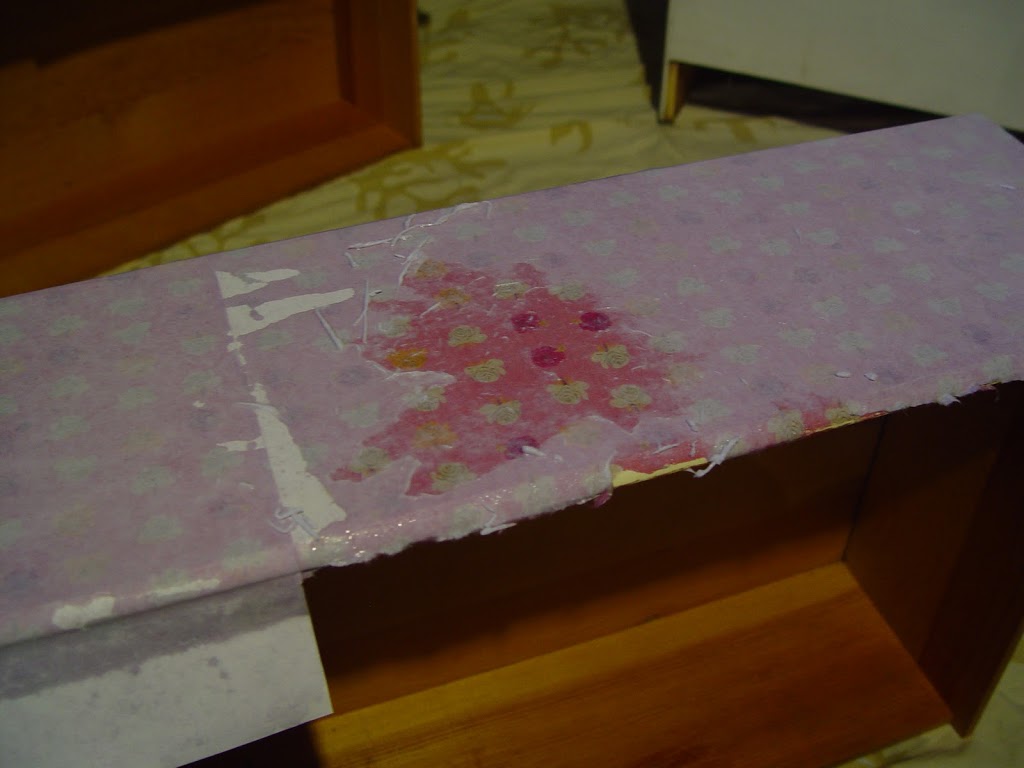
This took me a while,
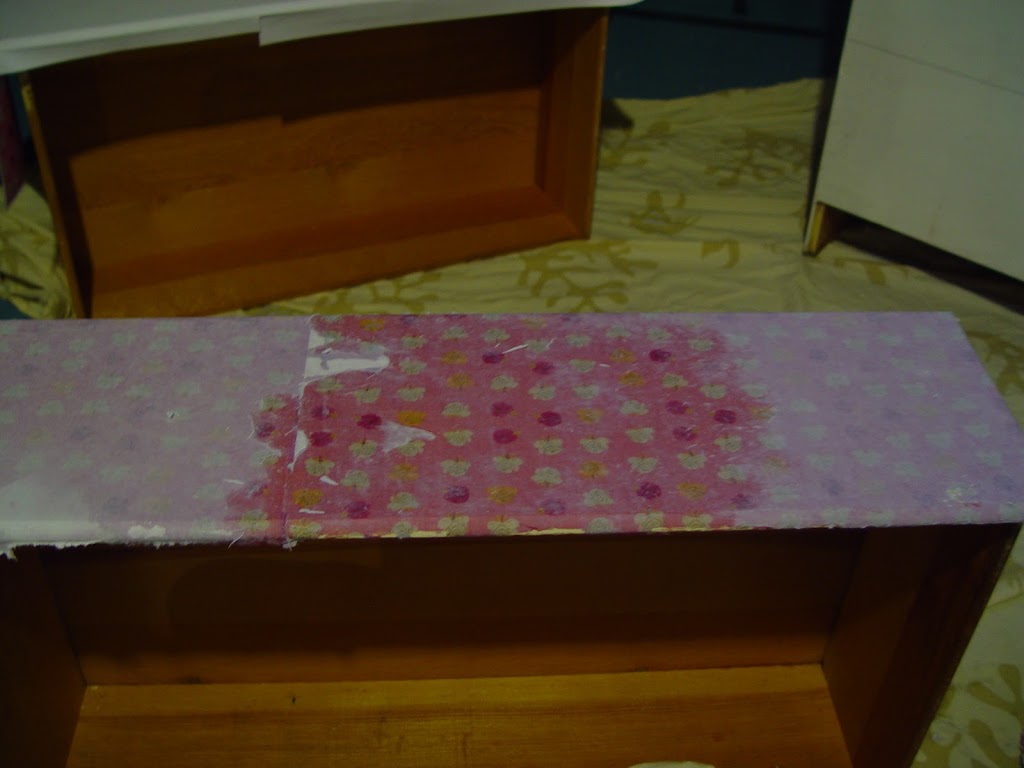
but the results were amazing.
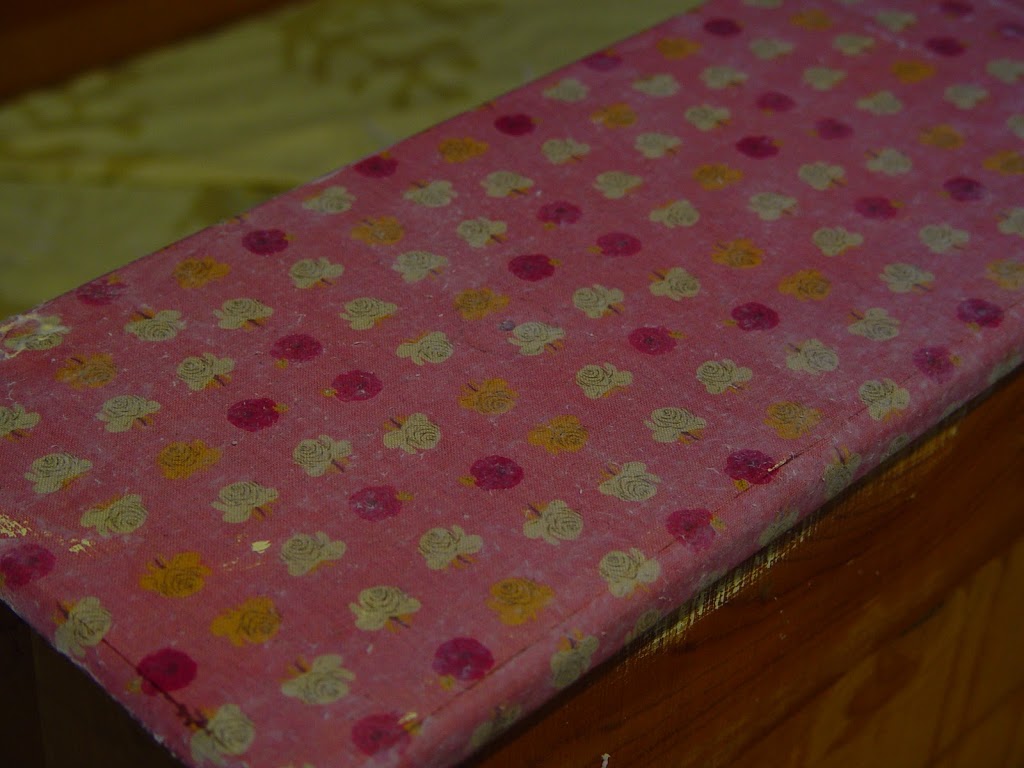
Once it dries, you can age it by sanding it with a fine sandpaper or staining it with an acrylic stain. I used a bit of sandpaper and lightly aged it.
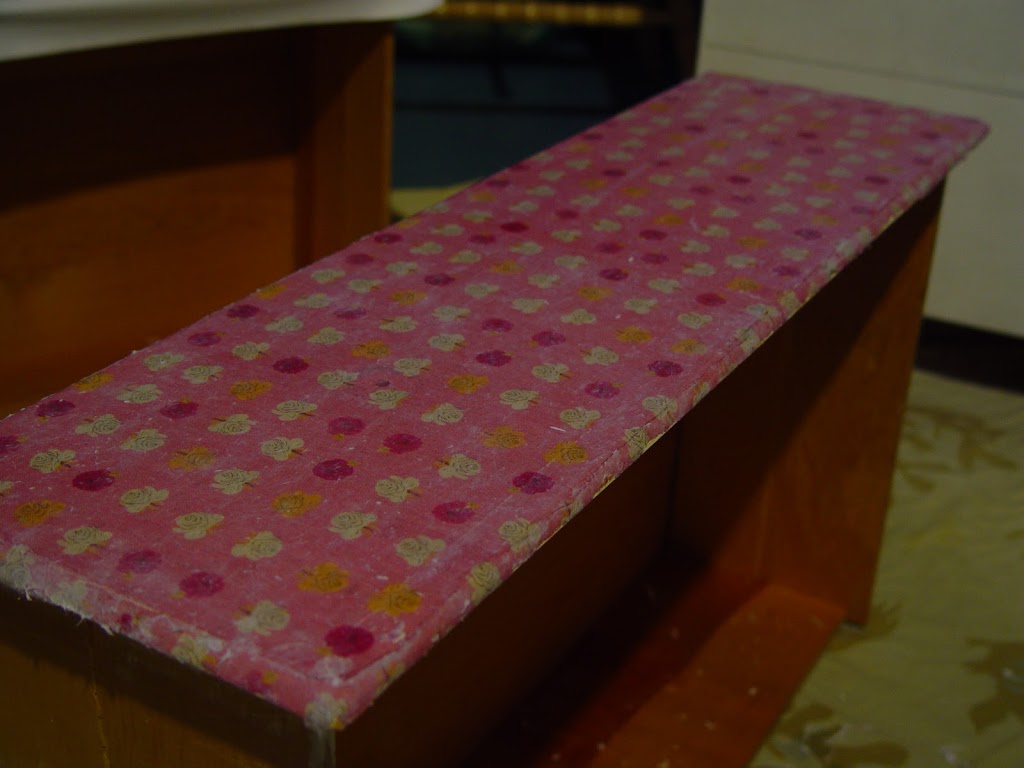
Finally I painted the edges of the drawers white to match the dresser (and to hide some little imperfections).

Next to protect your work, take the drawers outside and spray them with a clear matte varnish.
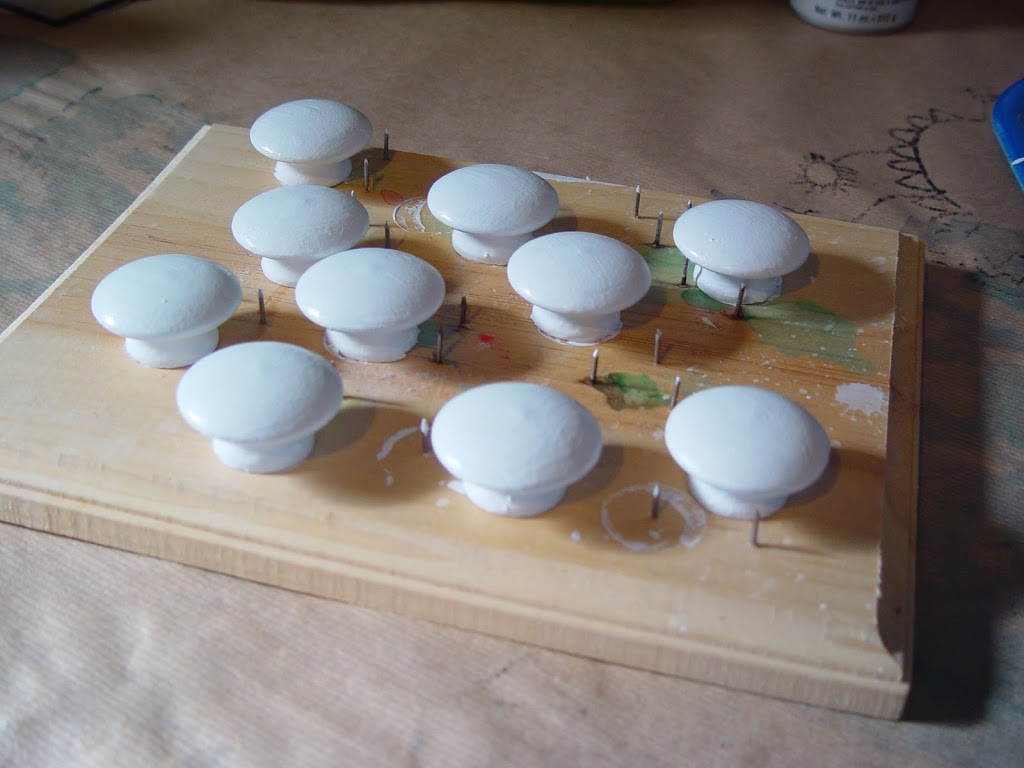
Oh, and don’t forget to give the knobs a fresh coat.
When it’s all dry, reassemble it and admire!

Awesome. I’ve been meaning to update the dresser in the baby-man’s room, but haven’t gotten around to it, yet. Maybe I’ll have to encorporate this into my fiendish plans…..
This is wonderful. What a clever way to totally change the look of this dresser. Your little princess is sure to enjoy this for many a day!
very cool! Great tutorial! I will have to try this! Thanks!
Love this! I have an old dresser that needs a makeover and this would be fun to try on it. Thanks!