
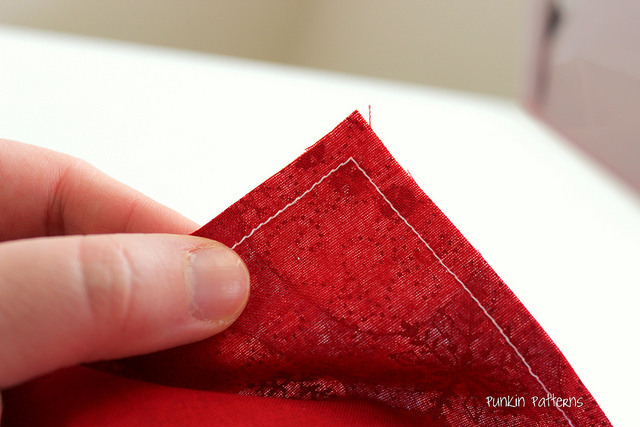
Once you’ve mastered sewing a straight line, learning how to sew a perfect corner is the next step. It’s really easy.
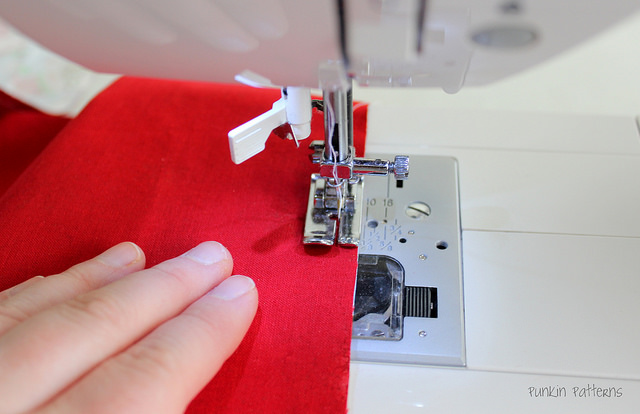
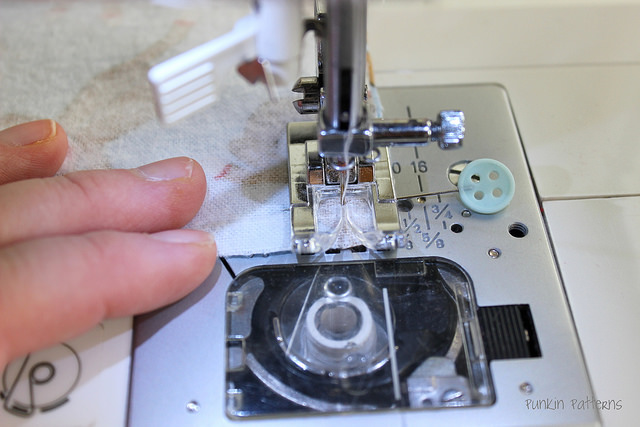
Sew along your fabric and stop the same distance as your seam allowance away from the edge. Here I was using a 1/4″ seam so I stopped 1/4″ from the end. Make sure your needle stops down. If you don’t have an option on your machine to stop with the needle down, use the hand wheel on the side of the machine to manually move the needle down.
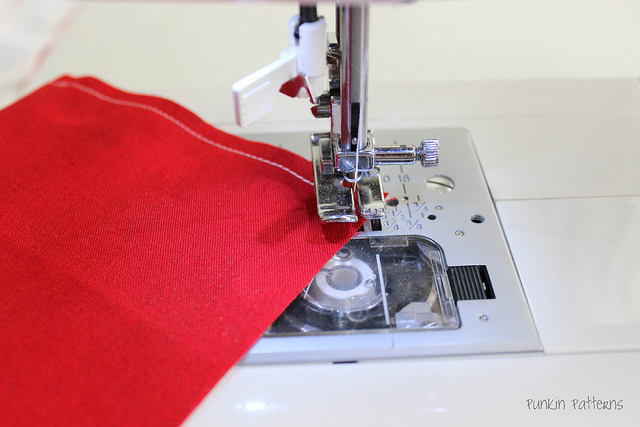
Lift the presser foot (keeping the needle down) and rotate the fabric.
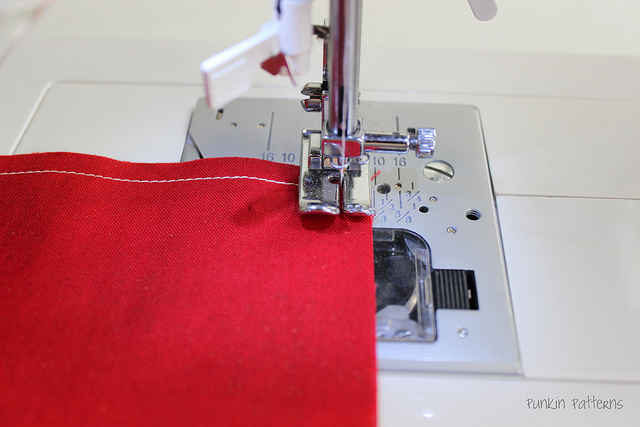
Put the presser foot down after you’ve rotated the fabric completely. The edge of the fabric should match up with your seam line you used before. Since we here we’re using a 1/4″ seam with a 1/4″ foot, the fabric edge should line up with the edge of the foot again.
Continue sewing your seam and you’ve got a perfect corner.
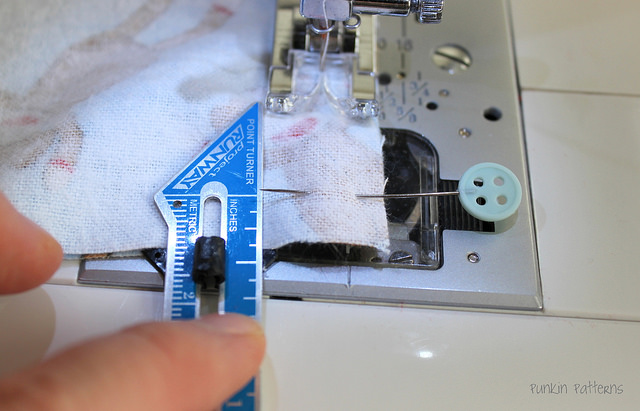
There are a couple simple tricks to make sure you stop at the right distance. You can eyeball it. With experience you’ll see a 1/4″ distance easily (or 3/8″ or whatever seam allowance you use most often). You can also measure and mark it. That is a great way.
In this photo, I’m using a 3/8″ seam allowance so that’s what we measure in from the end and mark. You can mark with a water soluble pen or pencil or just a pin.
Continue sewing and stop at the pin (or mark you made). Continue as instructed above. It’s that simple.
Happy Sewing!

Thank you, so easily explained.