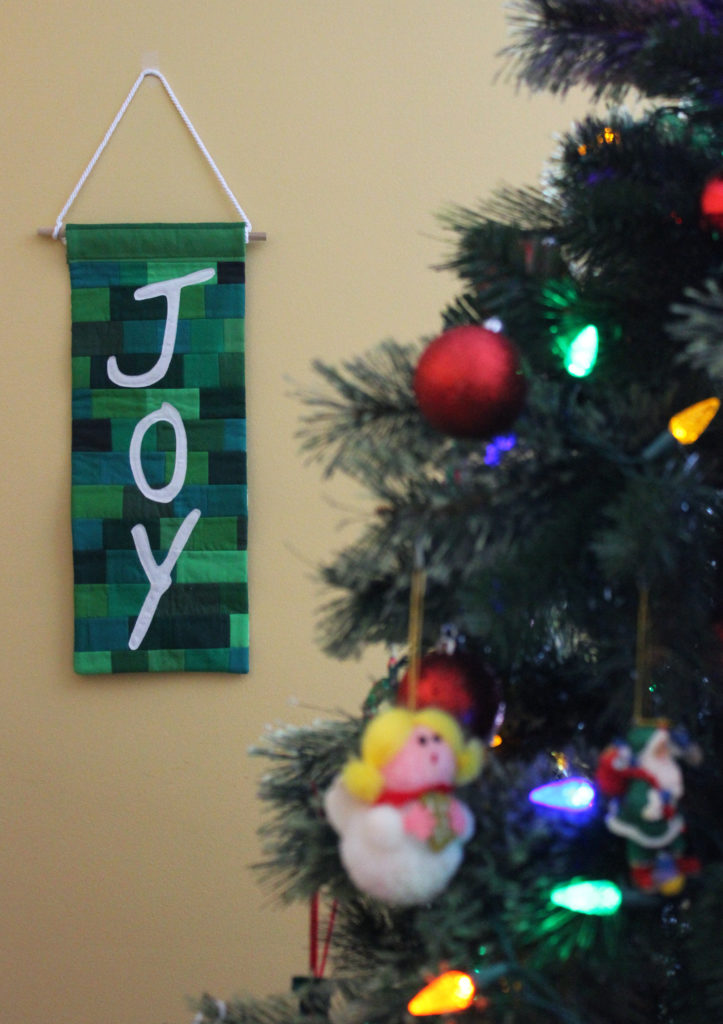
Does any one else leave decorations up until Epiphany? Well, that’s today – the 12th day of Christmas. Kids have been back to school for 4 days and tomorrow I’ll be taking down the massive amount of decorations we have and putting them away for another year. I love decorating for Christmas but I’m always excited to get the house back in order.
I wanted to share a quick tutorial for this JOY banner. It’s fantastic for those whose New Year’s goals include no procrastination. You’ll be so ready for next Christmas! (haha)
Joking aside, you could use this banner for lots of different words. Do you have a word for 2017? I keep trying to think of one for myself, but I haven’t quite decided yet. Is this the year for “Do”? “Make”? “Create”? You could make a banner like this for your 2017 word.
Note: Use a 1/4″ seam allowance for seams unless otherwise noted.
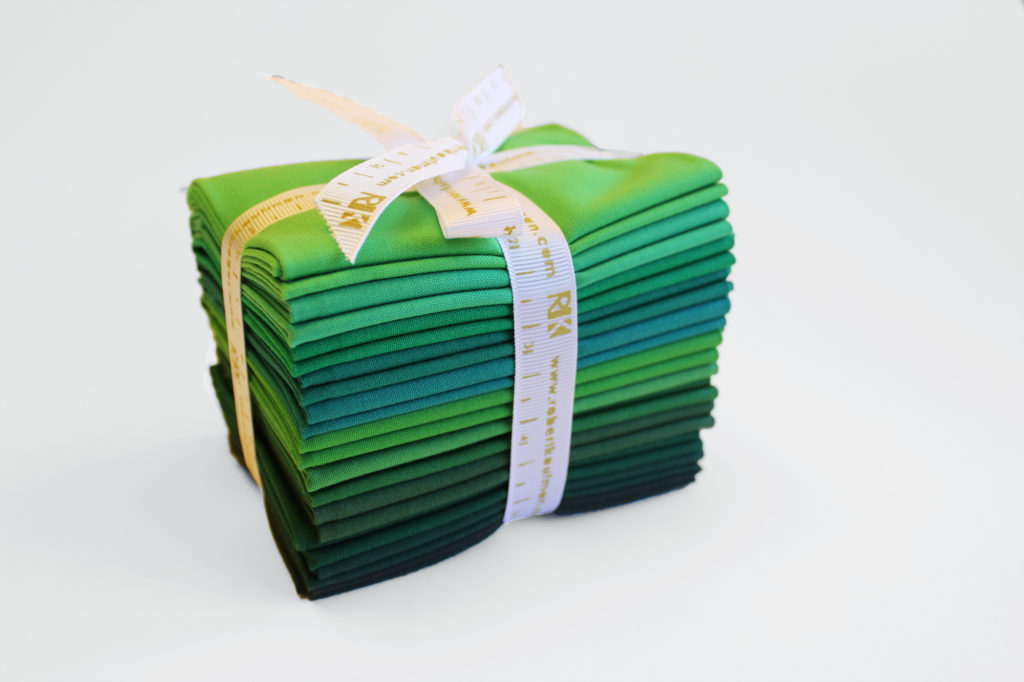
Start with your green fabrics. I used 12 different shades of green. Cut your fabric into 2” strips. Subcut these strips into 1.5” – 3” sections. Once you have a small pile of these pieces, randomly grab different shades and sizes and start sewing them together into rows about 9” in length.
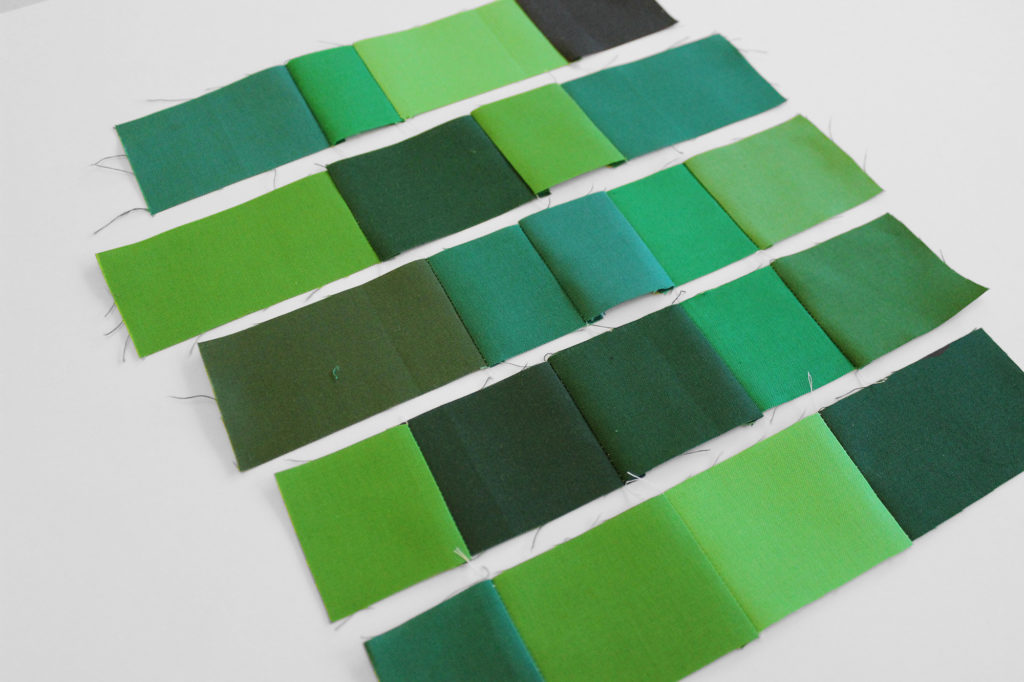
Sew the rows together into a large piece. Continue in this manner until your piece measures roughly 19” in length.
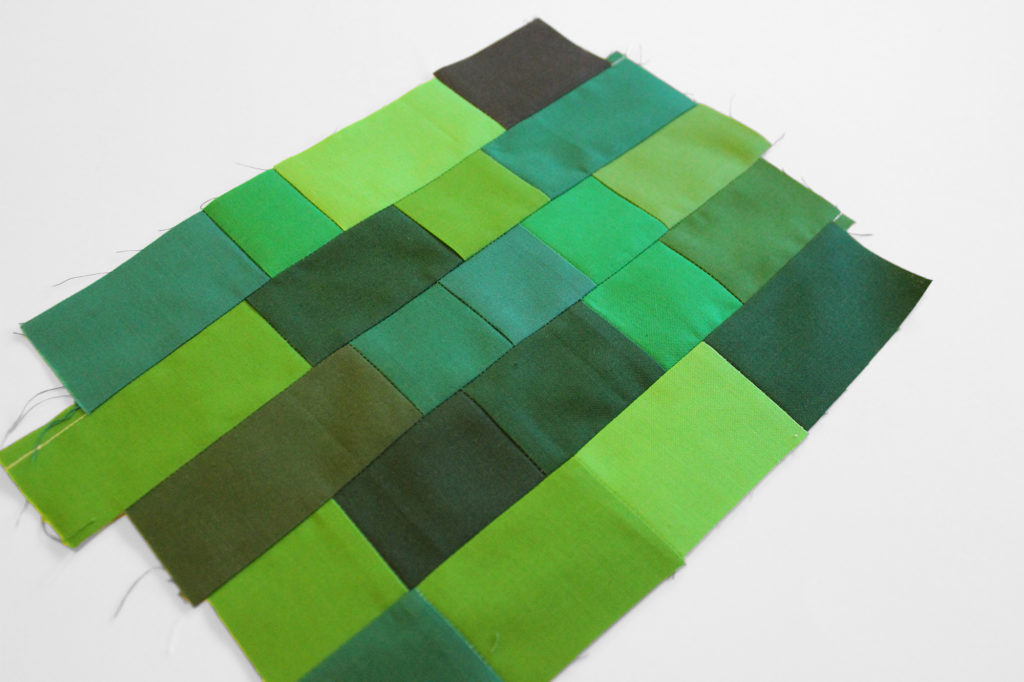
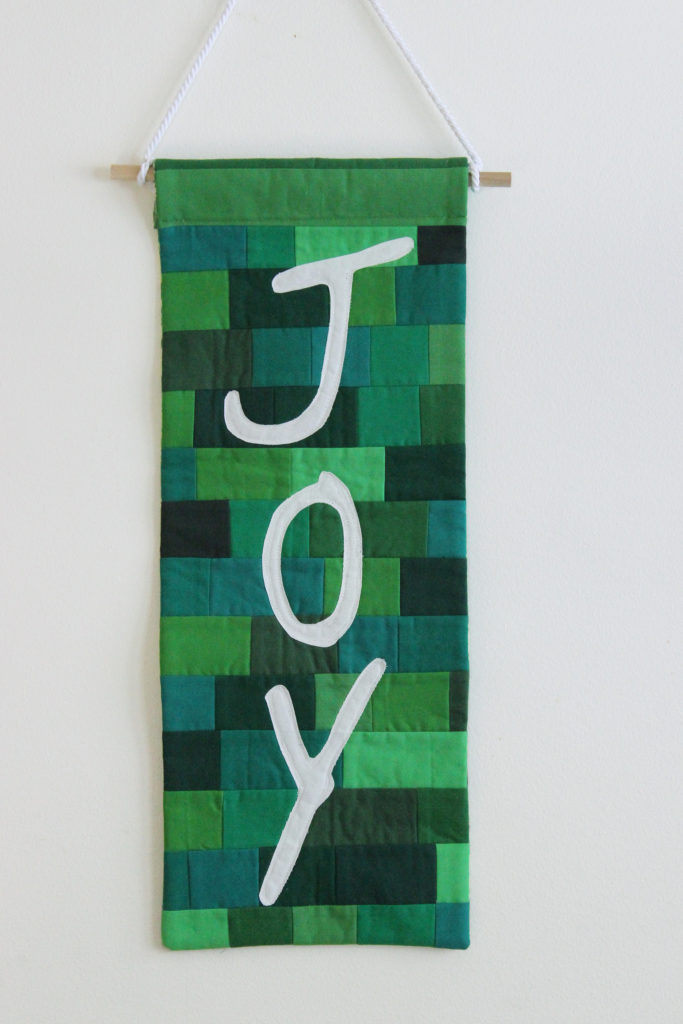
Trim your fabric slab to 8.5” wide x 19” long. At the top of your piece, add a 4.5” high x 8.5” wide piece of green fabric for your hanging tab.
Add fusible fleece to the wrong side of your banner.
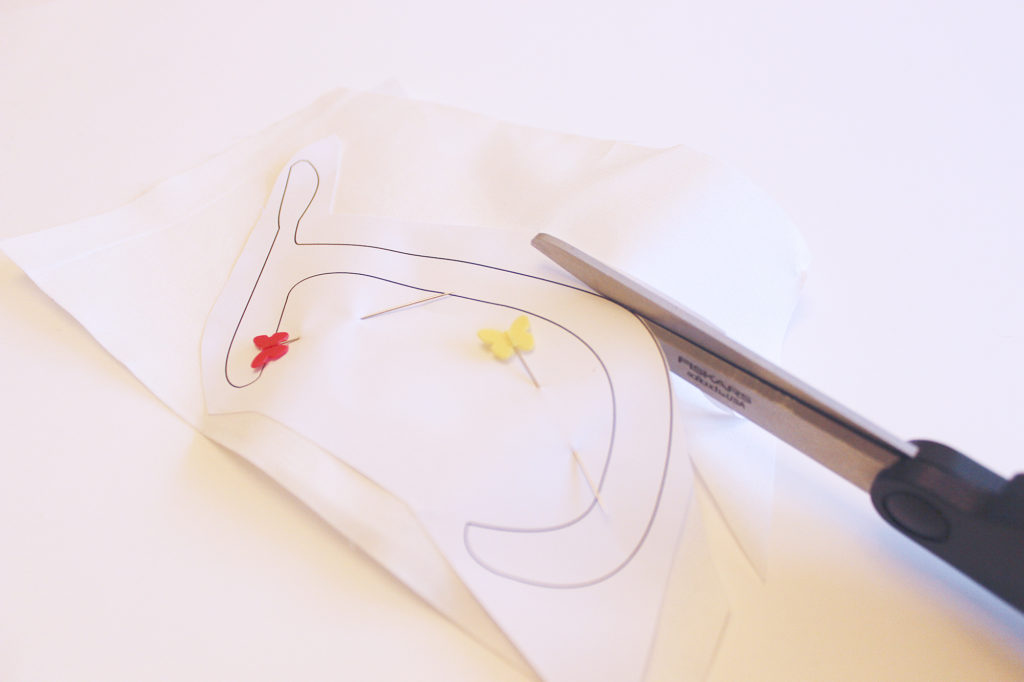
On a small 8.5” x 11” piece of white cloth, fuse Wonder Under to the wrong side of the fabric. Take your JOY template (click here to download it) and pin to the top of the fabric so that the letters are on top of the fabric. Cut through the layers to get your fabric letters.
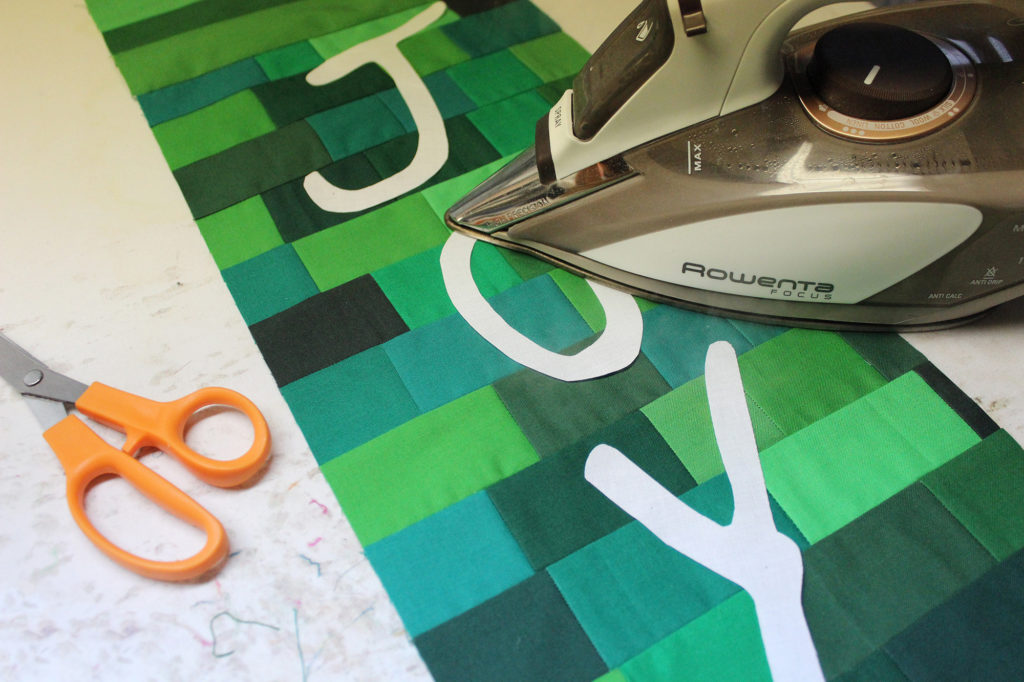
Fuse the letters to your banner by ironing on. See manufacturer’s instructions on your specific fusible adhesive.
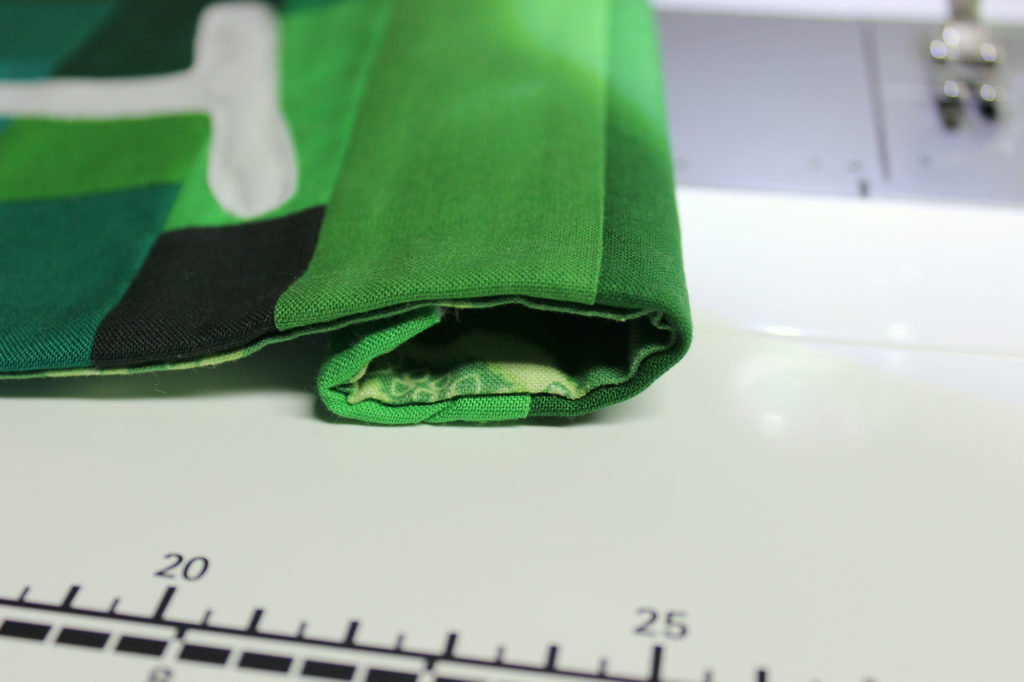
Now we’ll add a back to your banner… Cut a piece of backing the same size as your banner. With right sides together, sew around your banner with a ¼” seam allowance, leaving the top open for turning. Trim the corners. Turn right side out and press flat.
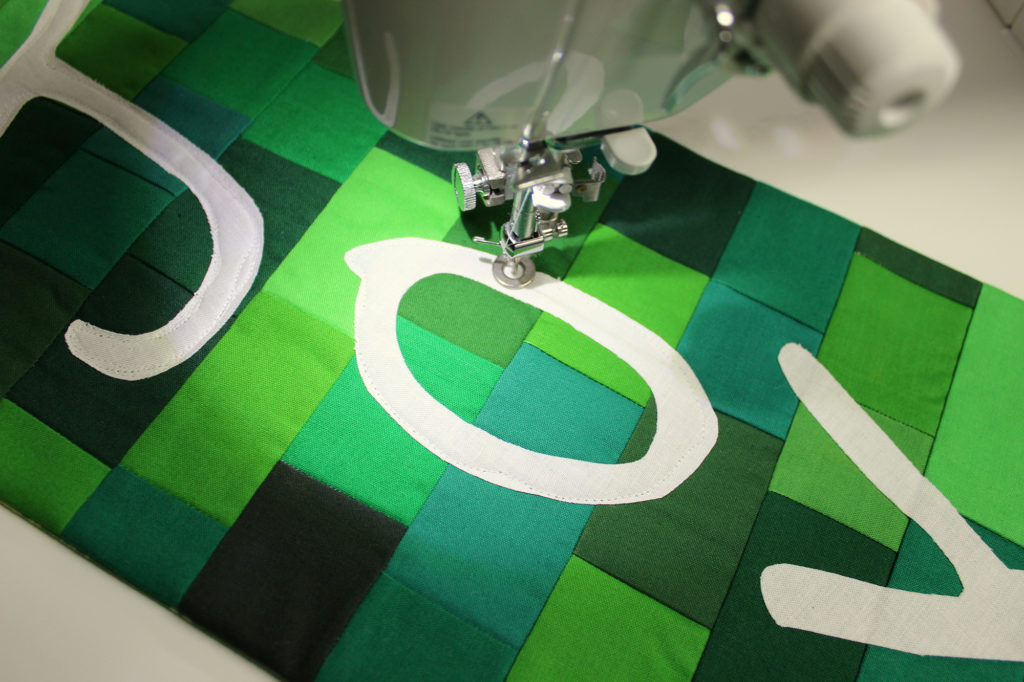
Using white thread, free motion quilt around your letters. Go around 3 x in an organic fashion (not perfect – give it a natural feel). You can quilt more of your banner if you like, but it is not necessary.
Make a hanging loop by taking the top section of your banner, fold down a ½” then fold again about 1.5”. Stitch across the top of the banner to secure in place.
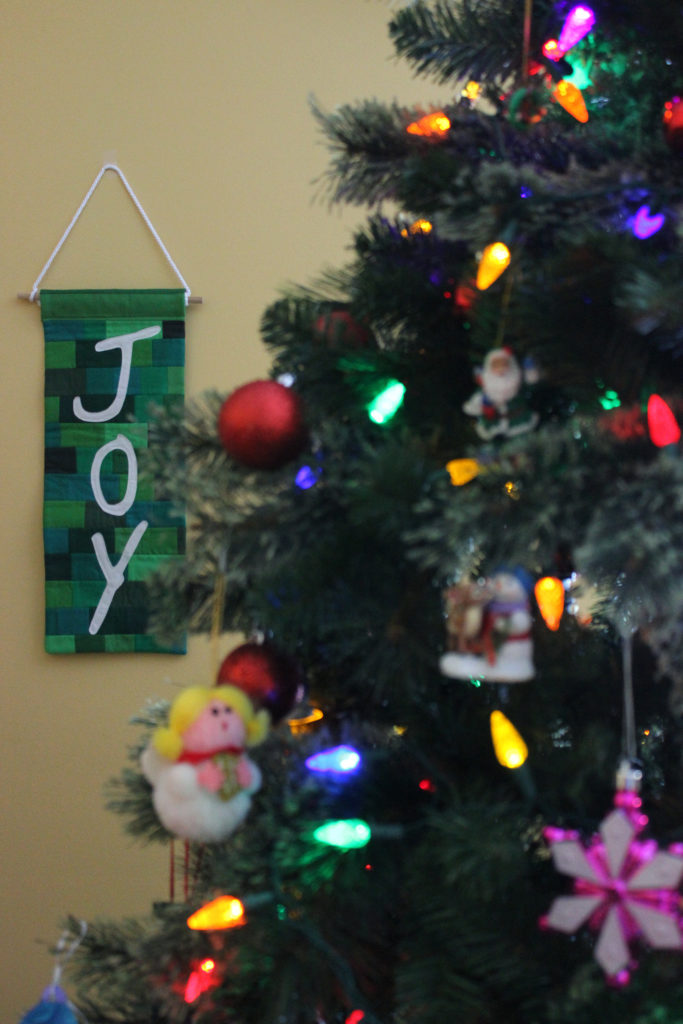
Place a wooden dowel (or branch) through your sleeve and hang with rope, yarn or twine. Enjoy! Happy (next) Holidays!
Details:
- Finished Dimensions: Approximately 7.5” wide x 20” long (not including hanger or branch)
- Fabrics: Kona Wondrous Woods FQ Bundle provided by Robert Kaufman Fabrics. The collection includes Kiwi, Fern, Clover, Willow, Holly, Grasshopper, Leprechaun, Jungle, Basil, Pesto, Forest and Evergreen. For the letters I used Kona white.
- What you don’t see: Pellon 805R Wonder Under, Pellon Fusible Fleece