
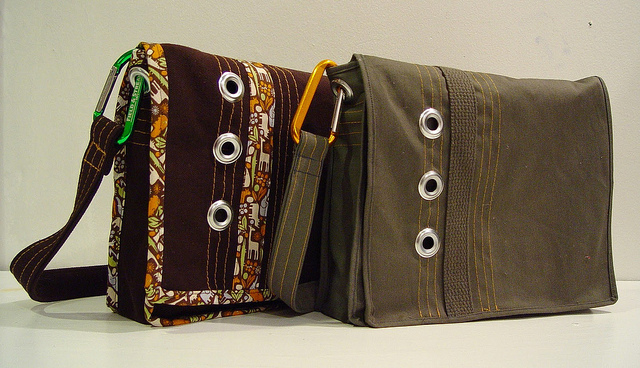
Adding grommets to your sewing can be a simple way to add style to a project. They can also add function (to hold a strap for a bag, for example) while doing it in a unique way. There are two types of grommets: metal grommets (my favorite) and there are also so snap-on plastic ones. My experience with the plastic grommets isn’t quite as positive. Although they are easy to install and you need no tools – just cut your hole and a simple snap together and it’s on, I’ve found it can easily snap apart or the fabric slips out from between the two pieces or maybe that’s just me. Needless to say, the metal grommets add a certain style the plastic ones cannot.
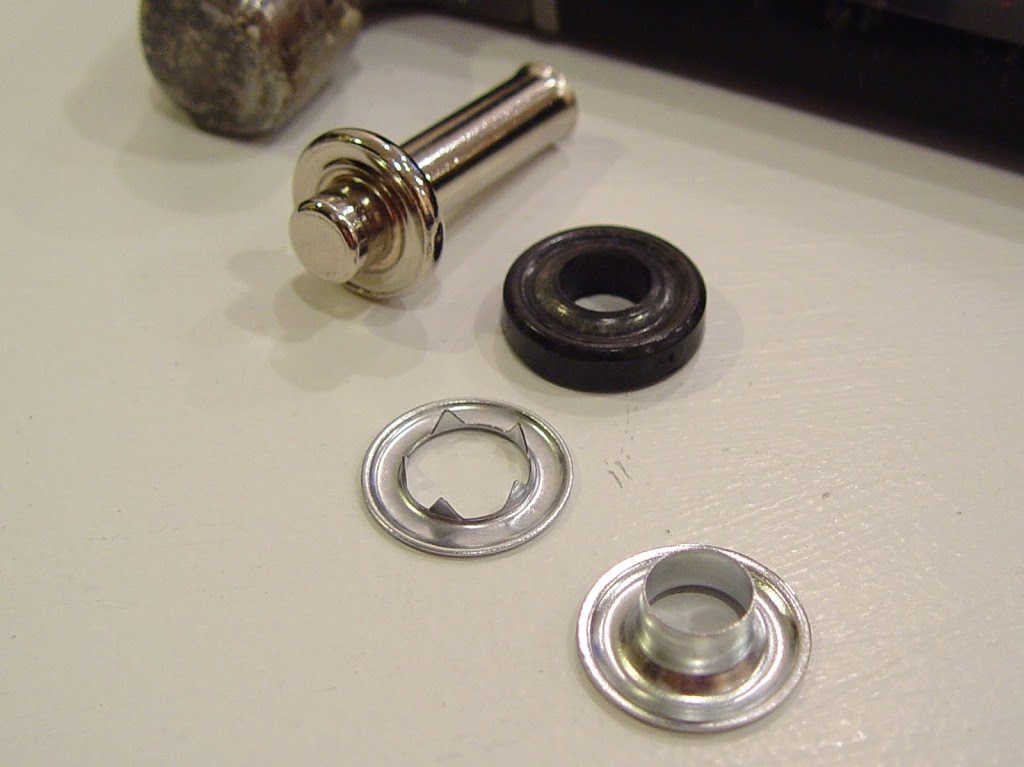
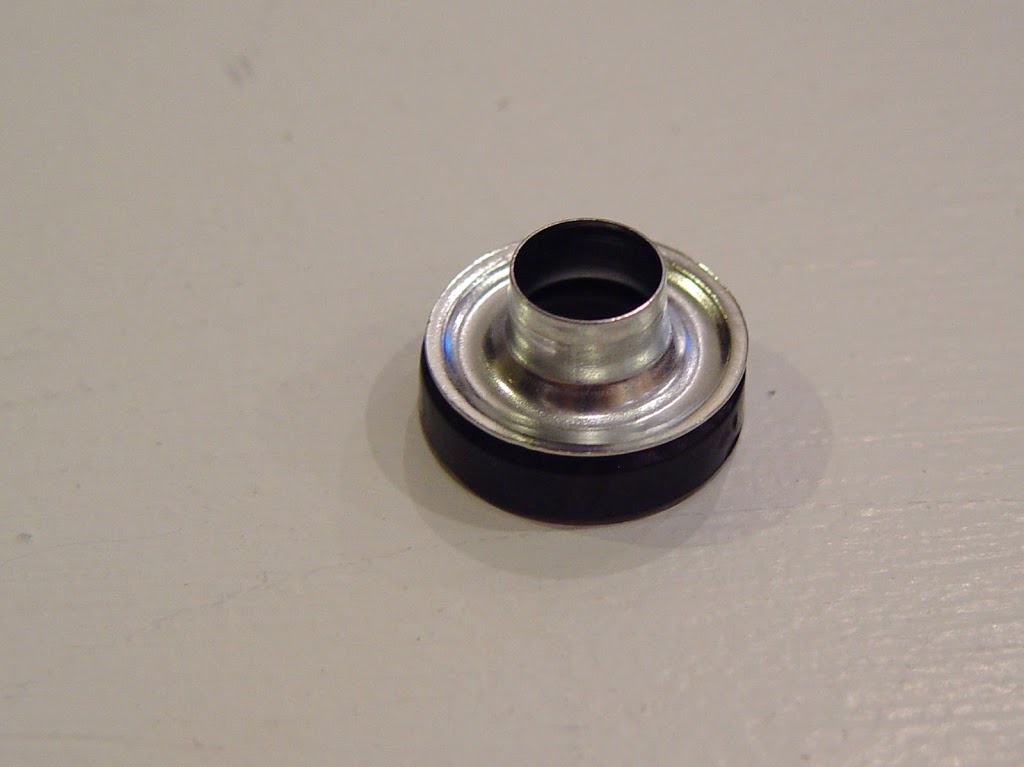
Adding metal grommets is quite simple. Purchasing a kit to start is the best because it will contain two tools you’ll need. In your grommet kit you’ll get an anvil and a setter(your tools) and also several washers and eyelets. You’ll also need to grab your hammer.
Lay the eyelet piece down where you want your grommet to be and trace a circle inside it to mark where to cut.
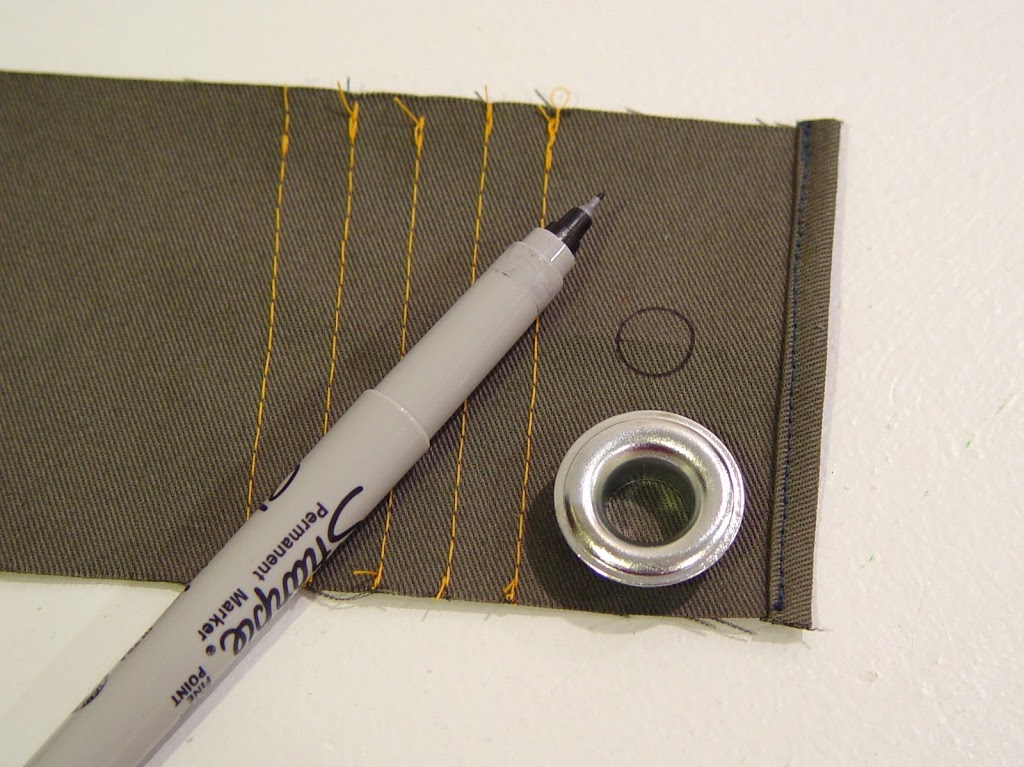
Cut out the marked circle on the line you have drawn. A really sharp pair of scissors helps here.
Next place the anvil on your concrete surface with the eyelet on top so the eyelet sits in the groves of the anvil and will stay in place. Make sure you do this on a concrete floor or outside on your driveway – it can damage your table or other soft surface. I do mine on a small section of concrete flooring in our basement (simply because eight months out of the year there’s snow outside).
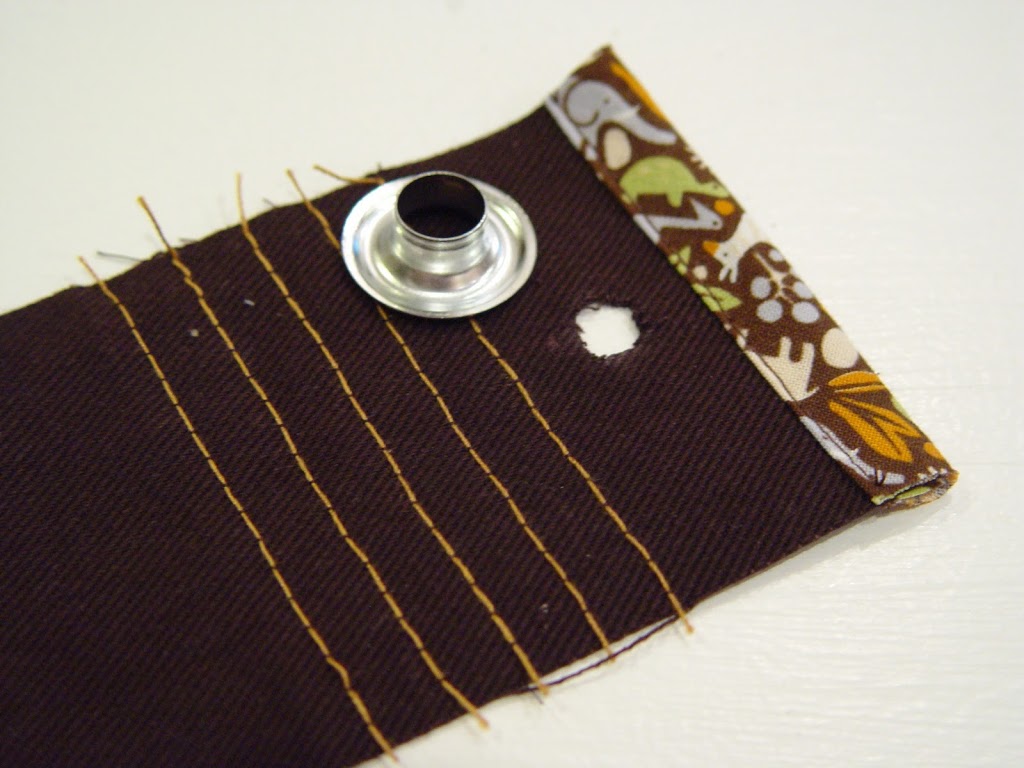
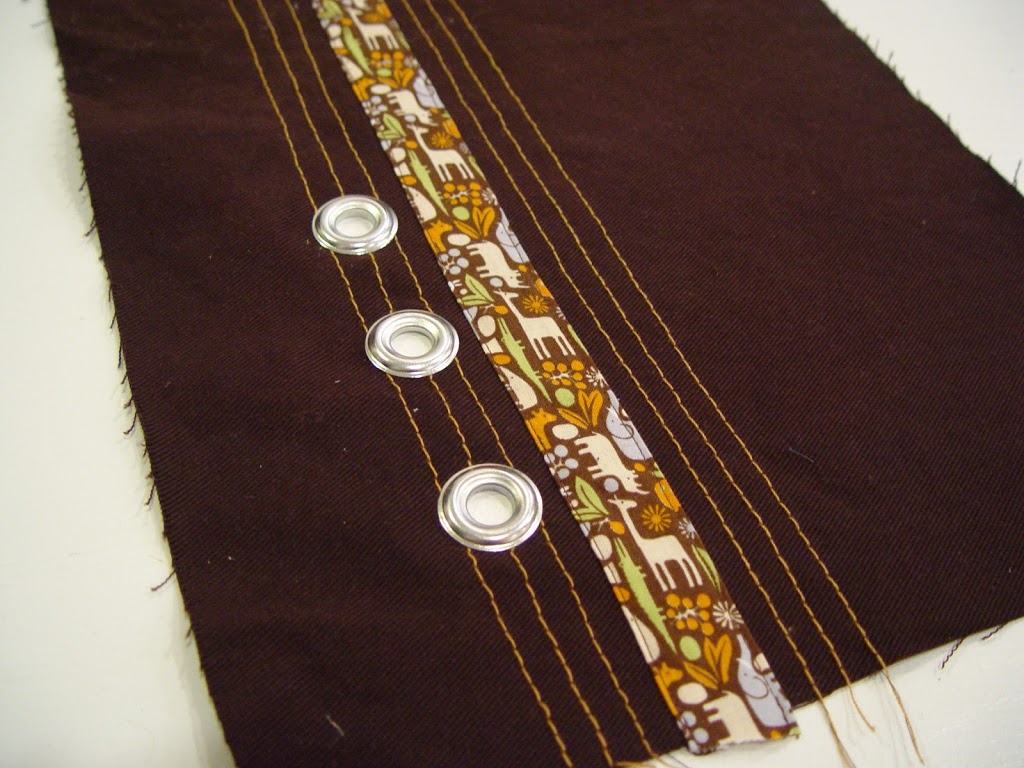
Place your fabric (right side down) on top of the eyelet letting the eyelet push through the hole. The hole should be just large enough for this.
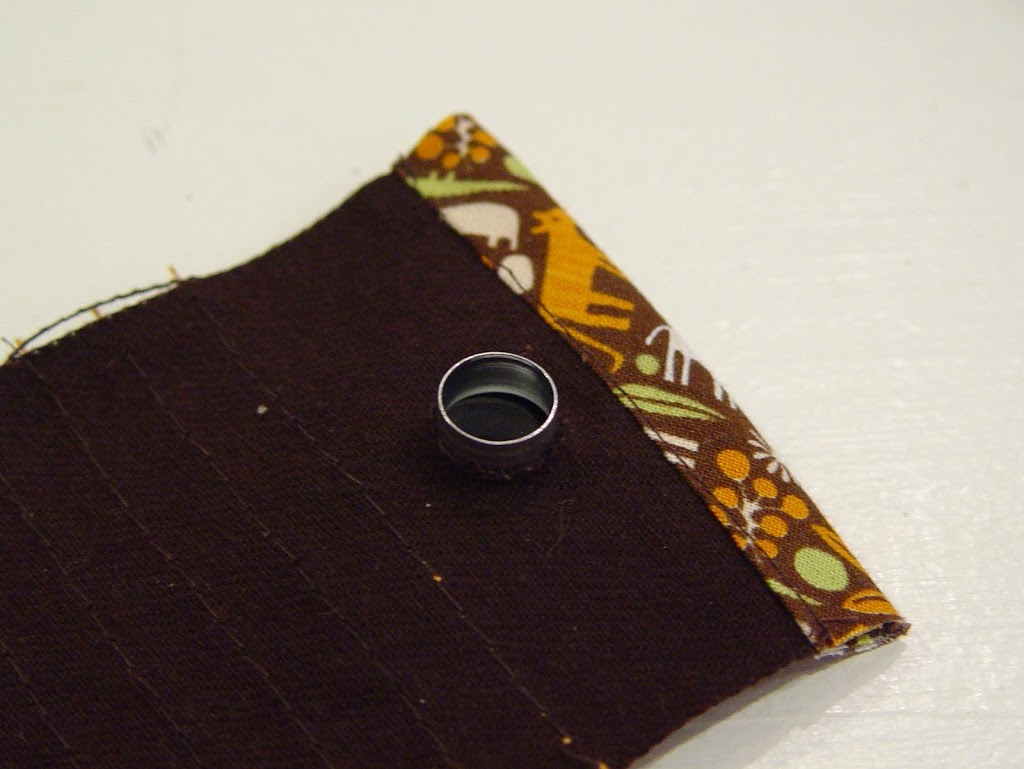
Place the washer on (prong side down).

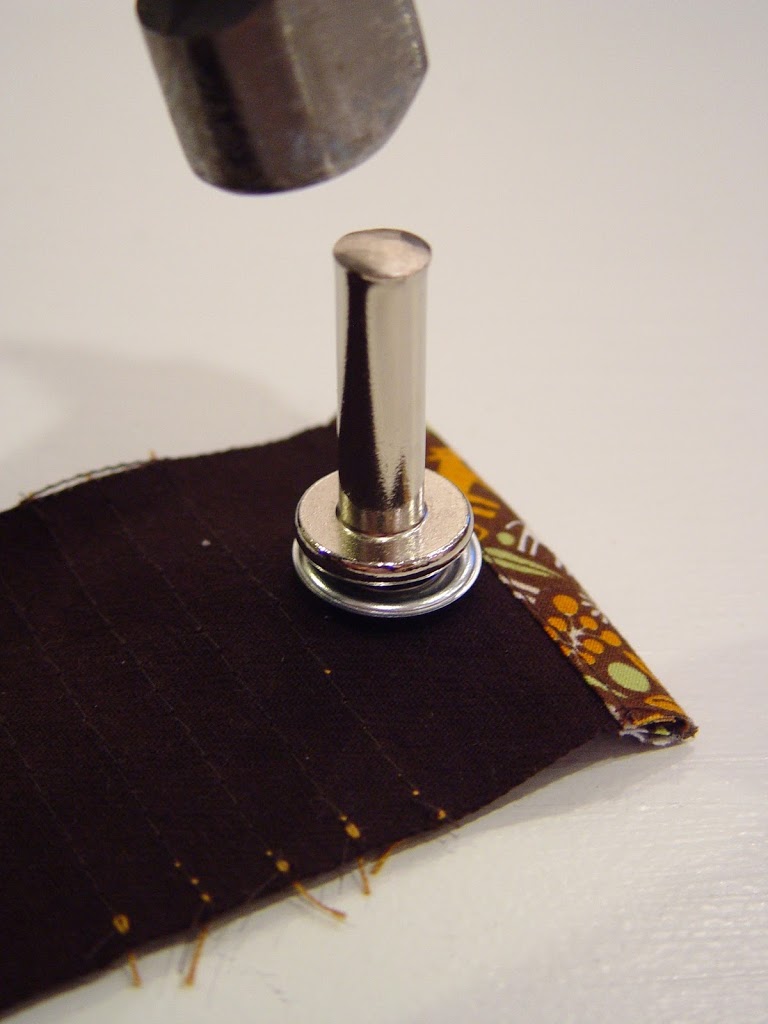
Place the setter inside the eyelet and hammer to secure the grommet. It may take several hits with the hammer – it just depends on how aggressive you are.
Remove the setter from the attached grommet. Sometimes it can get a little stuck, but a gentle push from the front side will help it come out.
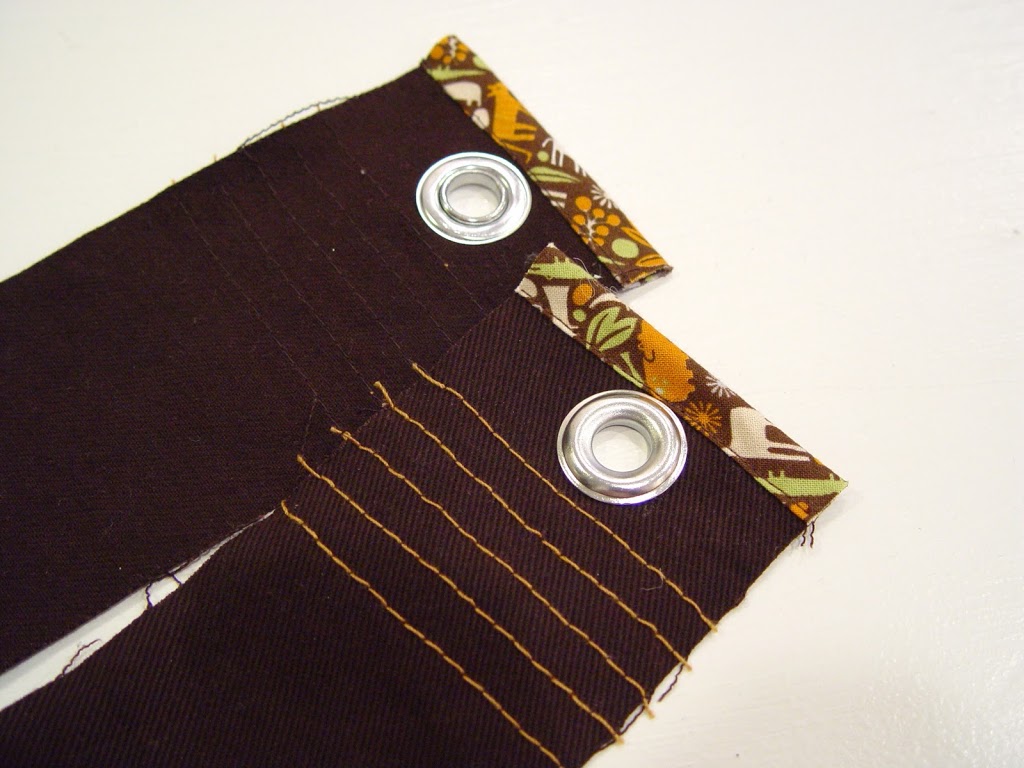
And there you go! A perfectly set metal grommet to add style to your sewing project.
Details: The project featured in the photos is Connor’s Messenger Bag.

Me gustó mucho tu messenger bag, y le hice una a mi hijo. Si la quieres ver, te dejo el link
http://arreboditcomunapantigana.blogspot.com/2011/10/kcwc-dia-6-mini-messenger-bag-acabada.html
Nice tutorial. Thank you for sharing.
I fully agree about the plastic grommets not lasting well. For Hannukah last year, I made my kids a set of bed curtains. I used large plastic grommets, so I could run the curtain bar right through the top of the curtain. By the end January, the fabric had slipped out of most of the grommets, and some of it had torn. Now I have to cut off the top part of the curtains, sew a new strip up there, and replace the grommets. Do you have any recommendations for setting LARGE grommets? I’ve never seen metal ones big enough to run a curtain bar through.
Thank you!
Sarah –
I have seen some large metal grommets (for curtains) at places like metalgrommets.com, however they’re very expensive for the large sizes and you’d need to buy tools to set them (just like what I used only larger). For some reason, the price goes up quite a bit for larger grommets. I suppose you could search more online to see if you can find a good deal, otherwise I would switch to maybe using loops at the top of your curtains instead — or just add superglue when you attach the plastic grommets to see if that helps hold the fabric in and in place.
Just a quick note to let you know that a link to this post will be placed on CraftCrave today [10 Nov 02:00am GMT]. Thanks, Maria