
This is a re-post of a tutorial I did a couple of weeks ago for the MMQG blog, just in case you missed it.
Bias tape is used in making piping, finishing raw edges and of, course in binding a quilt. There are lots of different widths depending on the use. There is single fold bias tape where the two raw edges are folded toward the center, with wrong sides together, pressed in place. Double fold bias tape is just single fold bias tape which is folded in half again, hiding the single folds, and pressed in place.
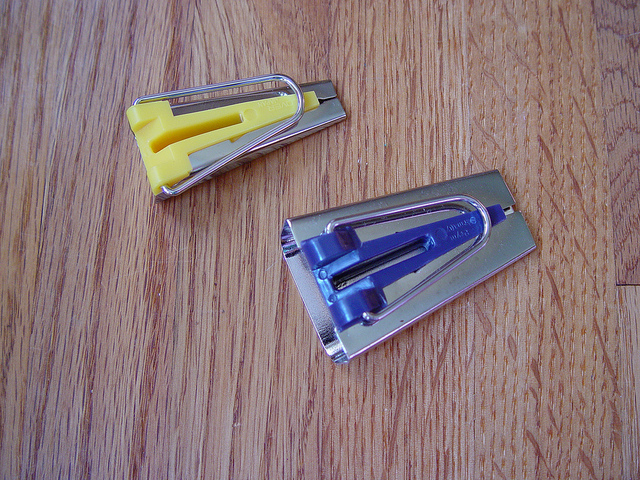
To make bias tape, you can purchase small bias tape making tips like these for less than $10.
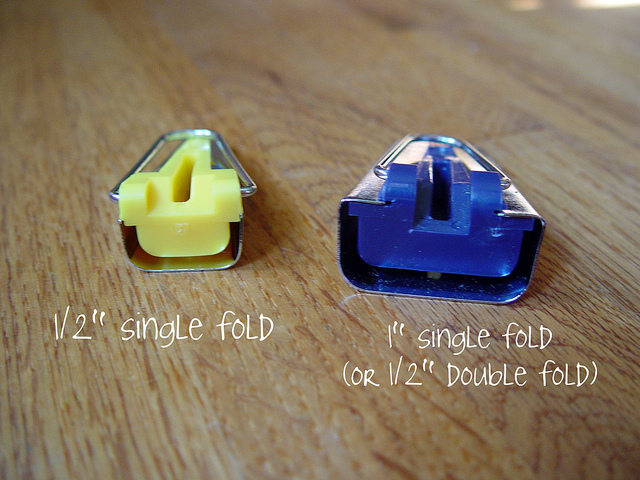
They are inexpensive and you just need the size you want and an iron. I typically only use the 1″ tip.
There are also machines available to help you make bias tape which I’ll be talking about briefly at the end of this post, but for the most part, the manual methods work just fine.
For this tutorial, I’ll be making bias tape from a fat quarter, but what I’ll be showing you can be easily applied to a yard of fabric right off the bolt. Also note there are many ways to do this — this is what I do and what I find the simplest. There are some methods out there that sew your fabric into a loop and then you cut a long continuous strip (like you’re peeling an apple), but I find that to be a bit more tedious since you need to mark your fabric, then once sewn, cut with scissors which can be a but more time consuming if you’re making a lot of bias tape at once.
You can get over 4.5 yards of seam binding from one fat quarter if you’re making 1″ single fold bias tape — more if you’re making smaller bias tape. I got roughly 15 yards of 1 1/4″ bias tape from a 1 yard cut of fabric. So, yes, much less expensive than the stuff in the store!
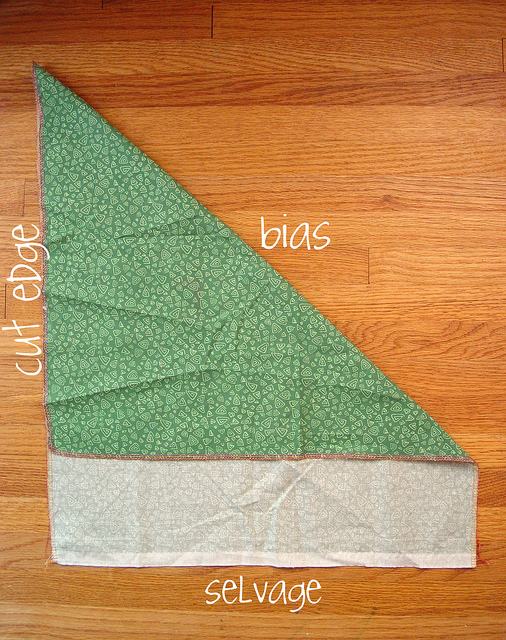
Take your fat quarter and identify the selvage versus the cut side. The selvage is the finished edge of the fabric formed during the production of the fabric. The cut side is the side that’s cut off the bolt for you at the store.
Note:: In this photo the cut edges are all serged – simply because I pre-washed and didn’t want the raw edges to fray too much. If you do this, the serged stitches should be cut off as they can be difficult to fit into the bias tape maker tips and they add unwanted bulkiness to your finished bias tape.

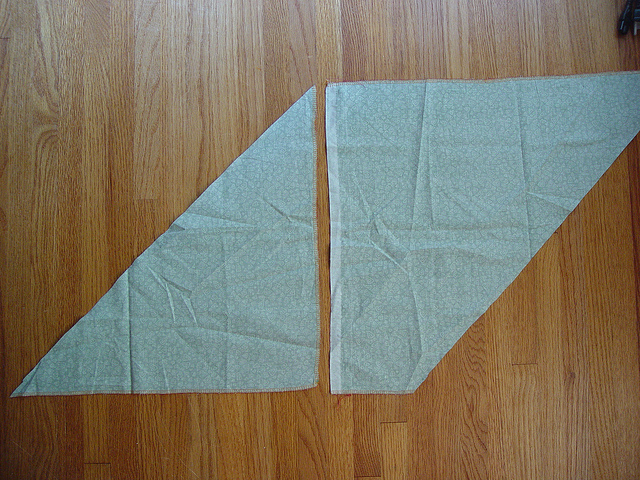
Fold the fabric so that the cut edge of one side lines up with the other, creating a 45 degree angle, which is the bias of the fabric. Cutting on the bias makes the finished tape stretchier and it drapes better when compared to a strip that is cut on the grain.
Using scissors, cut along that folded edge of the bias.

Now you’ll have two pieces.

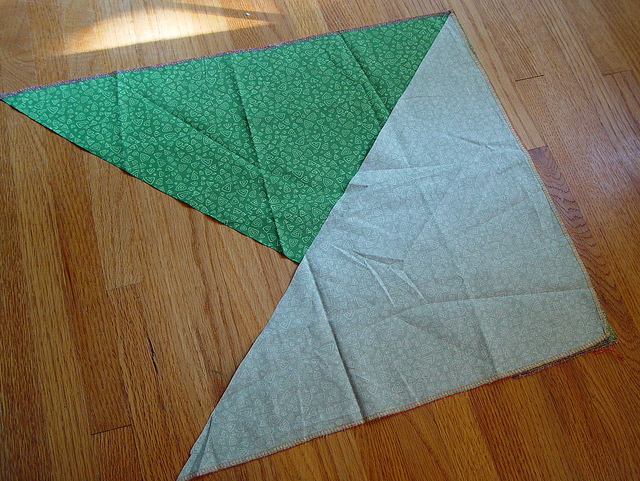
So we don’t waste any fabric, we’re going to sew these two pieces back together into a parallelogram. If the selvage is still on, make sure to trim that off OR sew a wider seam allowance so that doesn’t show in your final seam binding.
Place the right sides together and sew.
Open it up and press flat with an iron and you have your piece ready to cut into strips.
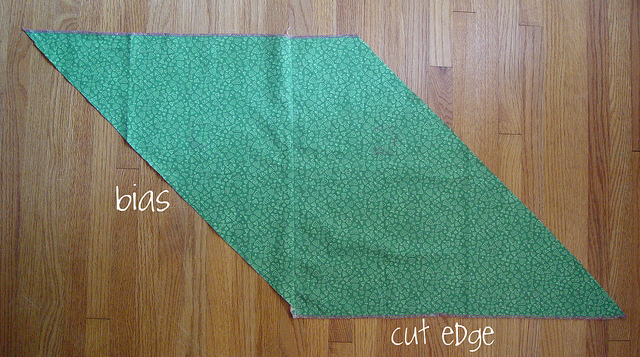
Cut your fabric into strips, parallel to the bias edge. The strip width is dependent upon what tip you’re using and how wide you want your finished bias tape. Since I’m using a 1″ tip, I’ll be cutting my strips to be 2″ wide (2x the size of my tip).
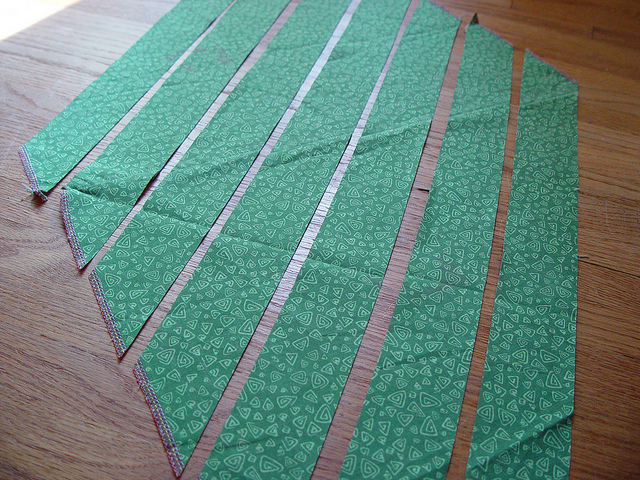
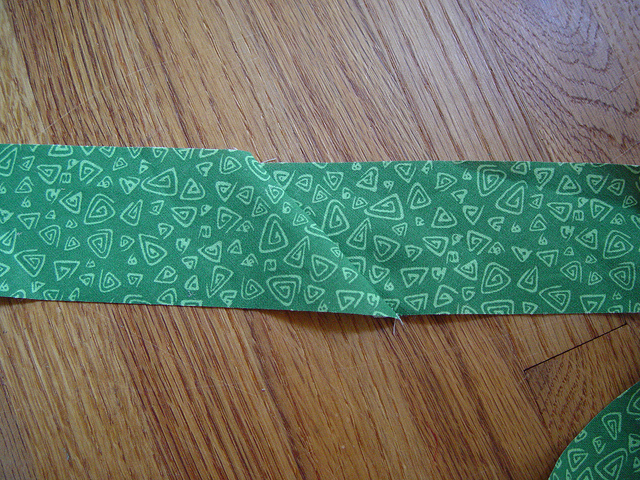
Now you’ll need to sew your strips together into one long continuous strip. To do this, lay your strips, right sides together, as shown. If you line them up end to end, they actually won’t come together correctly. You can think of it this way:: you’re lining up the edges along your seam allowance. So if you’re using a 1/4″ seam allowance, you’ll be lining them up 1/4″ from the end (where the sew line is marked).
When you open it up it looks like this (just trim the extra bits off before use):
Alternatively, you could do this:
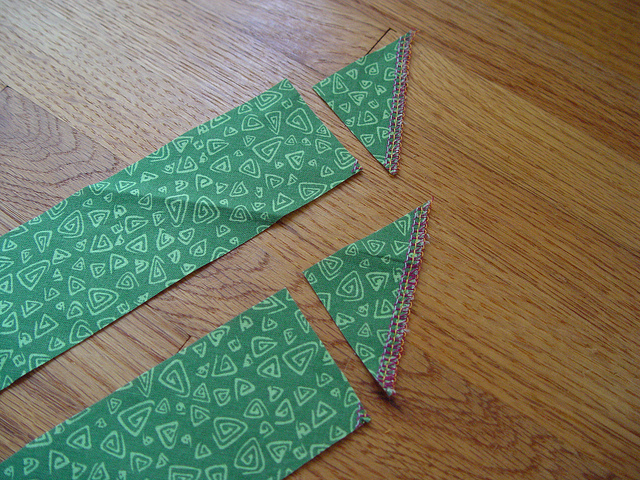
Trim the ends of your strips so they’re rectangles.
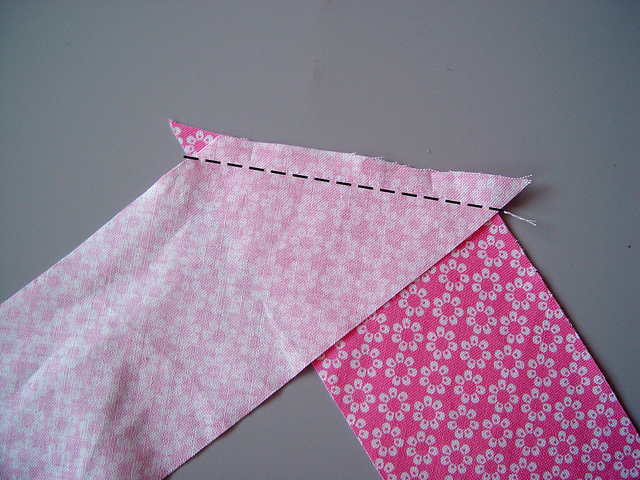
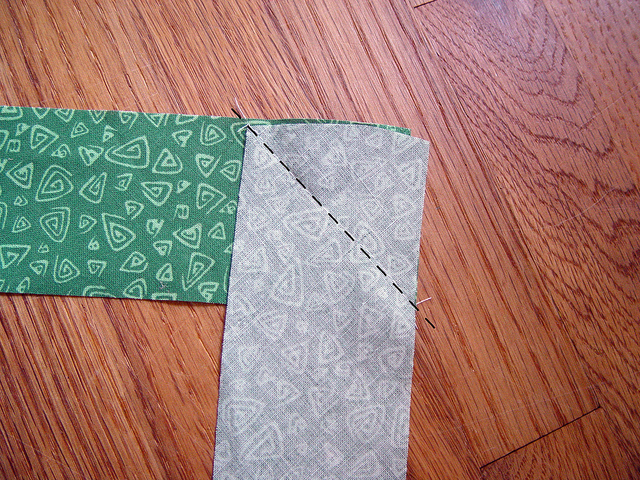
Place the strips, right sides together, at right angles. Sew the two strips together at a 45 degree angle (along the dotted line).
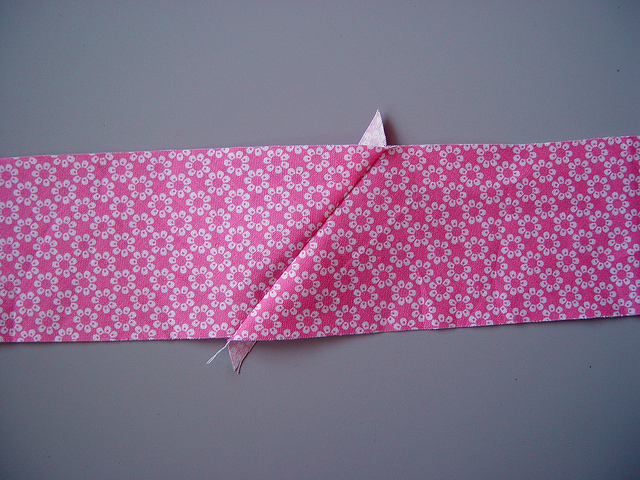
Trim the excess fabric and open to get a nice single strip.
Repeat will all your strips (using either method) until you have one long continuous strip.

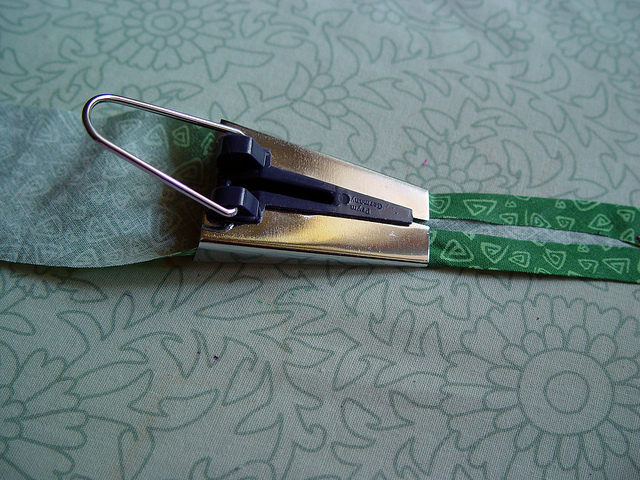
Now grab your bias tape tip and your iron. Feed the end of the continuous strip into the tip. You may need to use a needle the the little window to help push your fabric through. Tip:: Having a well ironed and starched end of the fabric helps too. Pull it through a little bit to get it started.
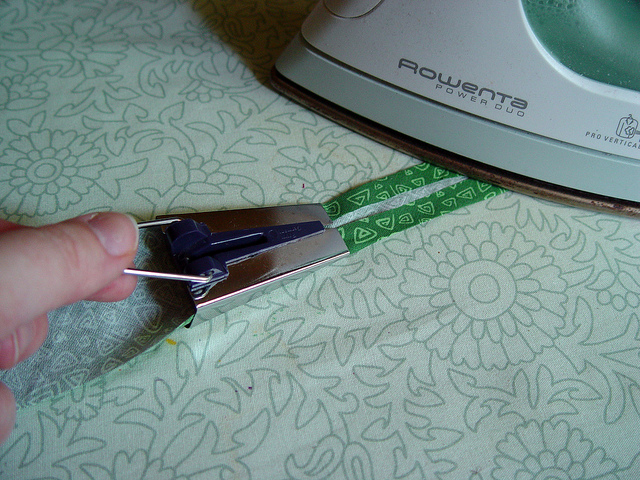
Iron your newly folded fabric as you’re pulling the metal loop on the bias tip maker.
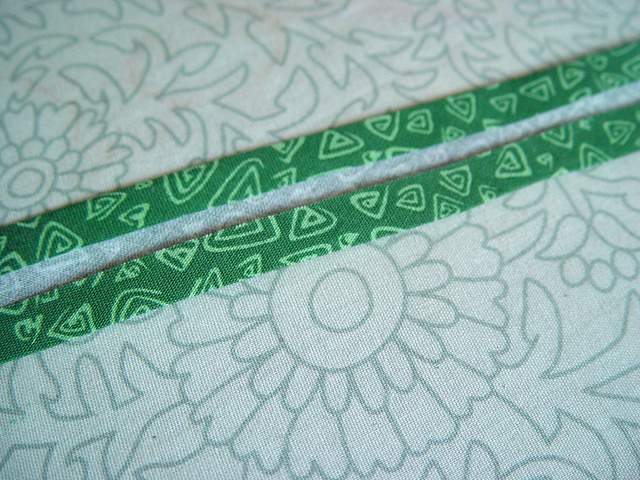
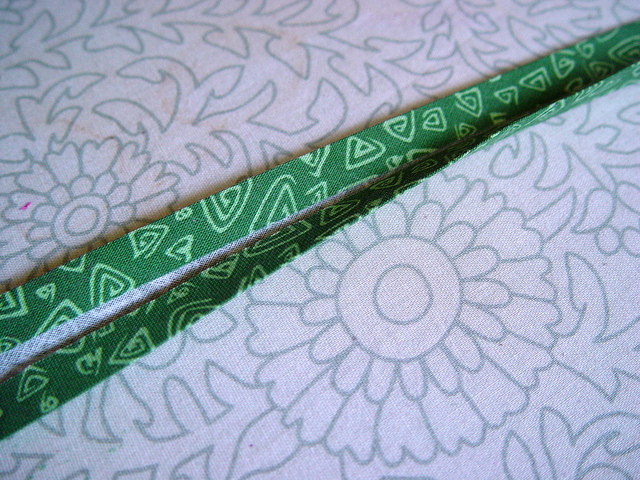
When you’re done, you’ll have single fold bias tape.
To make double fold bias tape, simply fold in half, hiding the other folded edges and iron in place.
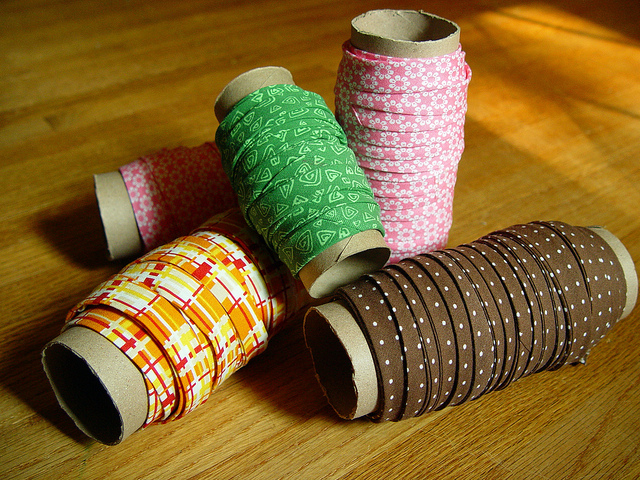
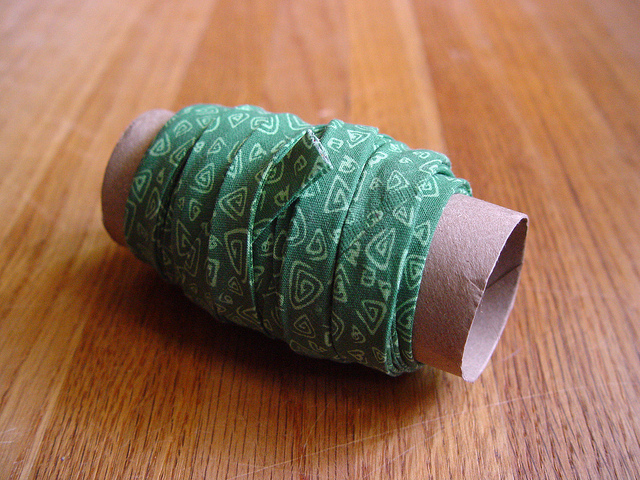
To store your beautiful new bias tape, I like to wrap it around an empty toilet paper roll or a piece of a wrapping paper roll. This way you won’t have any creases in your tape when you want to use it. When you’ve wrapped up the length of your tape, simply tuck the end under.
You can also use a machine (like this Simpliciy Bias Tape Maker).
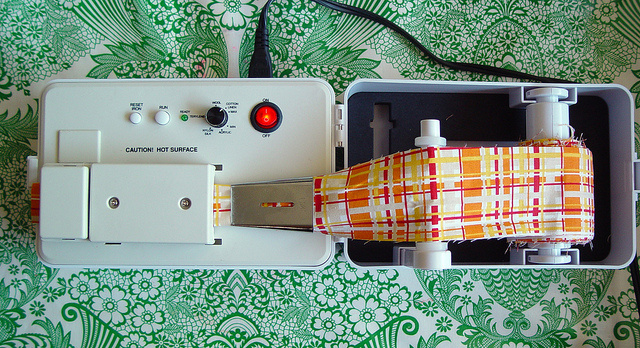
This is a great option if you’ll be making a lot of your own bias tape, however it is a bit more expensive to start, and you have to purchase their special bias tips which fit into the machine. Also, there isn’t an easy way to make your single fold bias tape into double fold bias tape. I tried the manufactures suggestion of putting it back through one side of the tip, but I had trouble getting the double width of the fabric through the tip and it didn’t want to stay to one side. As a result the bias tape wasn’t always (actually hardly ever) folded evenly in half. It was really all over the place. I tried it without a tip and just ran it through the machine trying to use my hands to get it to fold in half. It worked better, but the machine went a little to fast for my fingers. So in the end, I grabbed my ironing board and iron and did it the old fashioned way.
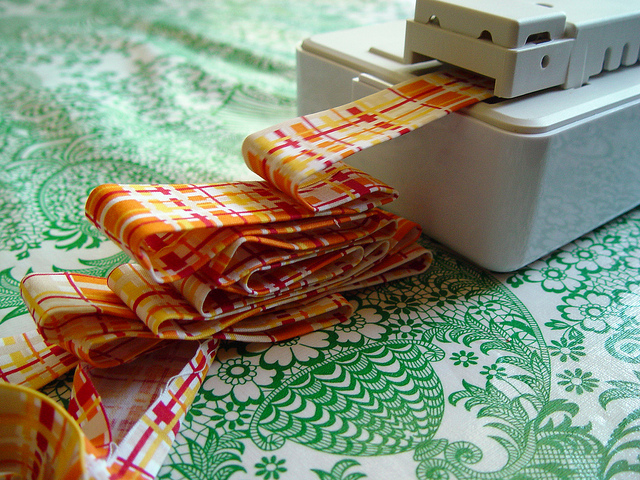
That said, it did make the single fold bias tape super fast!!
Hope you enjoyed this tutorial!! Now you’ll be making your own beautiful bias tape!

What a great, thorough tutorial. Thank you so much for sharing this, it will really help me out a lot!
Thanks…I have one of those tips laying around trying to decide how to use it. With your tutorial, I am less apprehensive to give it a try. I think I was trying to feed it from the wrong end. Sad, I know but sometimes I am just an opposite character!
Thank you so much for this post. I want to let you know that I posted a link to your blog in Creative Busy Bee Craft Inspirations, under the Page 2 post on Aug. 25, 2012. Thanks again.